Web UI Usage
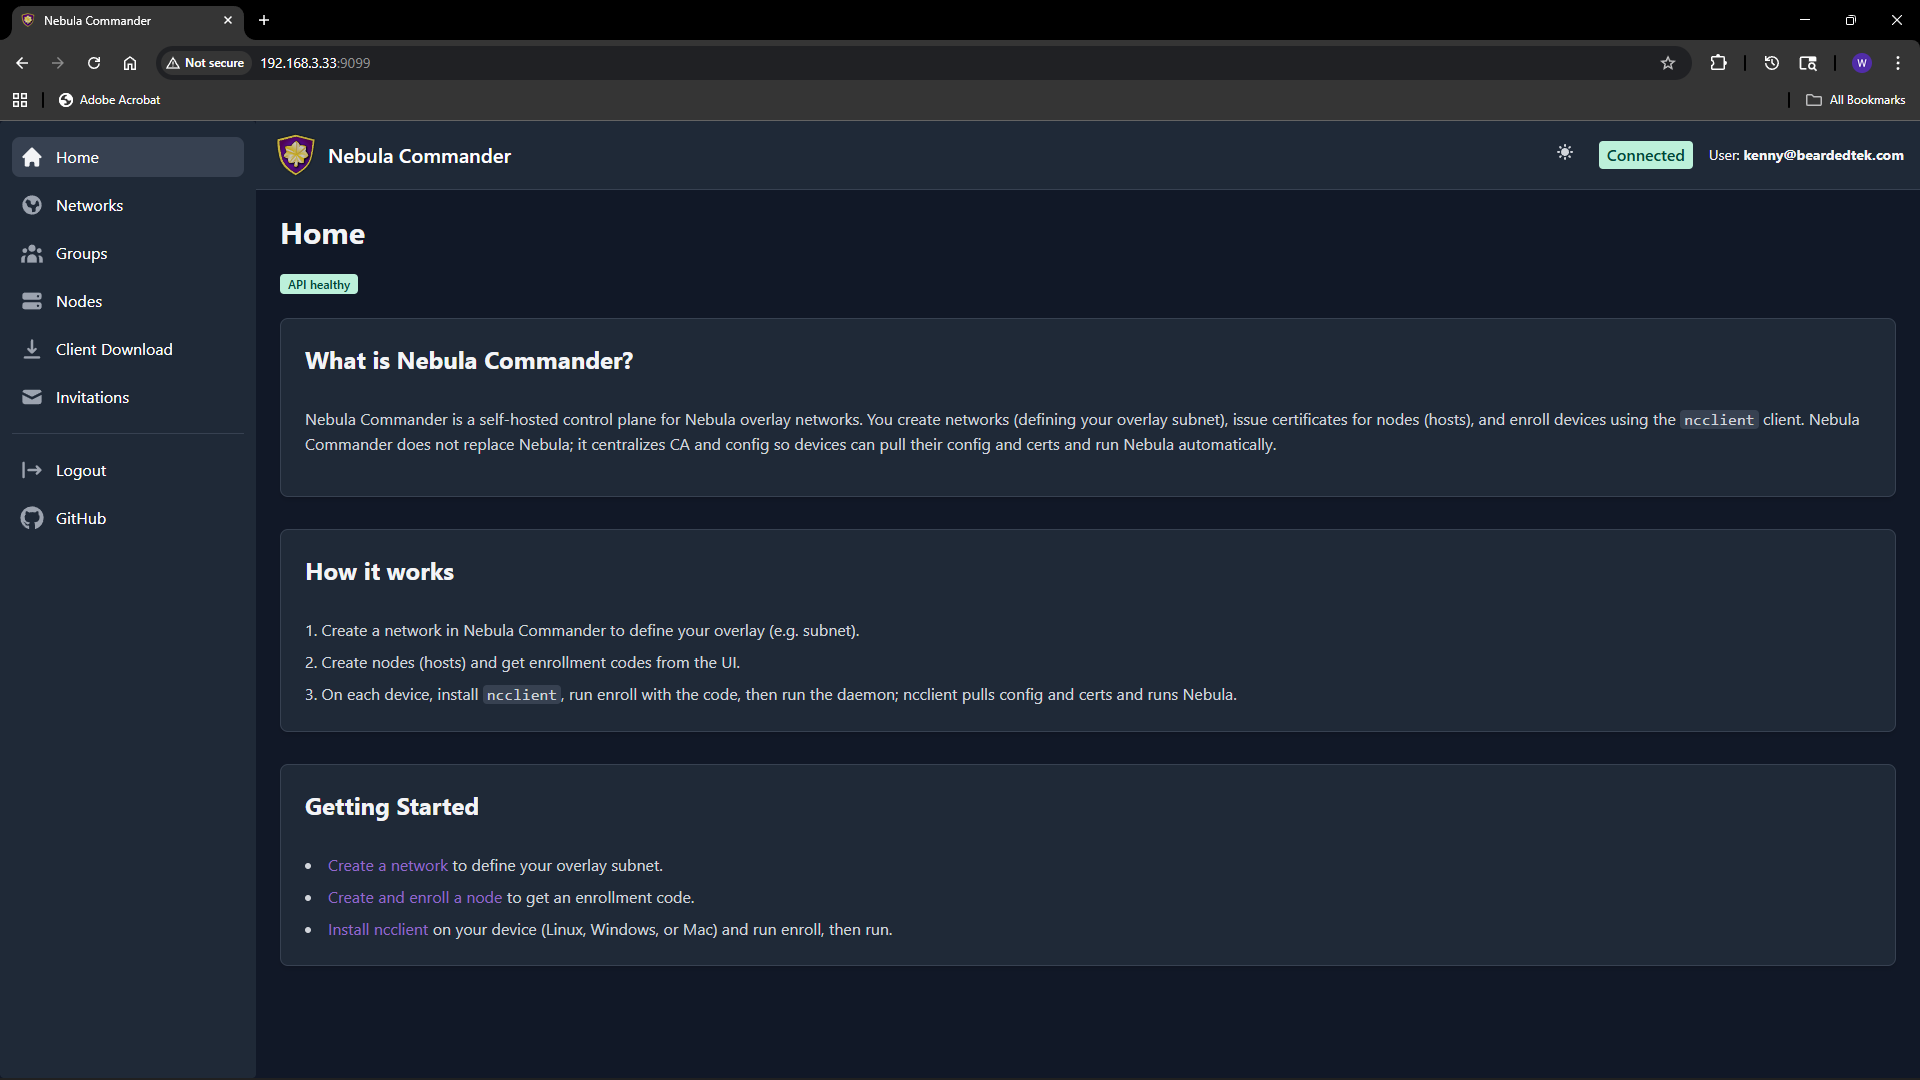
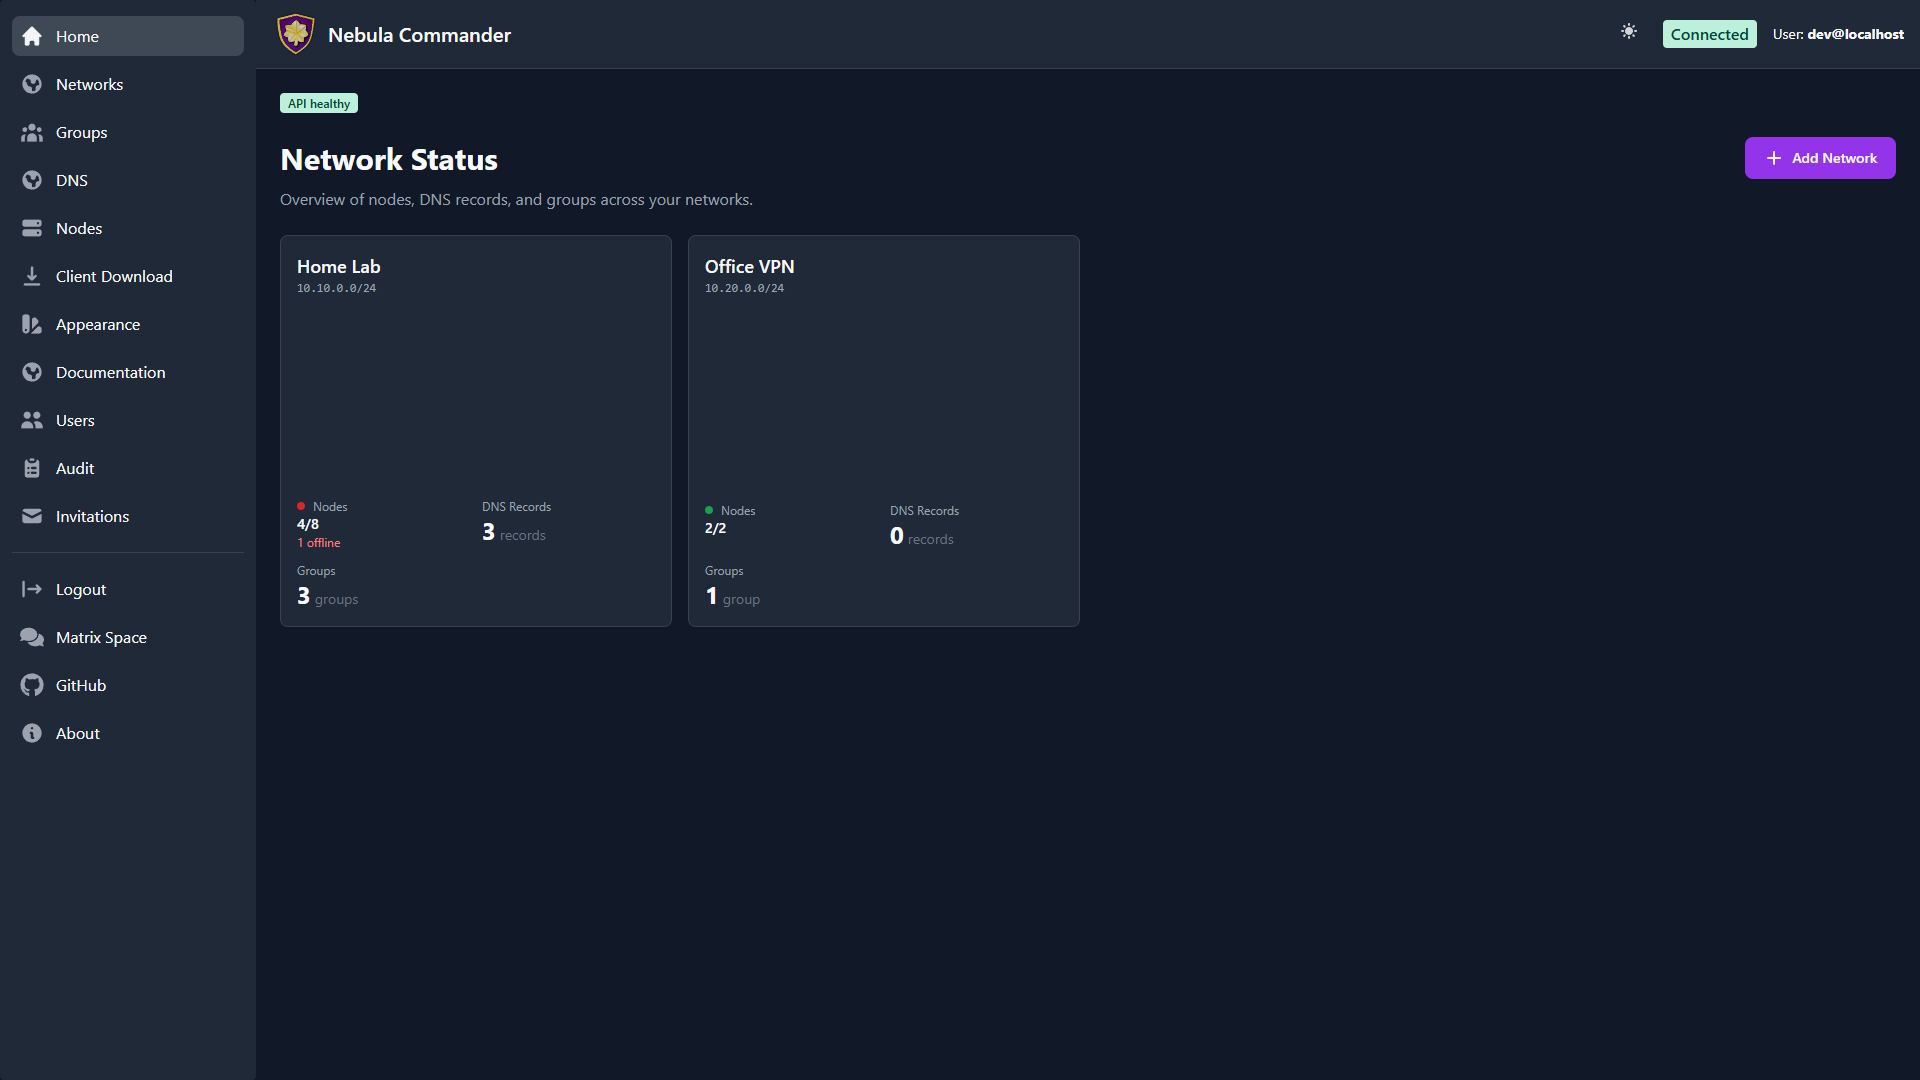
The Nebula Commander web UI is a React dashboard that talks to the backend API. You use it to manage networks, nodes, certificates, and users. Most list pages — Networks, Nodes, Groups, Users, and the Home dashboard — use the same square-card grid layout, so once one feels familiar the rest do too.
| Light | Dark |
|---|
 |  |
Logging in
- With OIDC – When OIDC is configured (OIDC), open the app URL and you are redirected to the provider (e.g. Keycloak). After login, you are sent back to the UI with a session.
- Without OIDC (development) – When the backend has
DEBUG=true and OIDC is not configured, the backend exposes a dev-token endpoint. The UI can log you in without a real IdP. Do not enable this in production.
Home
The Home dashboard is the first thing you see after logging in. Before you’ve
created a network and enrolled a node, it shows a getting-started walkthrough;
after that, it becomes a card-grid overview of every network you can access — the
same layout as the Networks page, so it doubles as a
quick jumping-off point.
Main flows
- Networks – Create and manage Nebula networks. As a network owner you control nodes, IP allocation, and firewall groups.
- Groups – Define security groups and inbound firewall rules per group.
- DNS – Configure split-horizon DNS per network (domain and hostname aliases). Used by ncclient with
--accept-dns and by the Docker lighthouse client. - Nodes – Add nodes to networks, assign IPs, create or sign certificates, generate enrollment codes for ncclient, and configure subnet routers and exit nodes.
- Client Download – Download ncclient (CLI, Linux
.deb/.rpm/Flatpak, Windows app/MSI) served from this server. - Invitations – Invite users to networks with roles and permissions (when OIDC is enabled).
- Users – System admins manage every user account and their system role.
- Backup & export – System admins download an encrypted copy of the whole instance, or import one to move servers.
- Appearance – Customize your own color theme, light and dark mode.
Certificates are created or signed from the Nodes page (Create or Sign flow). For Sign flow, the server does not have the private key; place host.key on the device (e.g. in the ncclient output directory).
Responsive / mobile
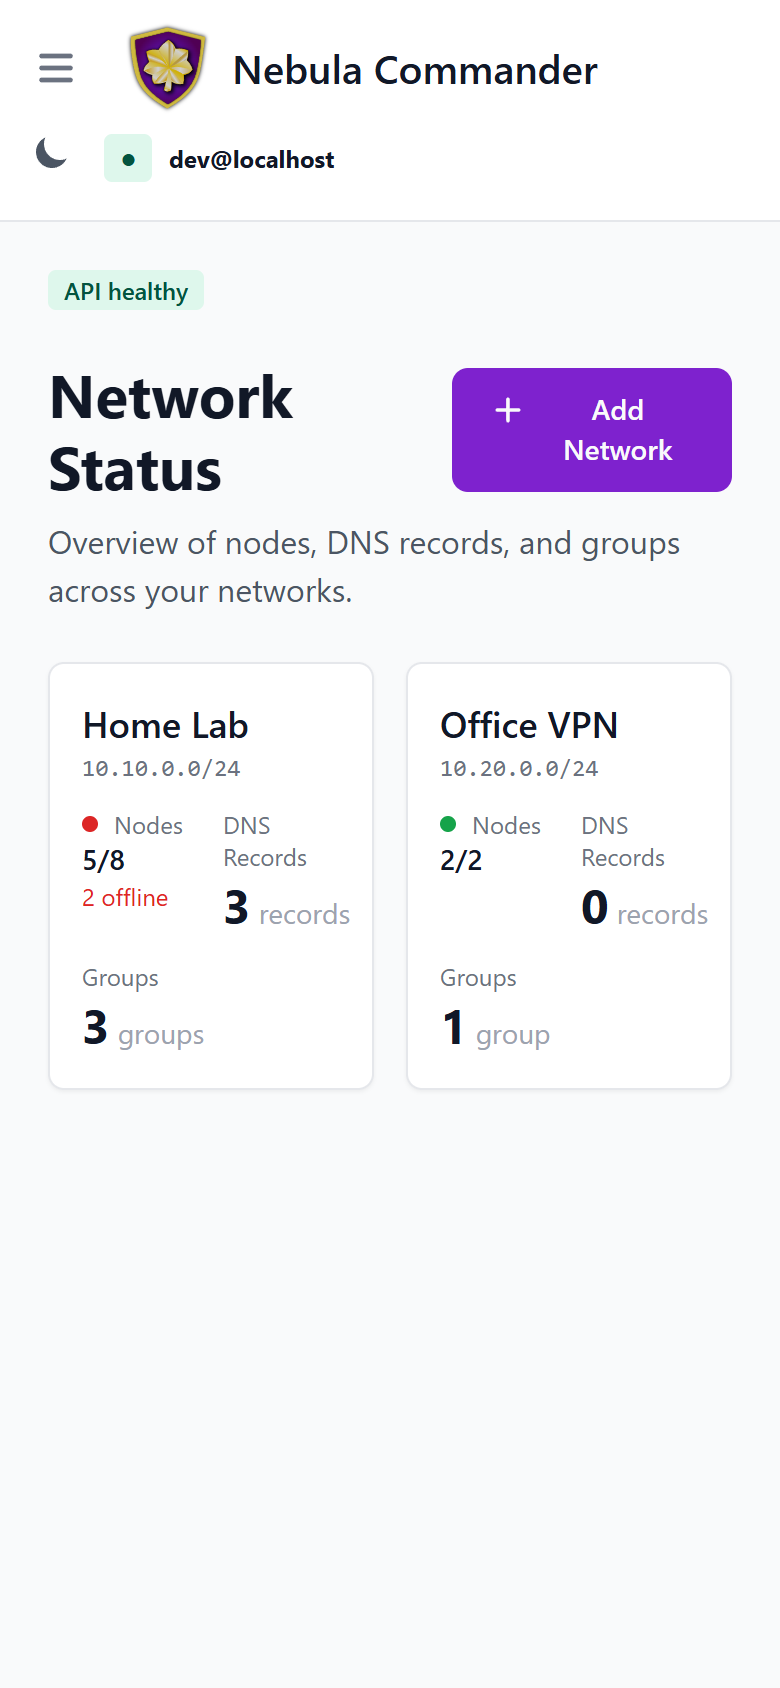
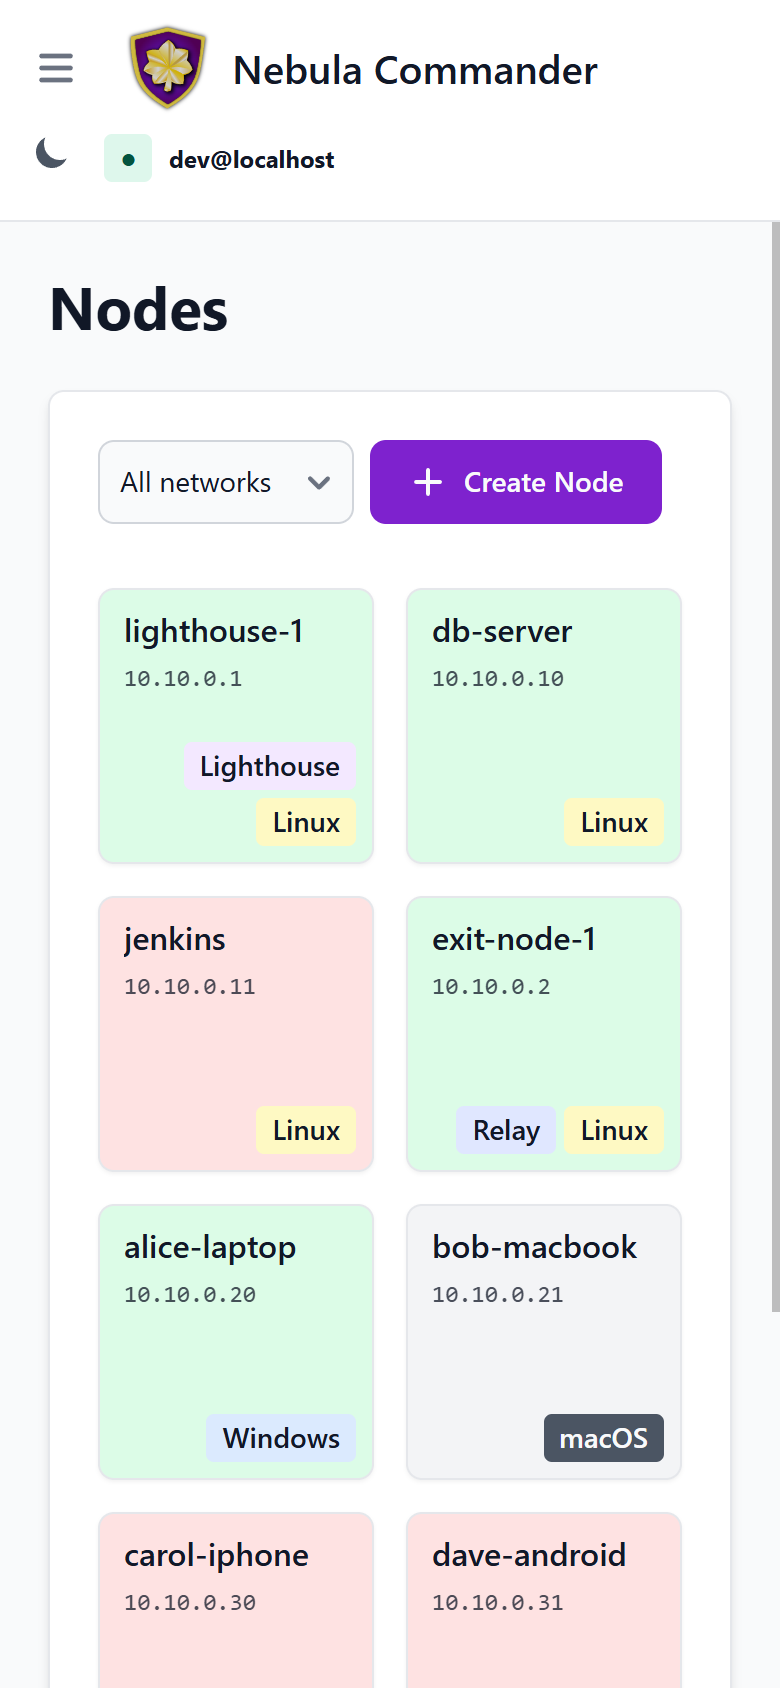
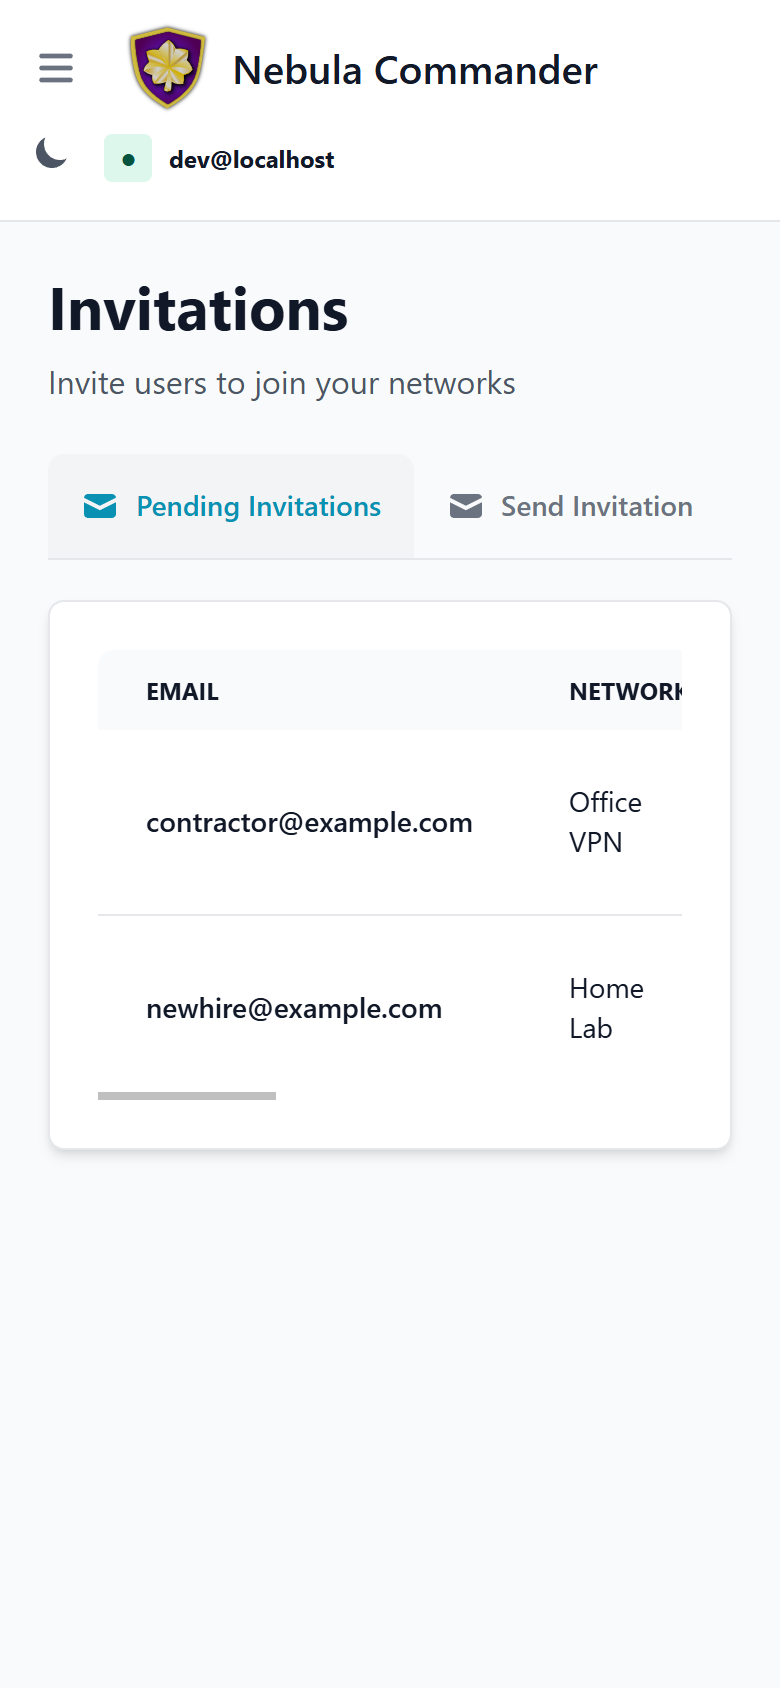
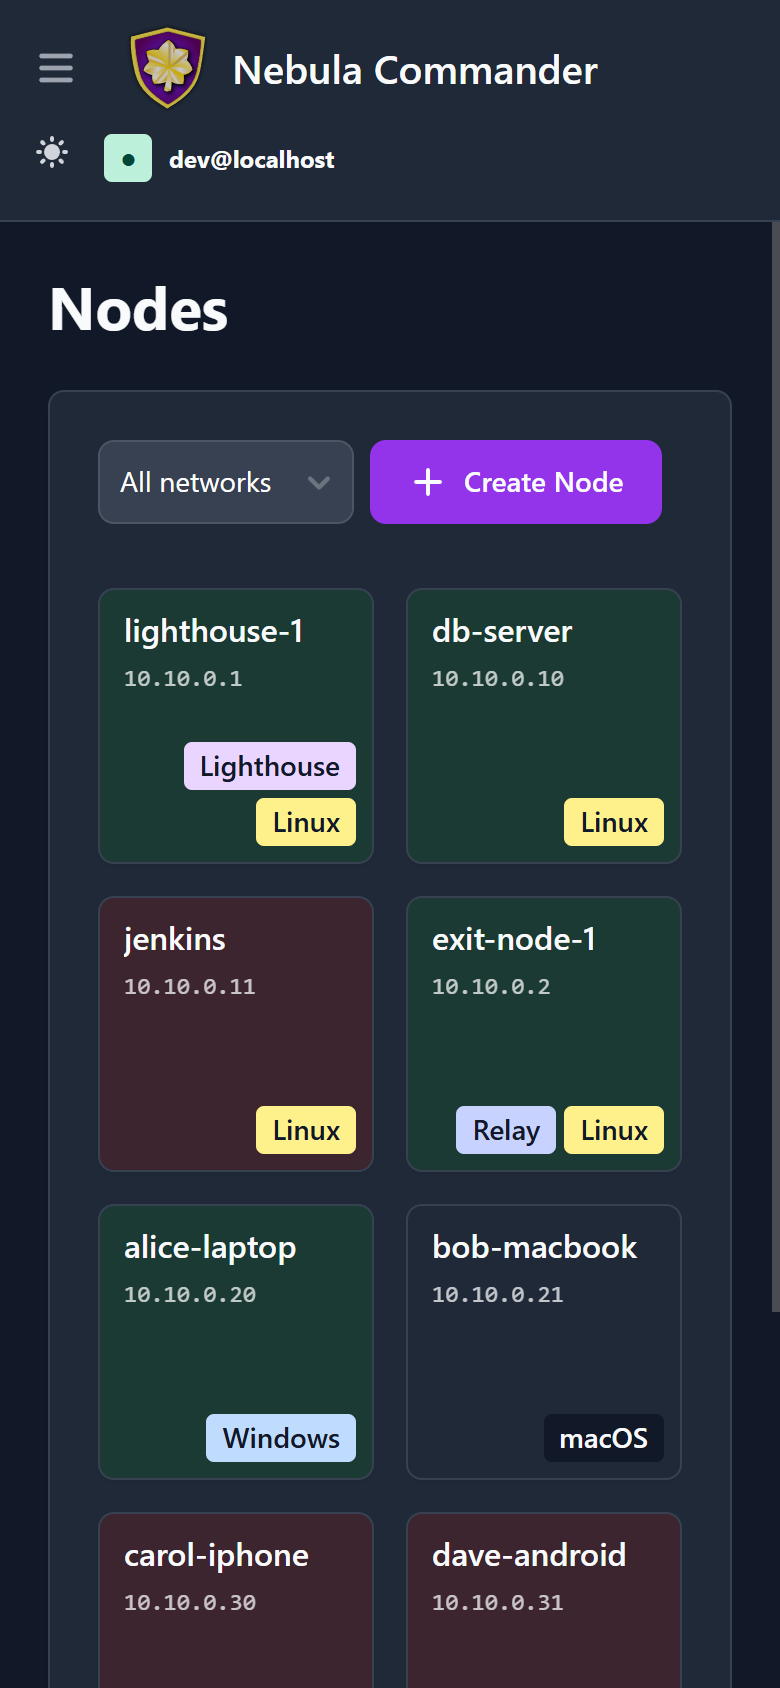
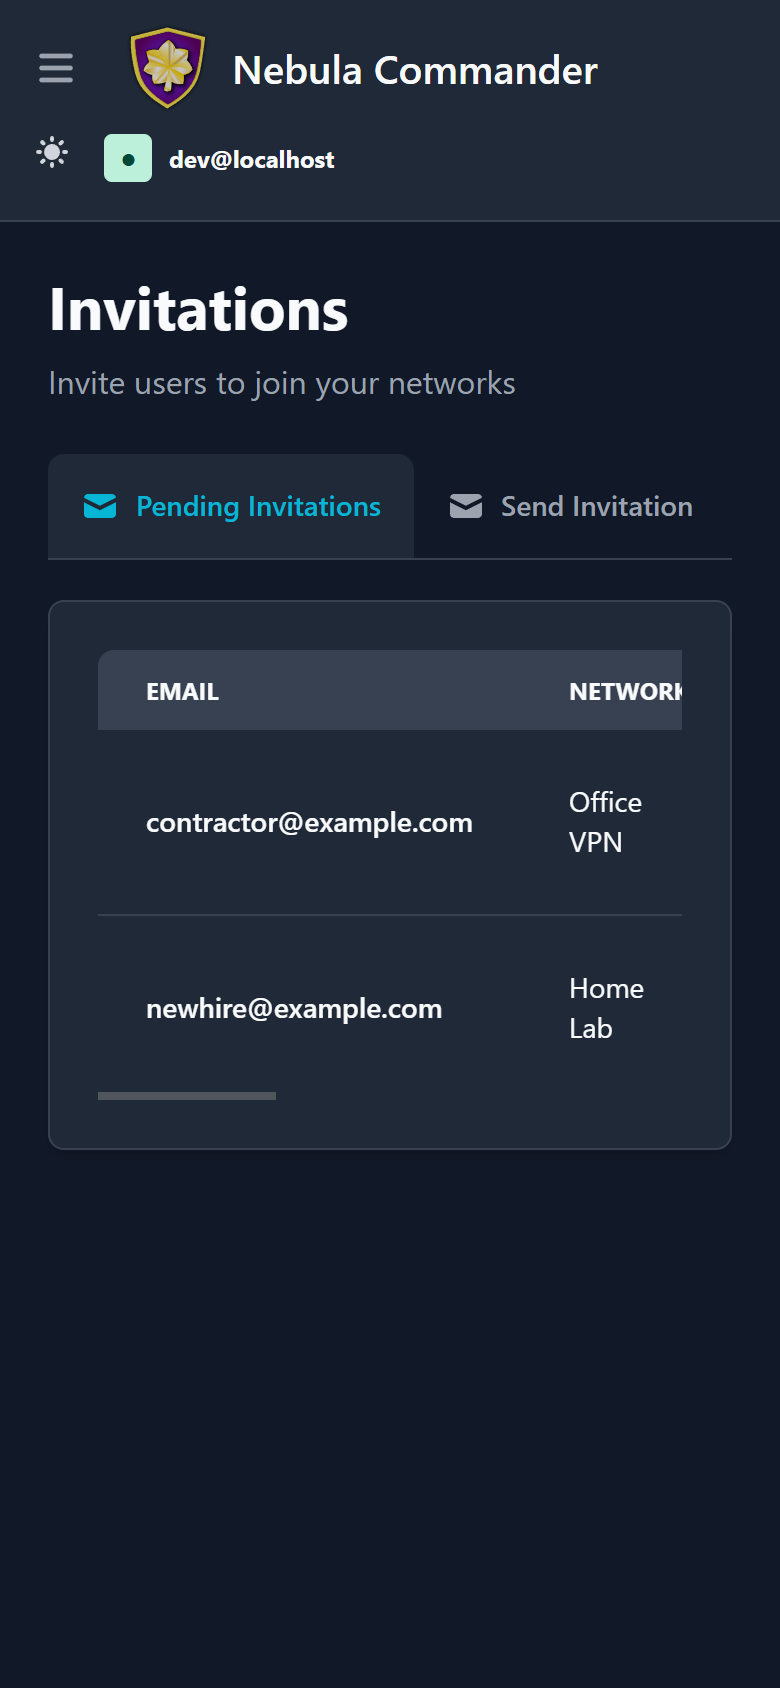
The whole web UI is responsive - the same React app adapts down to phone-width
screens rather than being a separate mobile build. The sidebar collapses to a
hamburger menu, card grids reflow to fewer columns, and wide tables (like
Invitations) scroll horizontally within their own container instead of the
whole page:
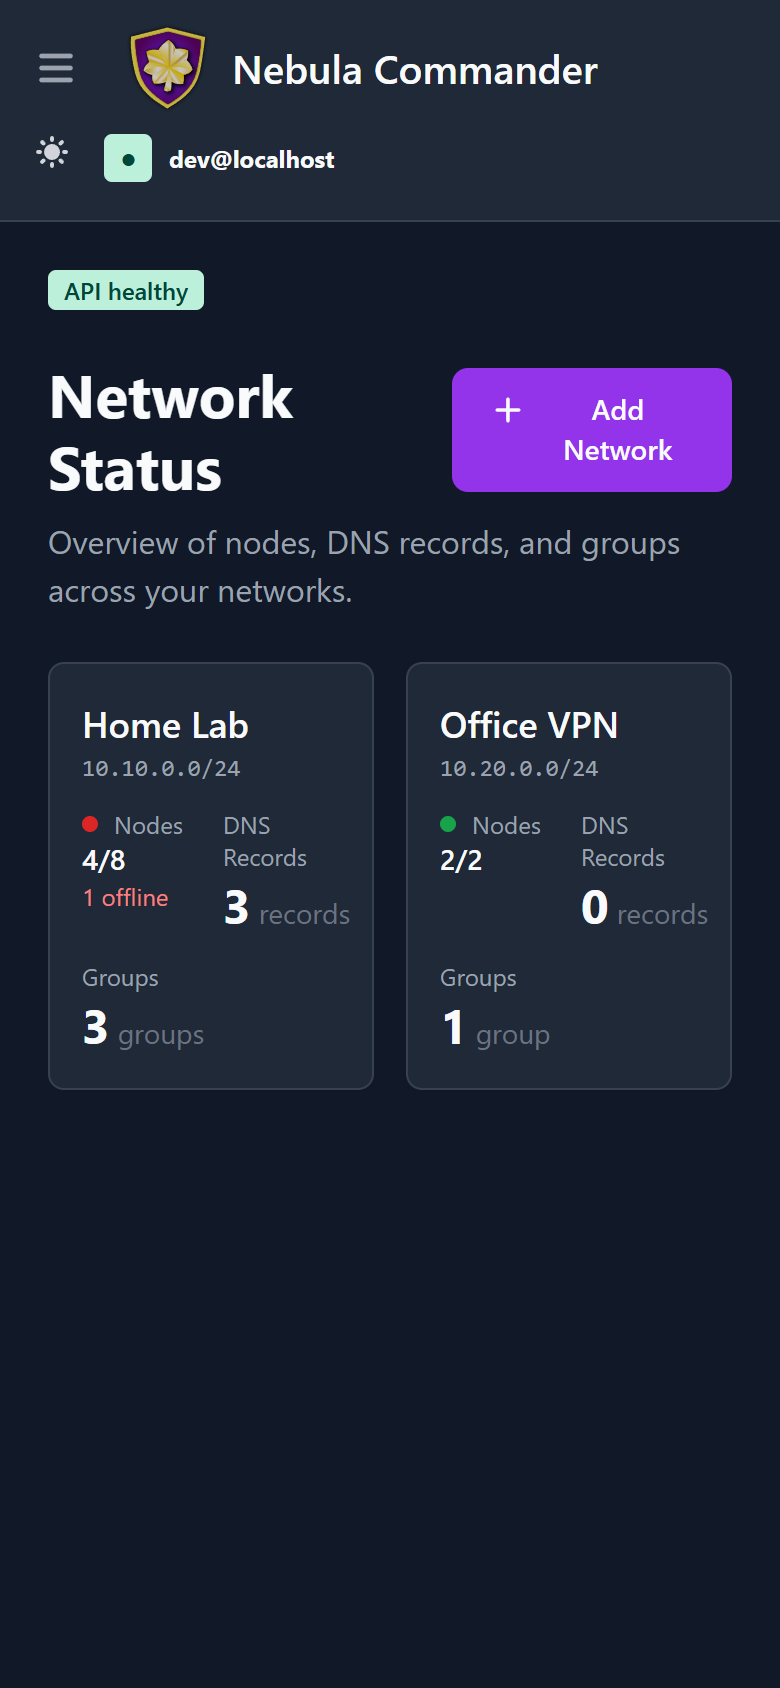
Dark mode works the same way on mobile:
Access control
Access is role-based: system-admin, network-owner, and user. Permissions include network-level and node-level access, plus access grants for temporary elevated admin access. Critical actions (e.g. delete network, node, or user) require reauthentication. Details are in the repository docker/README.
1 - Networks
The Networks page shows every Nebula network you can access as a grid of square
cards, and lets you create networks. Each network has a name and a subnet (CIDR)
used for IP allocation to nodes.
| Light | Dark |
|---|
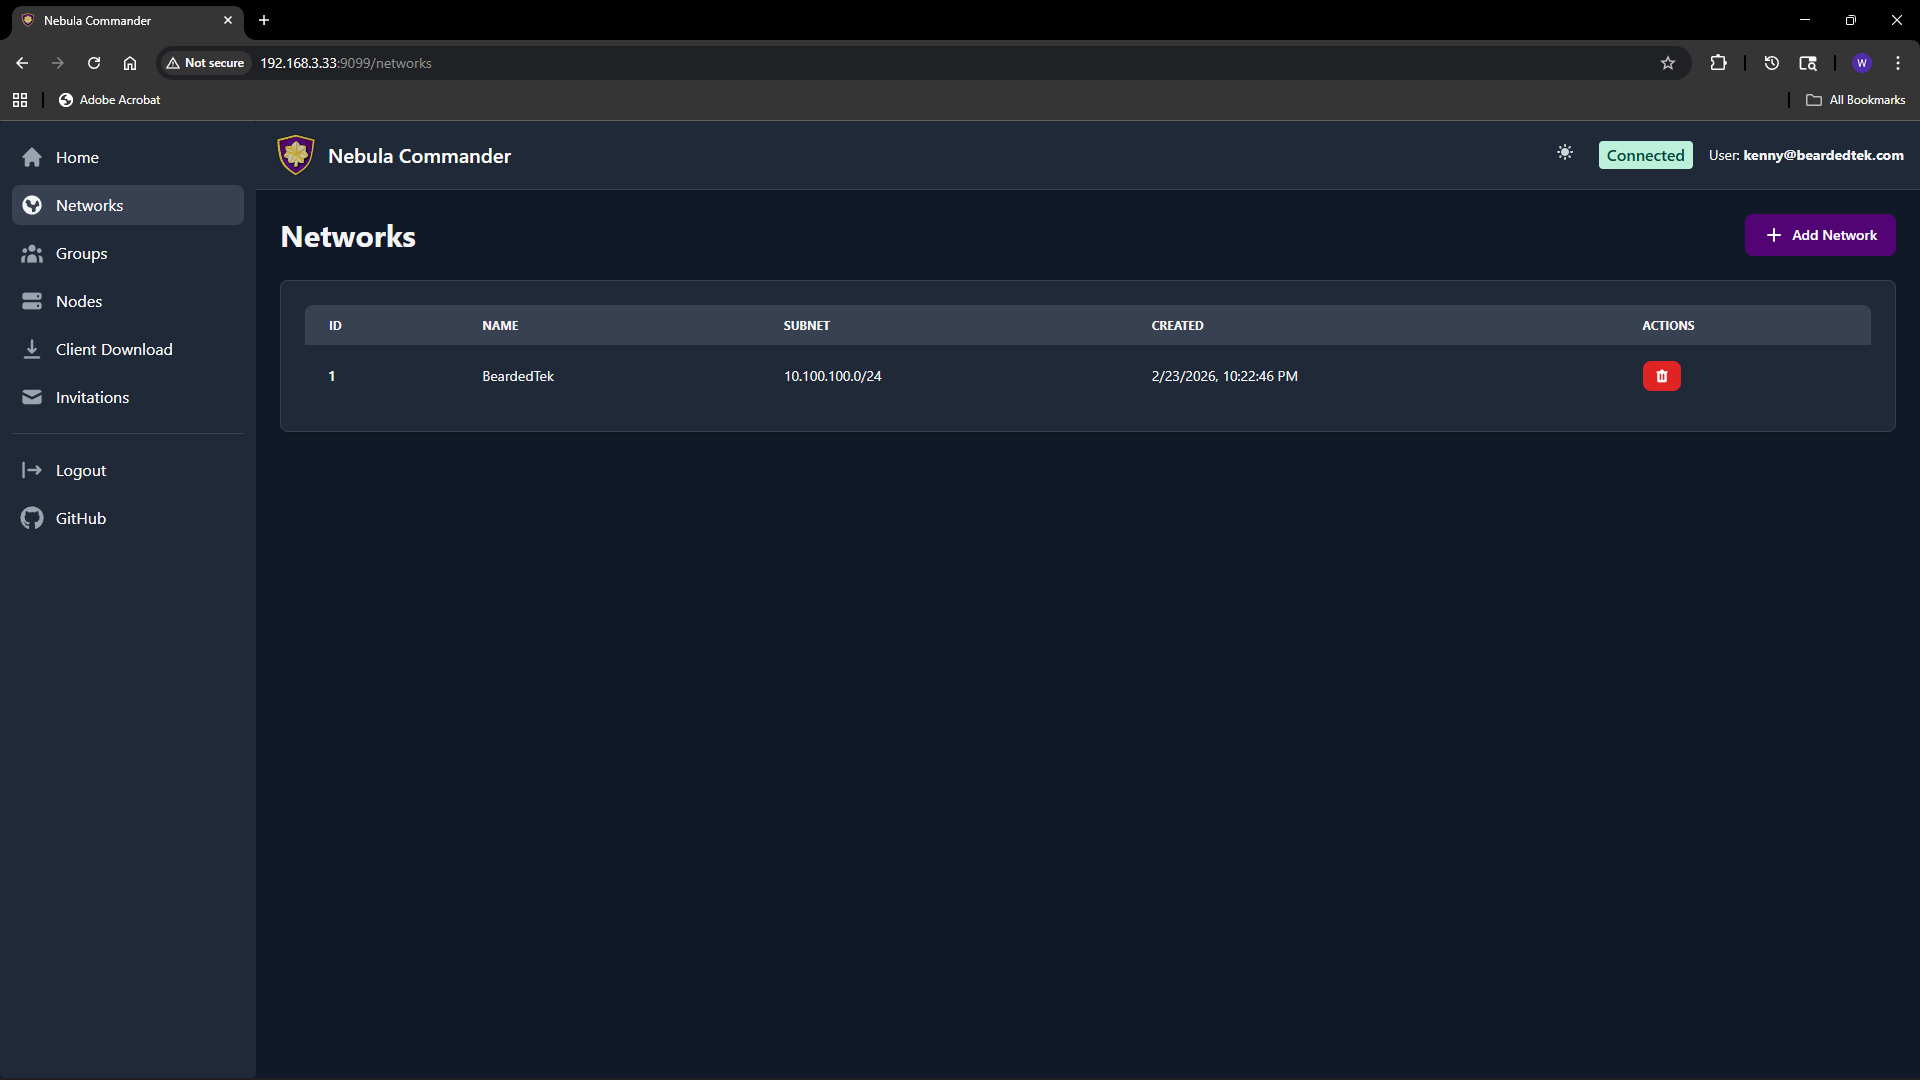 | 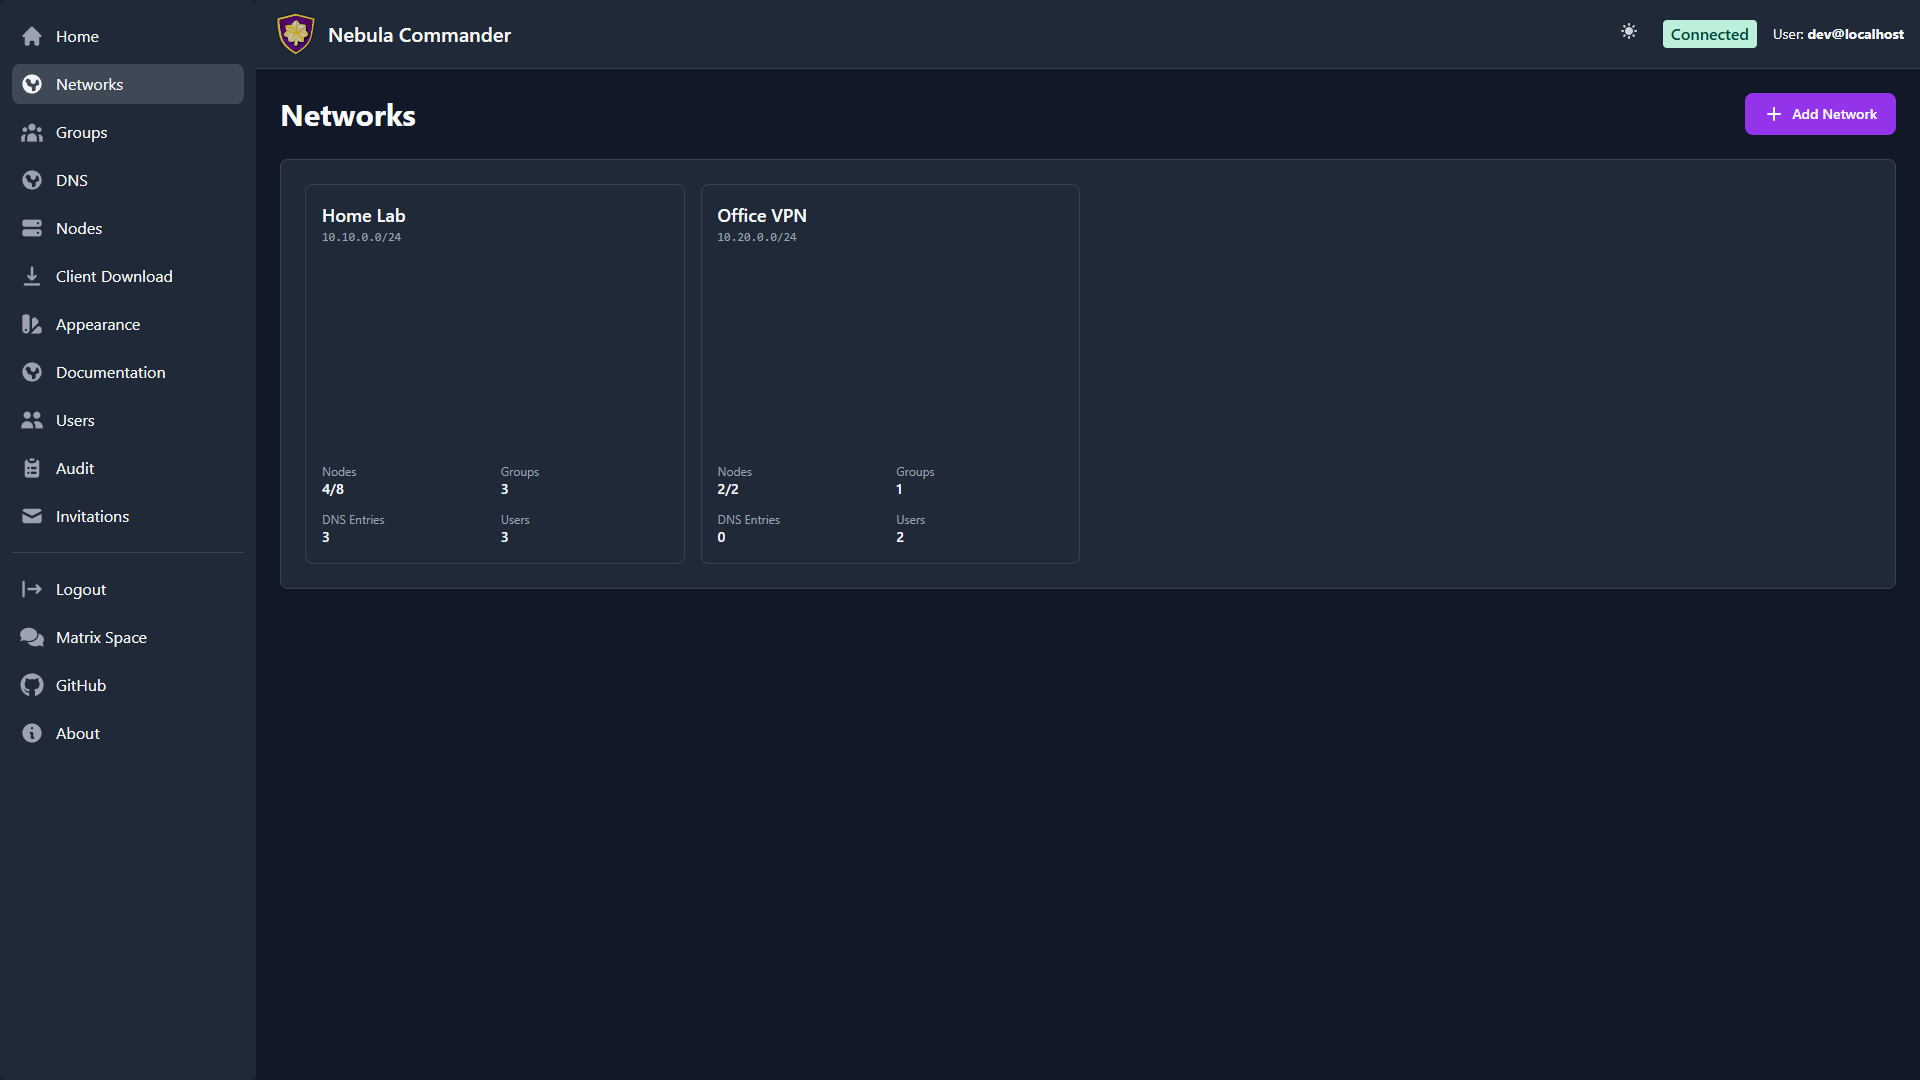 |
Click a network’s card to open its detail view: node/user/group counts and the
Group Access Diagram, a live visualization of which groups can reach which
(see Groups for what restricted vs. open means).
| Light | Dark |
|---|
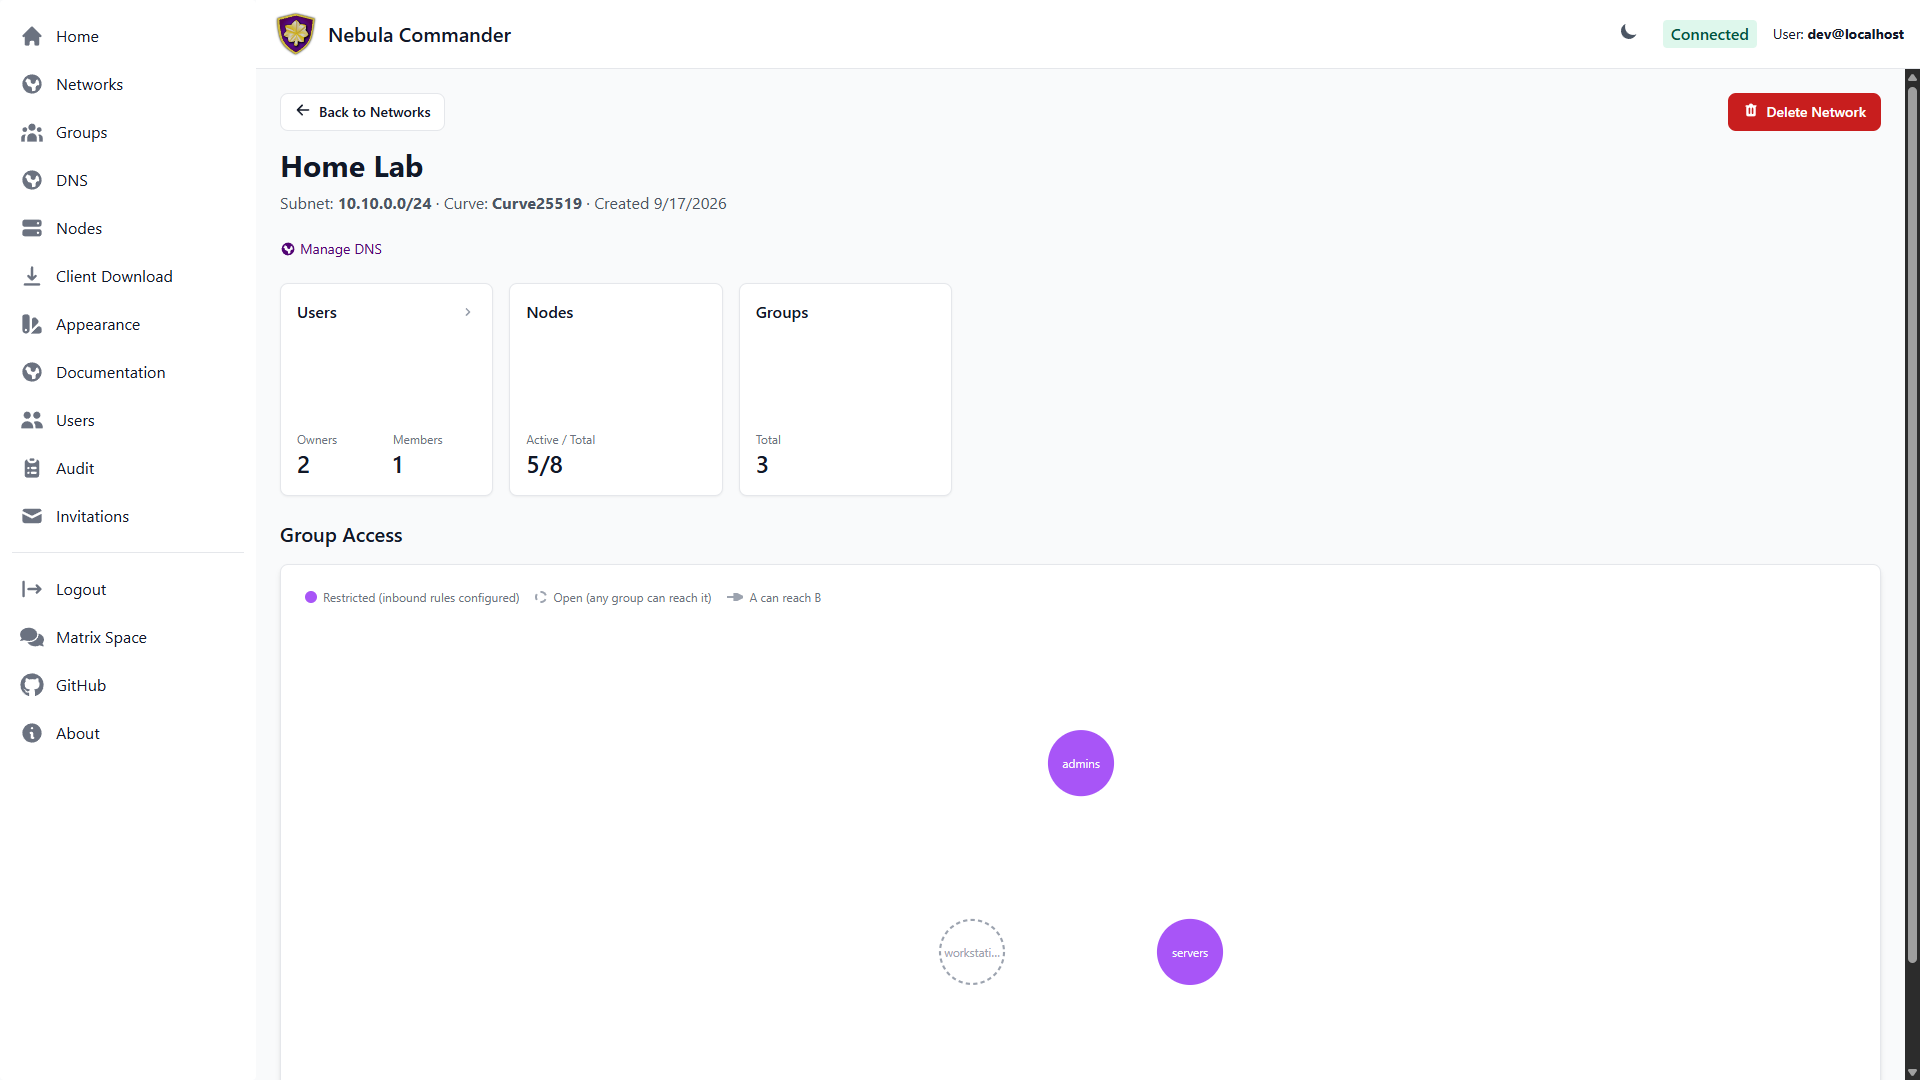 | 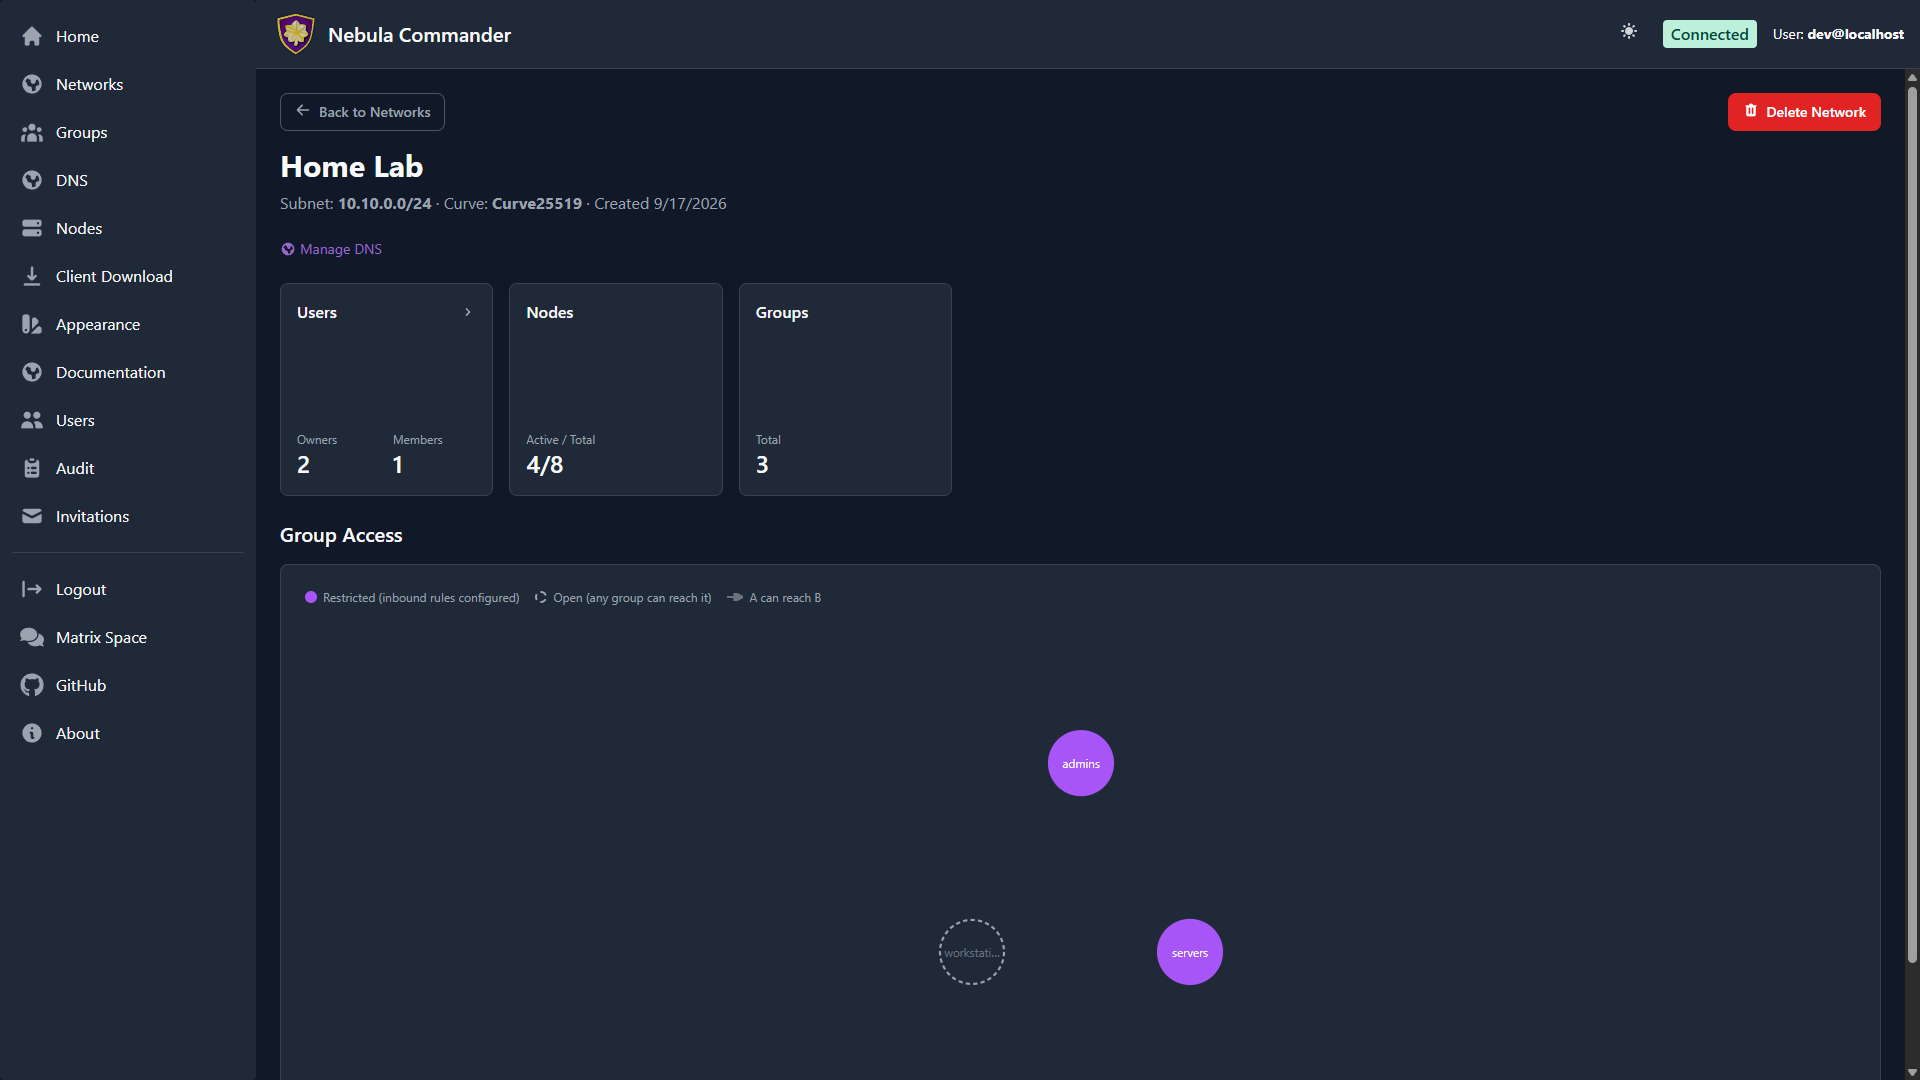 |
Adding a new network
- Open Networks in the sidebar.
- Click Add Network.
- Fill in the form:
- Network Name – A label for the network (e.g.
production, home). Must be unique and non-empty. - Subnet CIDR – The IPv4 range for this network. Example:
10.100.0.0/24. Node IPs are assigned from this range. Choose a range that does not overlap with your existing networks or LAN. - Certificate Curve – Curve25519 (default) or P256, opt-in per network. Applies to every node’s certificate on this network and can’t be changed after creation.
- Click Create Network. The new network’s card appears in the grid.
You can create multiple networks to separate environments (e.g. dev, staging, prod) or teams.
The network grid
Each card shows the network’s name and subnet CIDR, plus a 2×2 stat grid: Nodes
(active/total), Groups, DNS Entries, and Users — all computed
server-side, so they’re accurate the instant the page loads. Click a card to open
its detail page.
The Home dashboard shows the same card grid for a quick at-a-glance overview
across all your networks — the Nodes stat there additionally shows an offline count
when any node has gone dark, and the DNS/Groups stats are scoped to what you
specifically have permission to see on each network (you’ll see “Restricted”
instead of a number on a network where you don’t have that access).
Network detail page
Clicking a network card opens its detail page: three summary cards for Users
(owners/members, click to manage — add, edit role, or remove — in place), Nodes
(active/total, click to jump to the filtered Nodes page), and
Groups (total count, click to jump to the filtered Groups
page). Below the summary cards is the Group Access Diagram — a graph of every
group on the network, showing which groups can reach which others based on the
inbound firewall rules configured on the Groups page. A
solid circle means the group has at least one inbound rule configured
(“restricted”); a dashed circle means it has none, which under Nebula’s own default
means any group can reach it (“open”), not that it’s unreachable.
As a network owner you can also configure DNS (split-horizon
domain and aliases) for the network from here.
Deleting a network
Deleting a network is a critical action, moved to the network’s detail page. The UI
requires you to reauthenticate before the delete is performed.
- Open the network’s detail page and use the Delete Network action.
- A modal opens asking you to type the network name to confirm.
- Type the exact network name and confirm. You are redirected to the OIDC provider (or dev login) to reauthenticate.
- After reauthentication, you are returned to the UI and the network is deleted.
Ensure no nodes or critical services depend on the network before deleting. Deletion removes the network and its node/certificate data from Nebula Commander.
2 - Groups
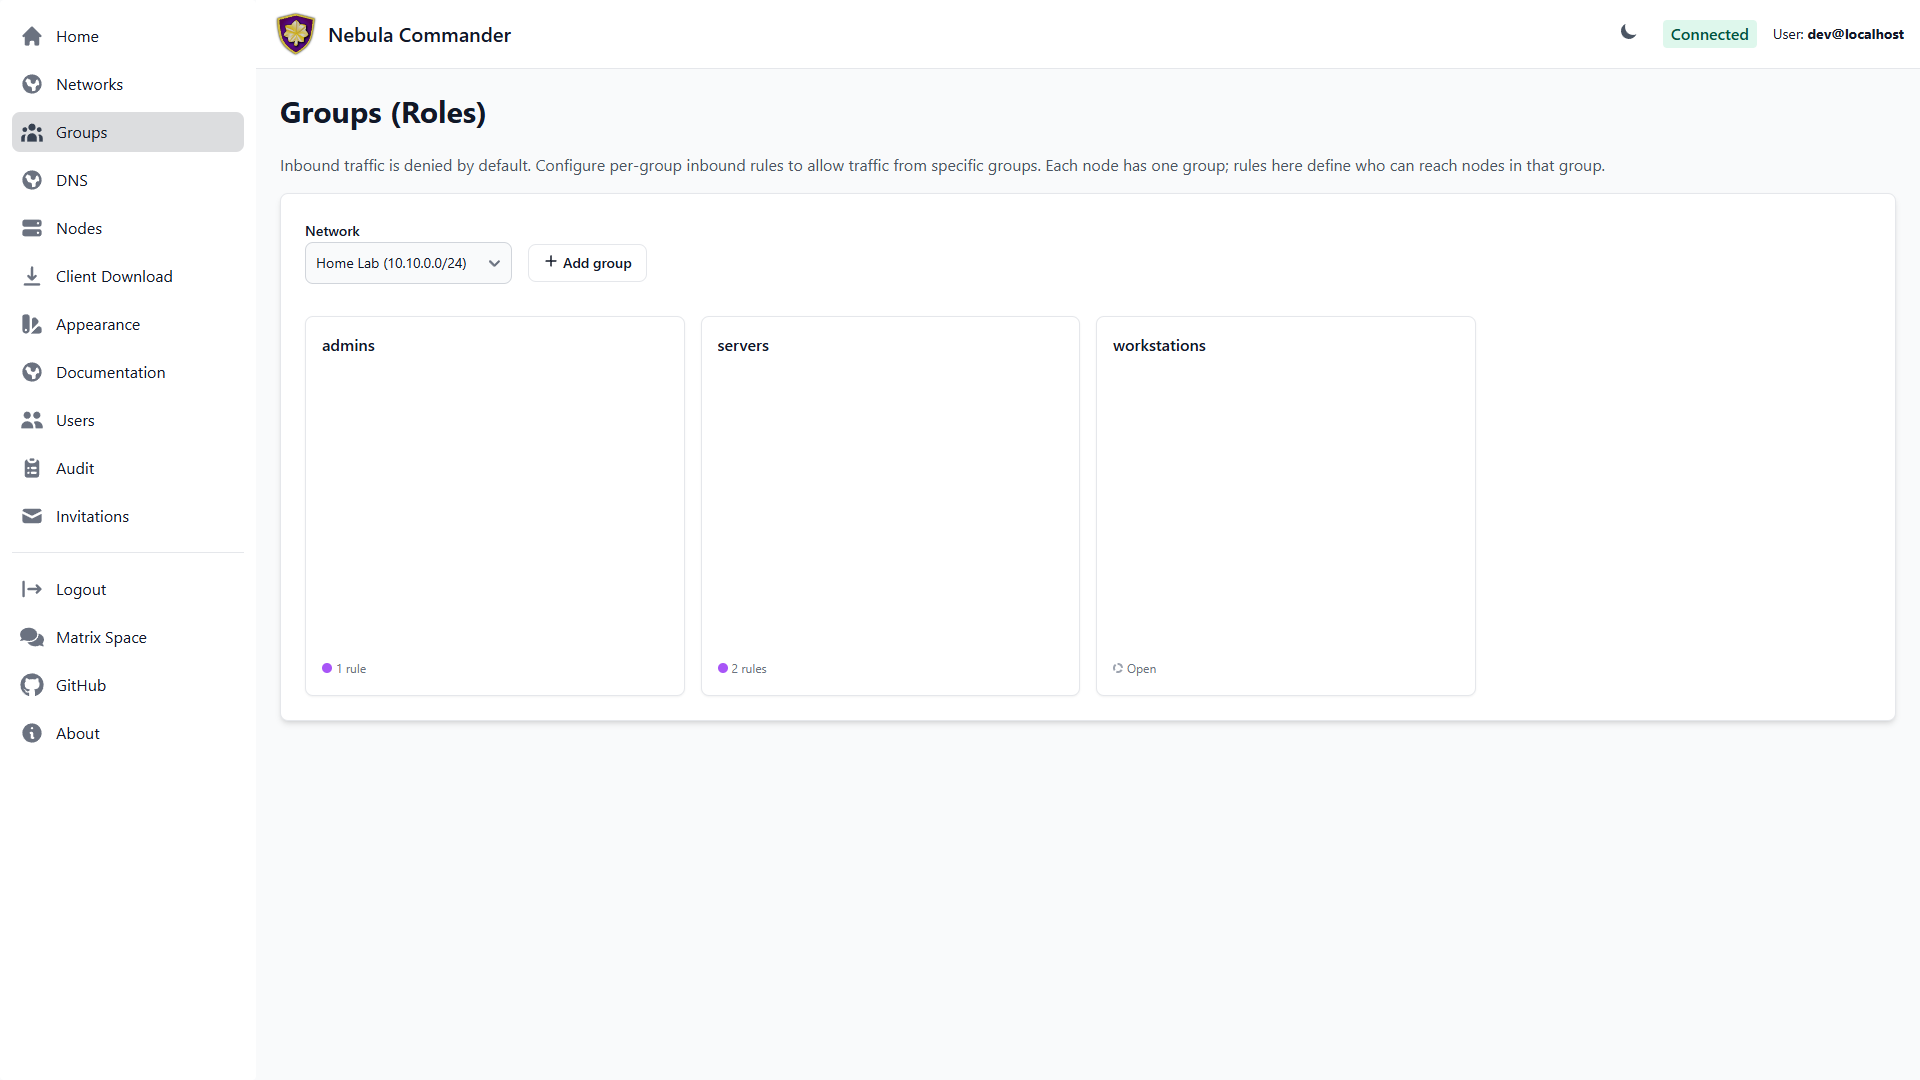
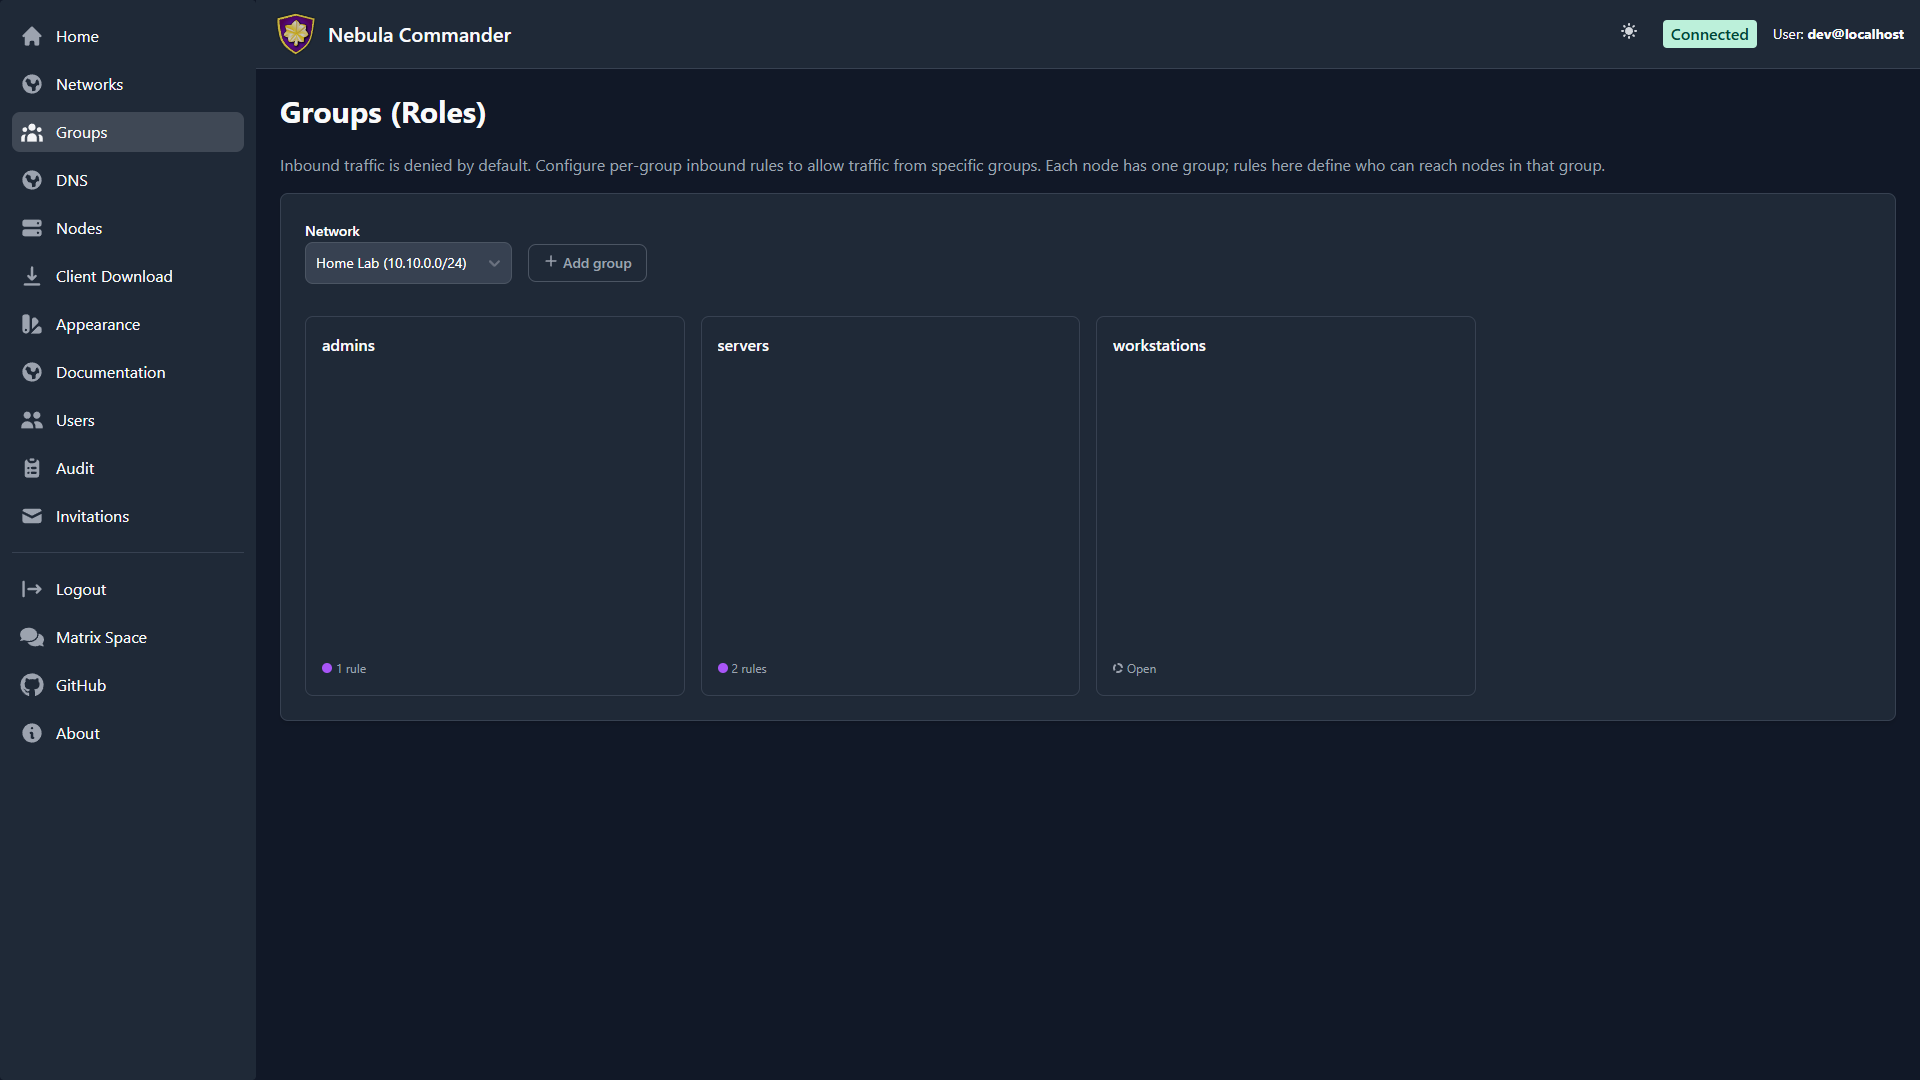
The Groups page lets you define Nebula security groups and their inbound firewall rules per network. Groups are used by nodes (each node has one group). Firewall rules control which other groups can send traffic to this group and on what protocol and ports.
| Light | Dark |
|---|
 |  |
Selecting a network
At the top of the Groups page, choose a network from the dropdown. Groups and rules are per network. Only networks you have access to appear in the list.
What groups are
In Nebula, a group is a tag (e.g. laptops, servers, admin) that you assign to nodes. The firewall then allows or denies traffic based on group membership. On this page you define the inbound rules for each group: which other groups can connect to this group, and on which protocol and port range.
The group grid
Groups show as a grid of square cards, one per group. Each card shows the group
name and a status indicator at the bottom: a solid dot and rule count if the group
has inbound rules configured (“restricted”), or a dashed outline reading “Open” if
it has none — under Nebula’s own default, a group with no inbound rules can be
reached by any other group, not by none. The same restricted/open coloring
appears in the Network detail page’s
Group Access Diagram.
Adding a group
- Select the network.
- Click Add group and enter a name (e.g.
servers). Group names are case-sensitive and must be unique within the network. - Submit. The group’s card appears in the grid with an empty set of inbound rules — click it to add rules (see below).
Groups are also created implicitly when you create a node and assign it a group that doesn’t exist yet.
Firewall rules per group
Click a group’s card to open its rule editor in a modal. For each group you configure inbound rules: who can send traffic to this group.
| Field | Description |
|---|
| Allowed group | The name of the other group that is allowed to send traffic to this group. |
| Protocol | any, tcp, udp, or icmp. |
| Port range | Port or range (e.g. 80, 443, 8000-8010) or any for all ports. |
| Description | Optional note for the rule. |
Example: To allow the group laptops to reach the group servers on TCP ports 80 and 443, add an inbound rule on the servers group with allowed group laptops, protocol tcp, and port range 80,443 (or two rules if your UI uses one port per rule).
Rules are stored per group. After editing rules, click Save in the modal. Changes apply when Nebula config is regenerated (e.g. when ncclient polls or you re-download config).
How to leverage groups
- Segment by role – Put nodes in groups like
laptops, servers, iot. Then allow only laptops and servers to reach iot on specific ports, and only servers to talk to each other on admin ports. - Least privilege – Only add inbound rules that are needed. Avoid
any/any unless intentional. - Node assignment – On the Nodes page, when you create or edit a node you set its group. That node is then subject to the inbound rules defined for that group on this page.
A group with no inbound rules is open, not blocked — Nebula’s own default is
that any group can reach a group with an empty rule list, the opposite of what
you might expect from “inbound rules.” Add rules only once you want to start
restricting who can reach a group; an empty rule list is not a safe default-deny
state.
3 - DNS
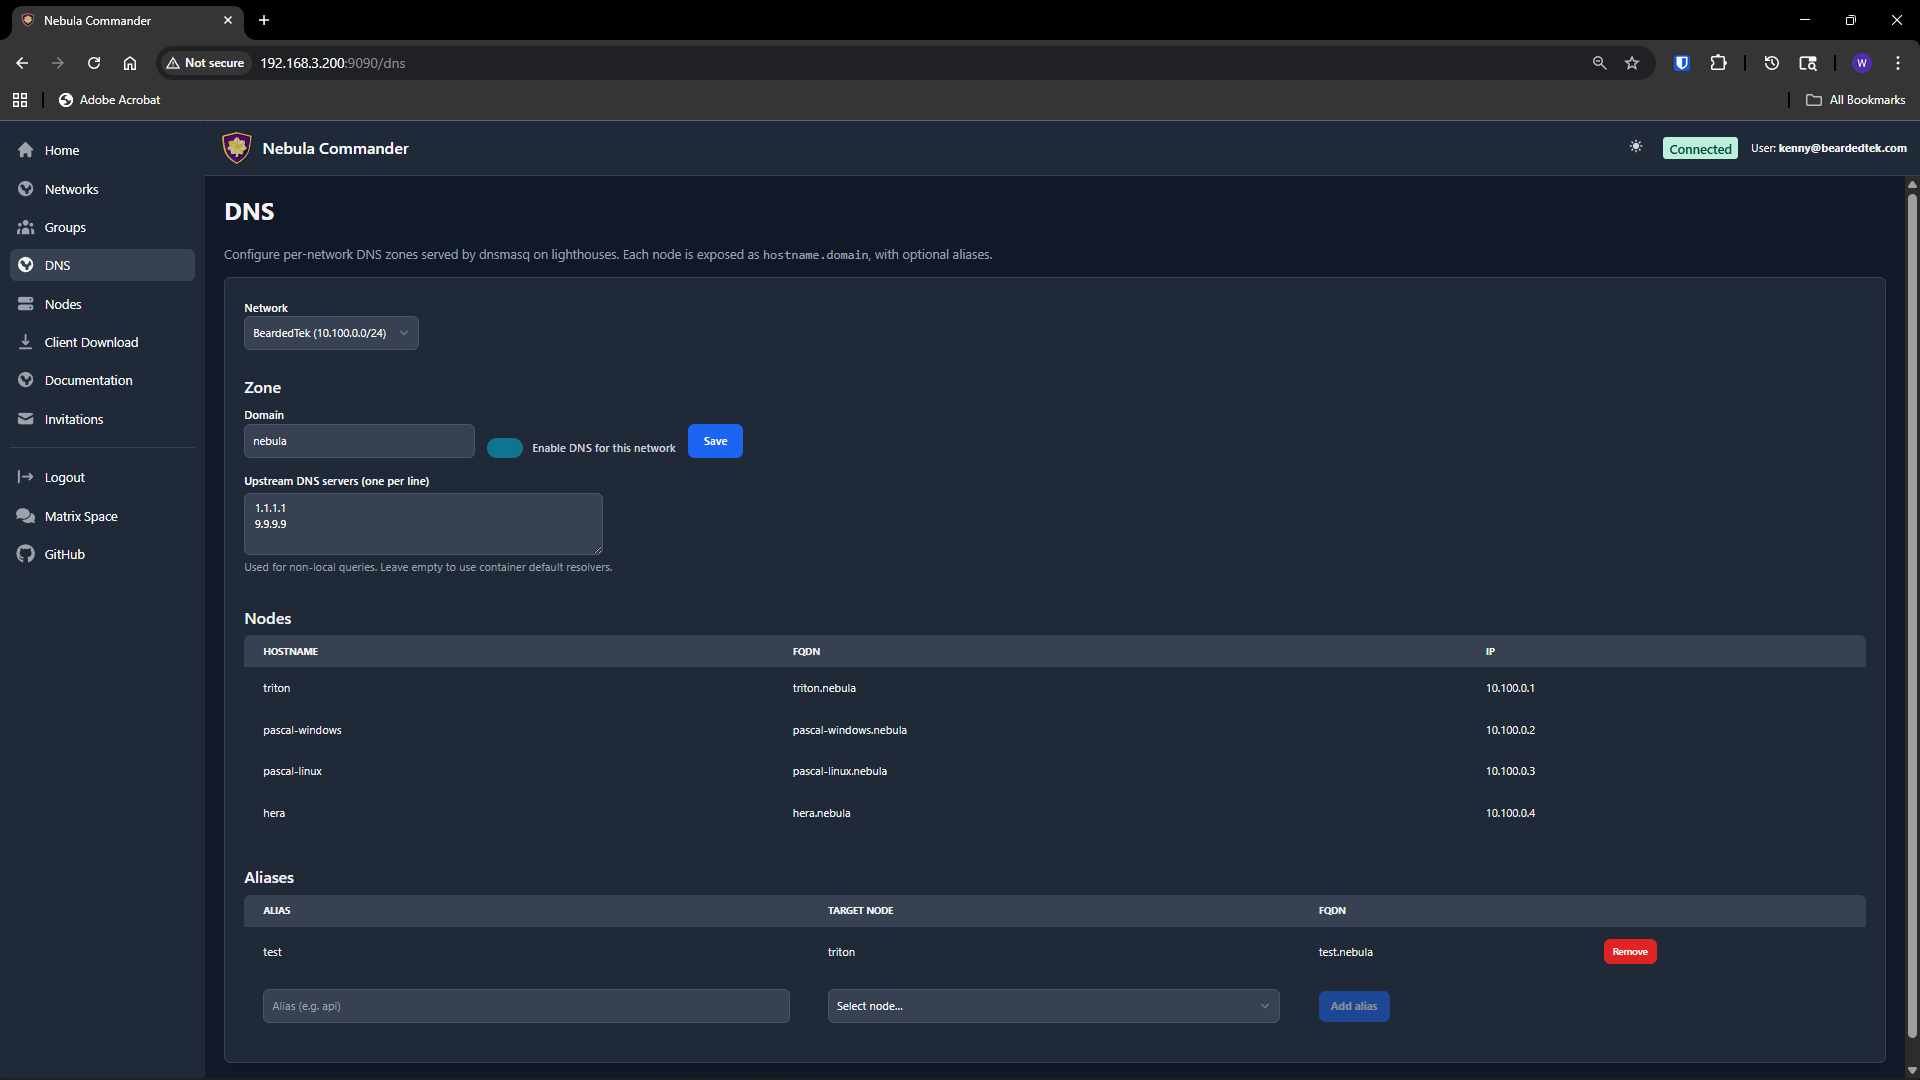
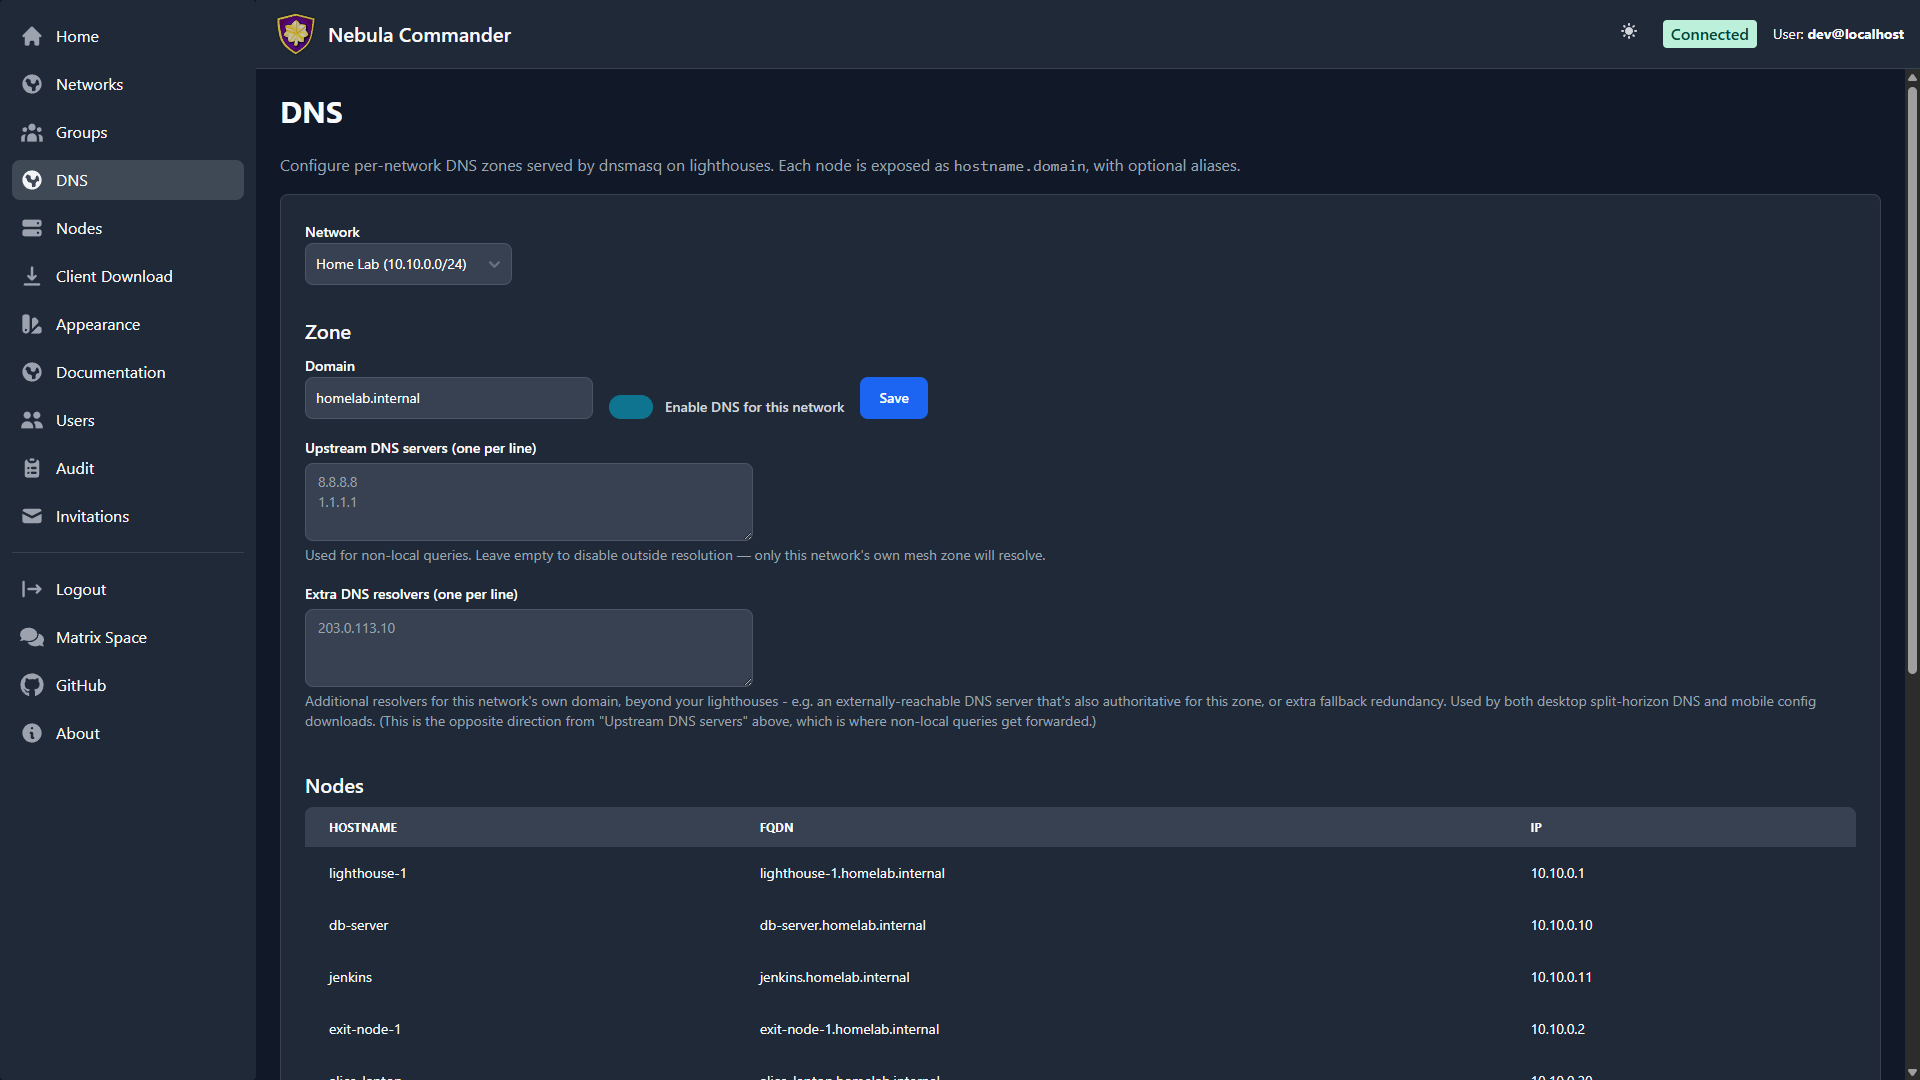
The DNS page configures split-horizon DNS per network: a domain and optional hostname aliases that resolve to nodes inside the Nebula overlay. When enabled, lighthouses (or the Docker ncclient stack) can run dnsmasq to serve this domain; enrolled devices can use ncclient with --accept-dns to resolve the Nebula domain via the overlay.
| Light | Dark |
|---|
 |  |
Access
Only network owners can view or change DNS for a network. Select a network from the dropdown at the top; the page shows the current DNS config and aliases for that network.
DNS config
- Domain – The DNS domain for this network (e.g.
mynet). By default it is the network name. Queries for *.<domain> (e.g. node1.mynet) are resolved by the server’s dnsmasq using the aliases and node IPs. - Enabled – Turn DNS on or off for the network. When disabled, device endpoints
/api/device/dns-client-config and /api/device/dnsmasq.conf return 404 for devices in this network. - Upstream servers – Optional list of upstream DNS servers (one per line) used by dnsmasq for non-Nebula queries when running in the lighthouse/container client.
Save changes with the Save button. The domain is used when generating dnsmasq config for devices (e.g. the Docker ncclient container) and in the dns-client config returned to ncclient when using --accept-dns.
Aliases
Aliases map hostnames to nodes. For example, alias server1 pointing to node prod-1 lets users reach that node as server1.<domain> over the overlay.
- Add alias – Enter a hostname label (e.g.
gateway, db) and choose the node it should resolve to. The alias must be unique within the network. Click add to create it. - Delete – Use the delete action next to an alias to remove it.
Aliases are used in the dnsmasq zone served to devices; only nodes that are lighthouses in the network can serve DNS to other devices (e.g. the Docker client runs dnsmasq in the same container as Nebula).
Device and API
- Enrolled devices fetch dns-client config from
GET /api/device/dns-client-config (domain + DNS server IPs) and, when running in a container or lighthouse, dnsmasq config from GET /api/device/dnsmasq.conf. See API: Device and API: Networks DNS.
4 - Nodes
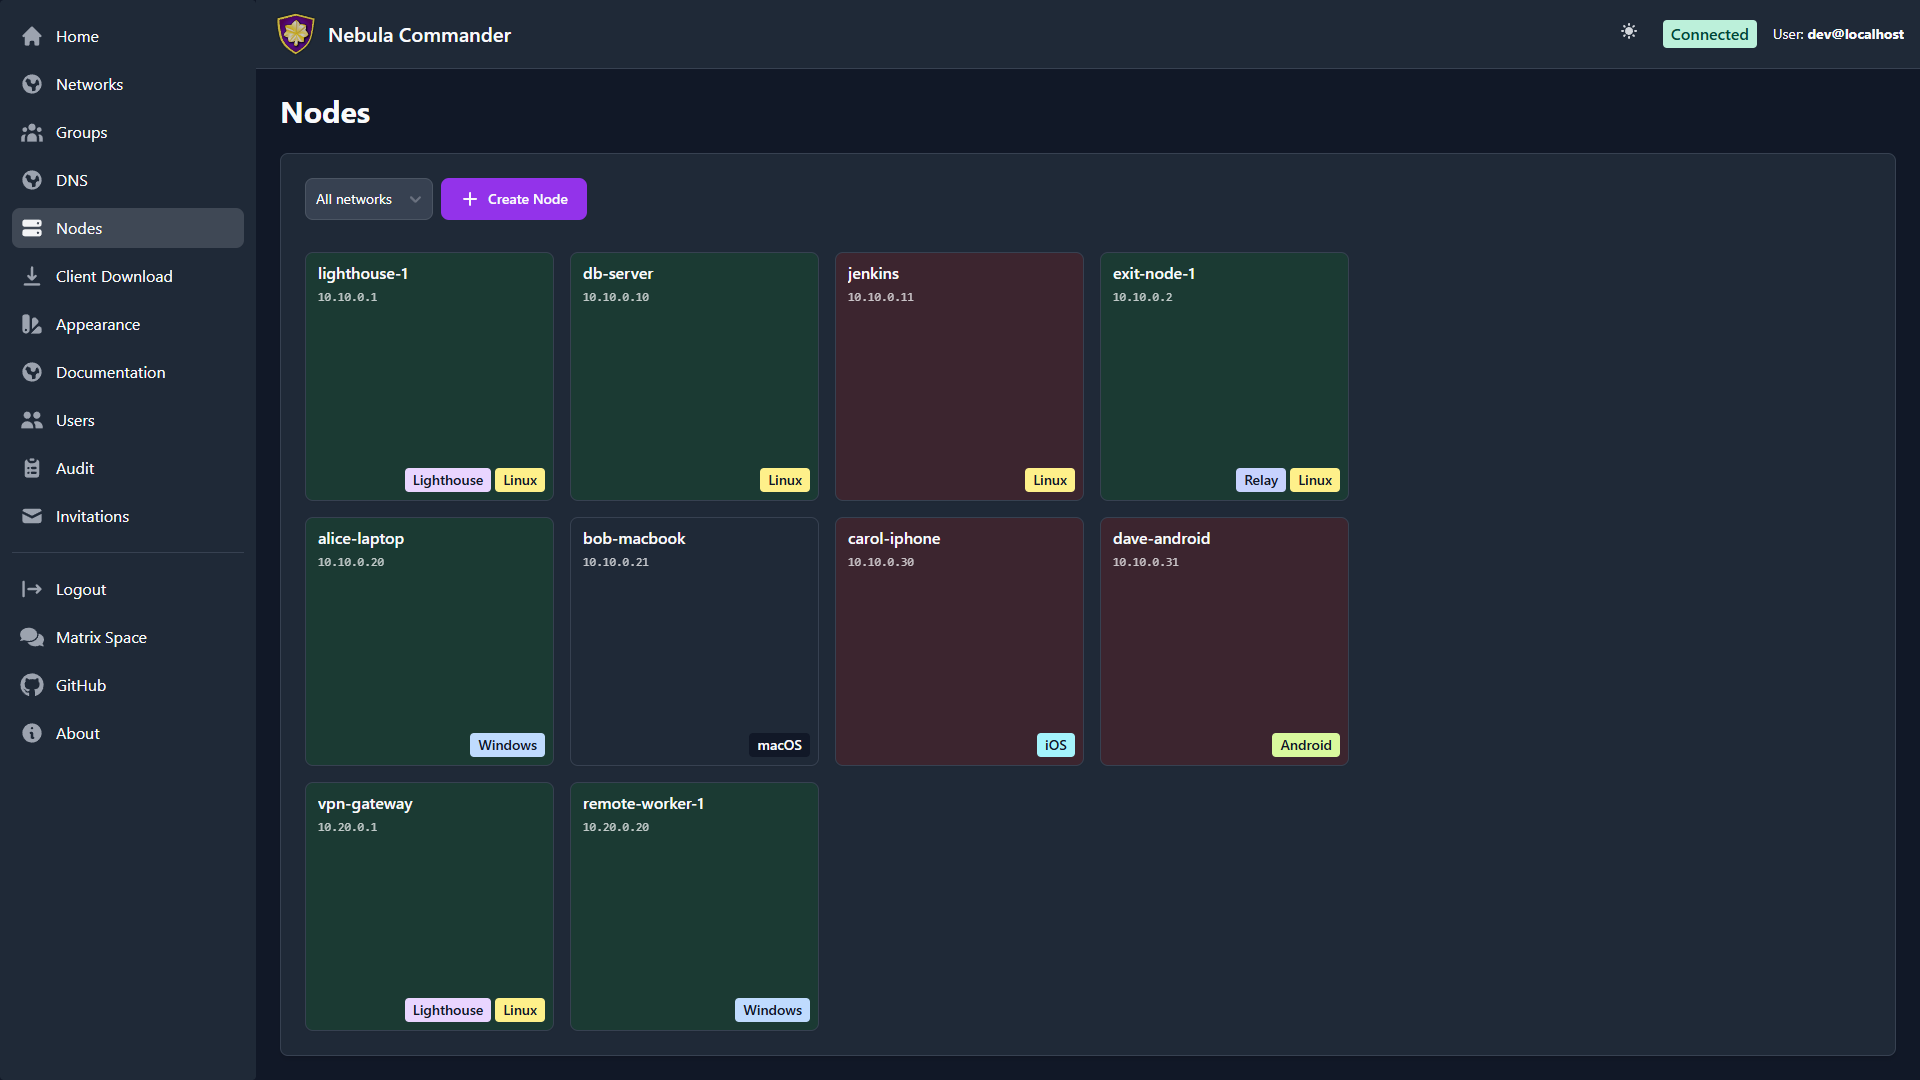
The Nodes page shows every node across networks (or filtered to one network) as
a grid of square cards. You create nodes, assign IPs and groups, create or sign
certificates, generate enrollment codes for ncclient,
download config, and — new since v0.3.7 — pick which other node each one should
route through as a subnet router or exit node.
| Light | Dark |
|---|
 |  |
The node grid
Each card is color-coded by status — never checked in, active, or inactive — and
carries a bottom-right badge cluster: Lighthouse, Relay, and a type/OS badge
(iOS, Android, Windows, Linux, macOS, or a generic Node
fallback until the platform is known). Hostname and IP sit at the top of the card,
always drawn above the badges so a long badge row can never hide them, even on a
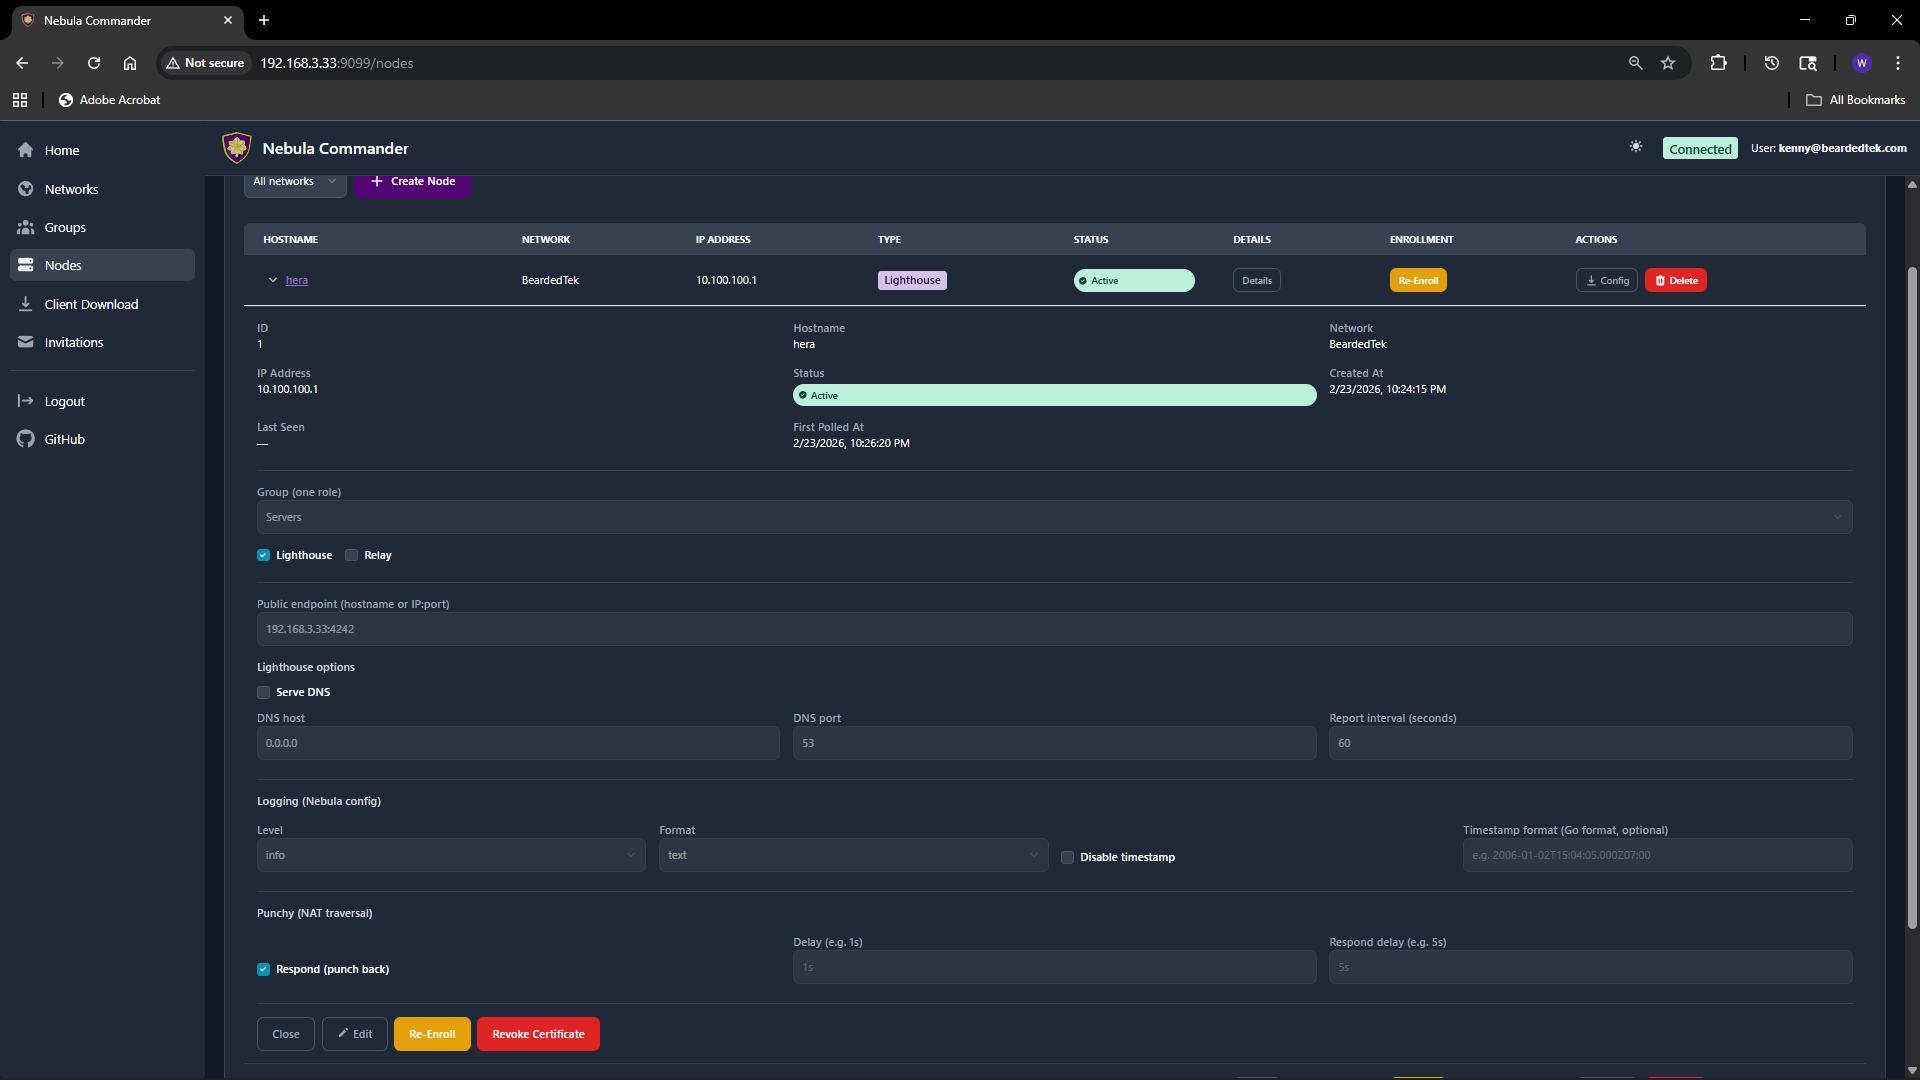
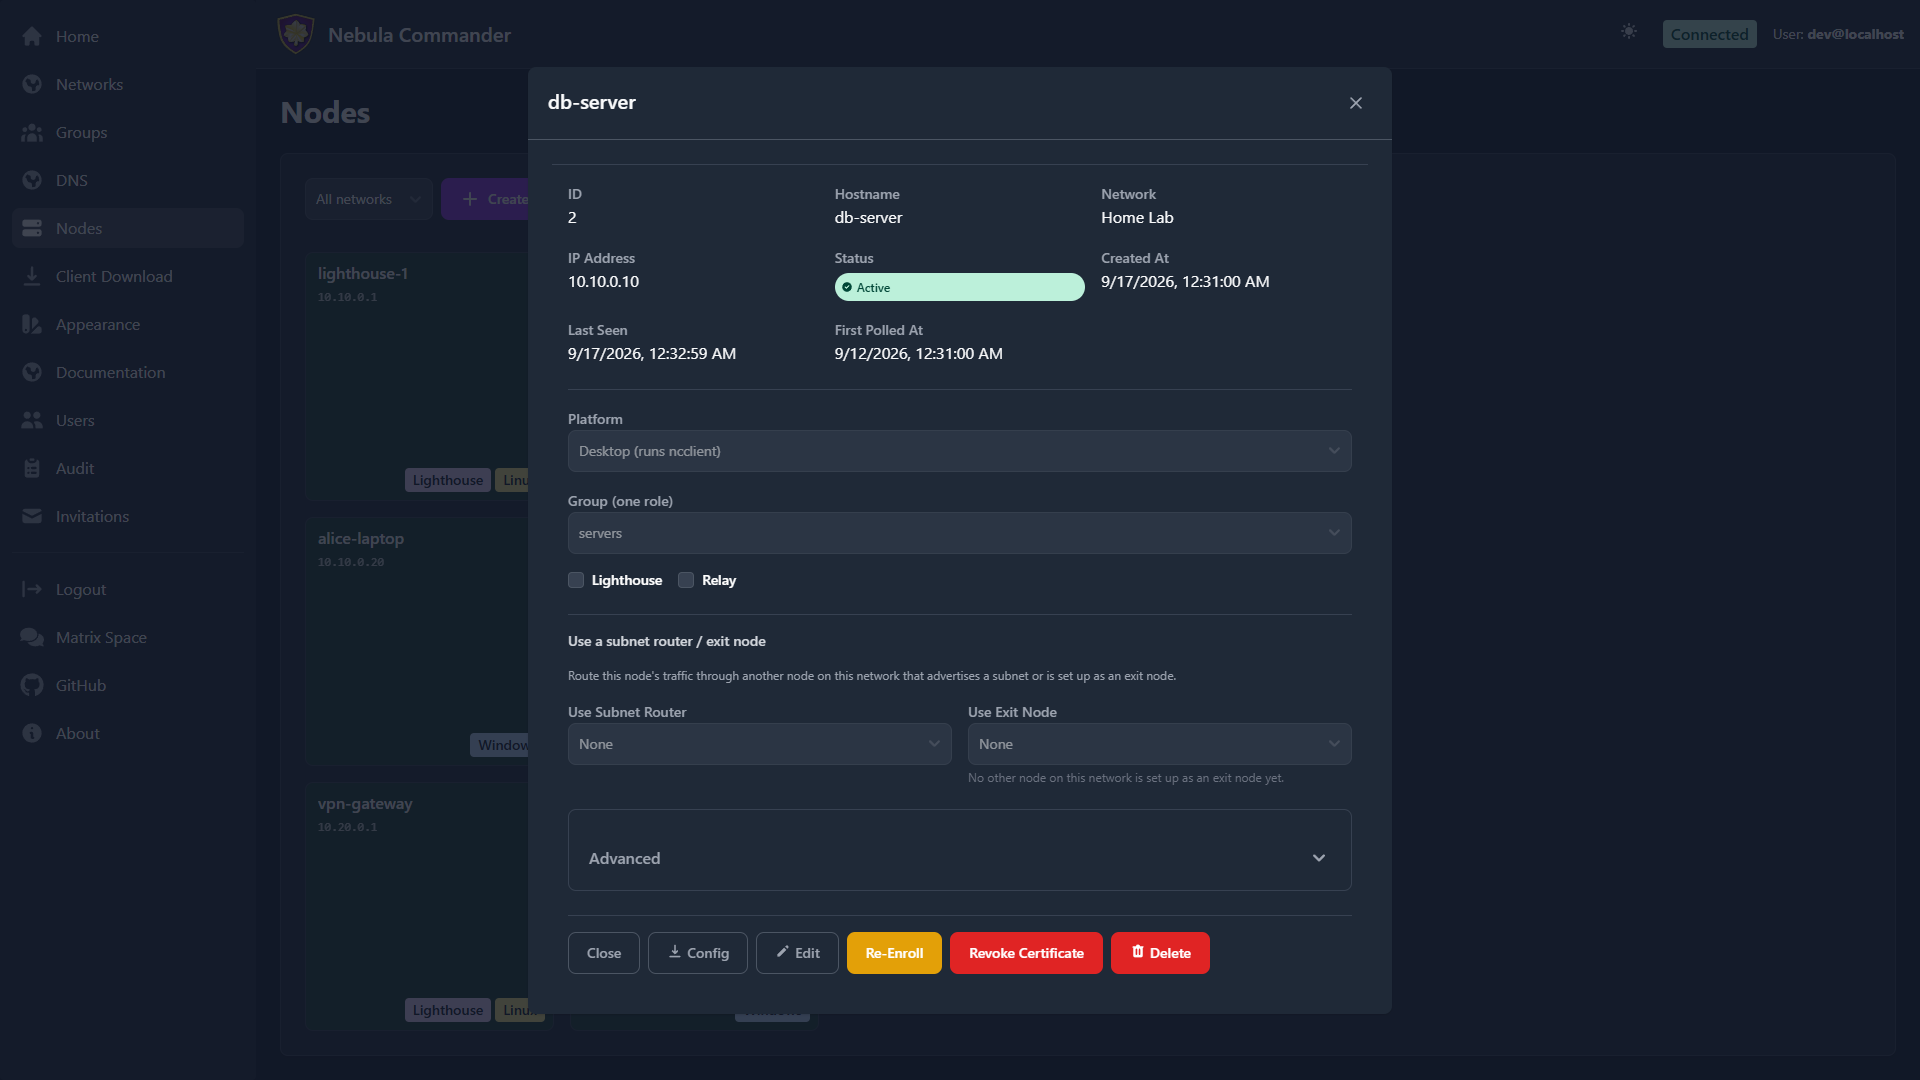
narrow phone screen. Click a card to open its details panel:
| Light | Dark |
|---|
 |  |
All of these colors,
including the status backgrounds and badge colors, are user-configurable — see
Appearance.
Creating a node
- Open Nodes and optionally filter by network.
- Click Create Node. Pick a network first if you haven’t filtered to one.
- Enter a hostname (e.g.
laptop-alice, server-1). The hostname identifies the node and is used in certificates and config. - The server assigns an IP address from the network’s subnet, or you may suggest one.
- Set the node’s group (e.g.
laptops, servers). The group is used for firewall rules and must match a group defined for that network. - Set the platform — Desktop (runs
ncclient), iOS, or Android. - Optionally set a public endpoint (
hostname:port or IP:port) if other nodes can reach this one at a fixed address. See the details panel below. - Submit. The node is created, its certificate is issued, and its card appears in the grid.
The node details panel
Click a card to open its details. The fields visible by default are the ones you’re
likely to change often:
| Field | Description |
|---|
| Platform | Desktop, iOS, or Android. Converting an existing node changes how it’s enrolled — see Mobile nodes below. |
| Group | Nebula security group for this node. Used for firewall (see Groups). |
| Lighthouse | If enabled, this node acts as a Nebula lighthouse (others can punch through to it). Desktop only. |
| Relay | If enabled, this node can relay traffic for other nodes. Desktop only. |
| Public endpoint | Optional hostname:port or IP:port where other nodes can reach this one directly (Nebula’s UDP port, usually 4242; IPv6 as [2001:db8::1]:4242). Every node’s endpoint is added to every other node’s static_host_map, so peers can connect without asking a lighthouse first. Lighthouses and relays need one. Clear the field to remove it. For more addresses, see Additional reachable addresses under Advanced and Public Endpoints & Reachable Addresses. |
| Use Subnet Router | Pick another node on this network to route this node’s traffic to its advertised subnets through. See Subnet Routers and Exit Nodes. |
| Use Exit Node | Pick another node to route all of this node’s traffic through (full-tunnel). Same doc as above. |
Advanced
Settings you set once and rarely touch again are tucked under an Advanced
disclosure at the bottom of the panel:
- Logging — Nebula’s own log level, format, and timestamp options.
- Punchy — NAT hole-punching behavior (respond, delay, respond delay).
- Additional reachable addresses — extra
IP:port addresses this node reports
to the lighthouses (a port forward, a second uplink), added one at a time with a
delete button on each. Not shown for lighthouses. See
Public Endpoints & Reachable Addresses. - Subnet Router & Exit Node Config — the gateway side of routing: which local
subnets this node advertises (auto-discovered on Linux nodes running
ncclient,
or entered by hand under Other), plus a “Used by” list per route where you
add the groups and individual hosts that may consume it. - Exit Node — the gateway-side exit-node toggle (Exit node (route all
traffic)) and its own “Used by” picker.
If you’re setting up a node to be a subnet router or exit node for others, that’s
all under Advanced. If you just want this node to use one that already exists,
the visible Use Subnet Router/Use Exit Node dropdowns are all you need.
Certificates: Create vs Sign
For each node you need a host certificate. Two flows:
- Create certificate – The server generates the private key and certificate. You can download a bundle that includes
host.key, host.crt, and ca.crt. Use this when the device does not already have a key (e.g. ncclient or you will copy the bundle to the device). - Sign certificate – You generate the private key on the device; the server only signs the cert. The server never has
host.key. After signing, download host.crt and ca.crt and place them on the device next to your existing host.key.
Choose Create for simplicity when the server can hold the key (or when you will deploy the bundle once). Choose Sign when you want the key to never leave the device.
Enrollment code (for ncclient)
After the node exists and has a certificate, you can generate an enrollment code for ncclient. Open the node’s card and click Get Enrollment Code. Copy the one-time code. On the device run:
ncclient enroll --server https://YOUR_NEBULA_COMMANDER_URL --code XXXXXXXX
The device stores a token and can then use ncclient run to pull config and certs. See Client Download for binaries.
Download config
You can download the node’s Nebula config and certs (e.g. config.yaml, ca.crt, host.crt, and host.key if Create was used). Use this for manual (nebula) setup or backup.
Revoke, re-enroll and delete
- Revoke certificate: takes the node off the network but keeps its record, so it can be re-enrolled later. Requires reauthentication and typing the node’s hostname to confirm.
- Re-enroll: issues the node a new certificate and enrollment code (for example if the device’s token was lost, or the device is being replaced), and retires the old certificate.
- Delete node: removes the node and its certificate from Nebula Commander. Requires reauthentication and typing the node’s hostname to confirm.
All three retire the node’s current certificate in the same way:
- Every other node rejects it. Its fingerprint goes on the network’s certificate blocklist (Nebula’s
pki.blocklist), which every node picks up on its next config poll (within its poll interval, 60 seconds by default). Existing tunnels using it are dropped. This works even if the device keeps a copy of its key and ignores the server. - The device shuts itself down. Its token stops working;
ncclient then stops Nebula and deletes its config and key from disk, and waits to be enrolled again. - Its IP address is held until the old certificate would have expired, so it isn’t given to a different node in the meantime. A re-enrolled node gets its own address back.
Changing a node’s group, or which subnets it advertises, re-issues its certificate; the previous certificate is blocklisted the same way, so the old group’s firewall access really goes away.
Certificates revoked before v0.7.0 can’t be blocklisted retroactively, because no fingerprint was kept for them. If that matters for your network, re-create the network to get a new CA.
If Nebula Commander is unreachable
Nodes keep working: the mesh doesn’t depend on the server, only on lighthouses. A node that restarts while the server is down starts Nebula from its last known config. Config, route and DNS changes, and revocations, reach a node once it can poll the server again.
Mobile nodes (iOS/Android)
There’s no ncclient agent for mobile, so mobile nodes skip the enroll-code flow
entirely. Set a node’s platform (Desktop, iOS, or Android) when creating or
editing it — a mobile node can’t also be a lighthouse or relay. Instead of an
Enroll button, a mobile node’s card shows a download config.yaml action: that
file is the same one GET /nodes/{id}/config always generates (inline
cert/key/CA already embedded), which is exactly the format the official Nebula
app from defined.net’s “Add Site → From file” import
expects.
Split-horizon DNS for mobile is platform-specific: iOS applies it
automatically whenever the network has DNS enabled (no per-node opt-in needed);
Android has no scoped equivalent, so it’s an explicit opt-in checkbox — when
enabled, all device DNS routes through the network’s lighthouse(s) while
connected.
5 - Client Download
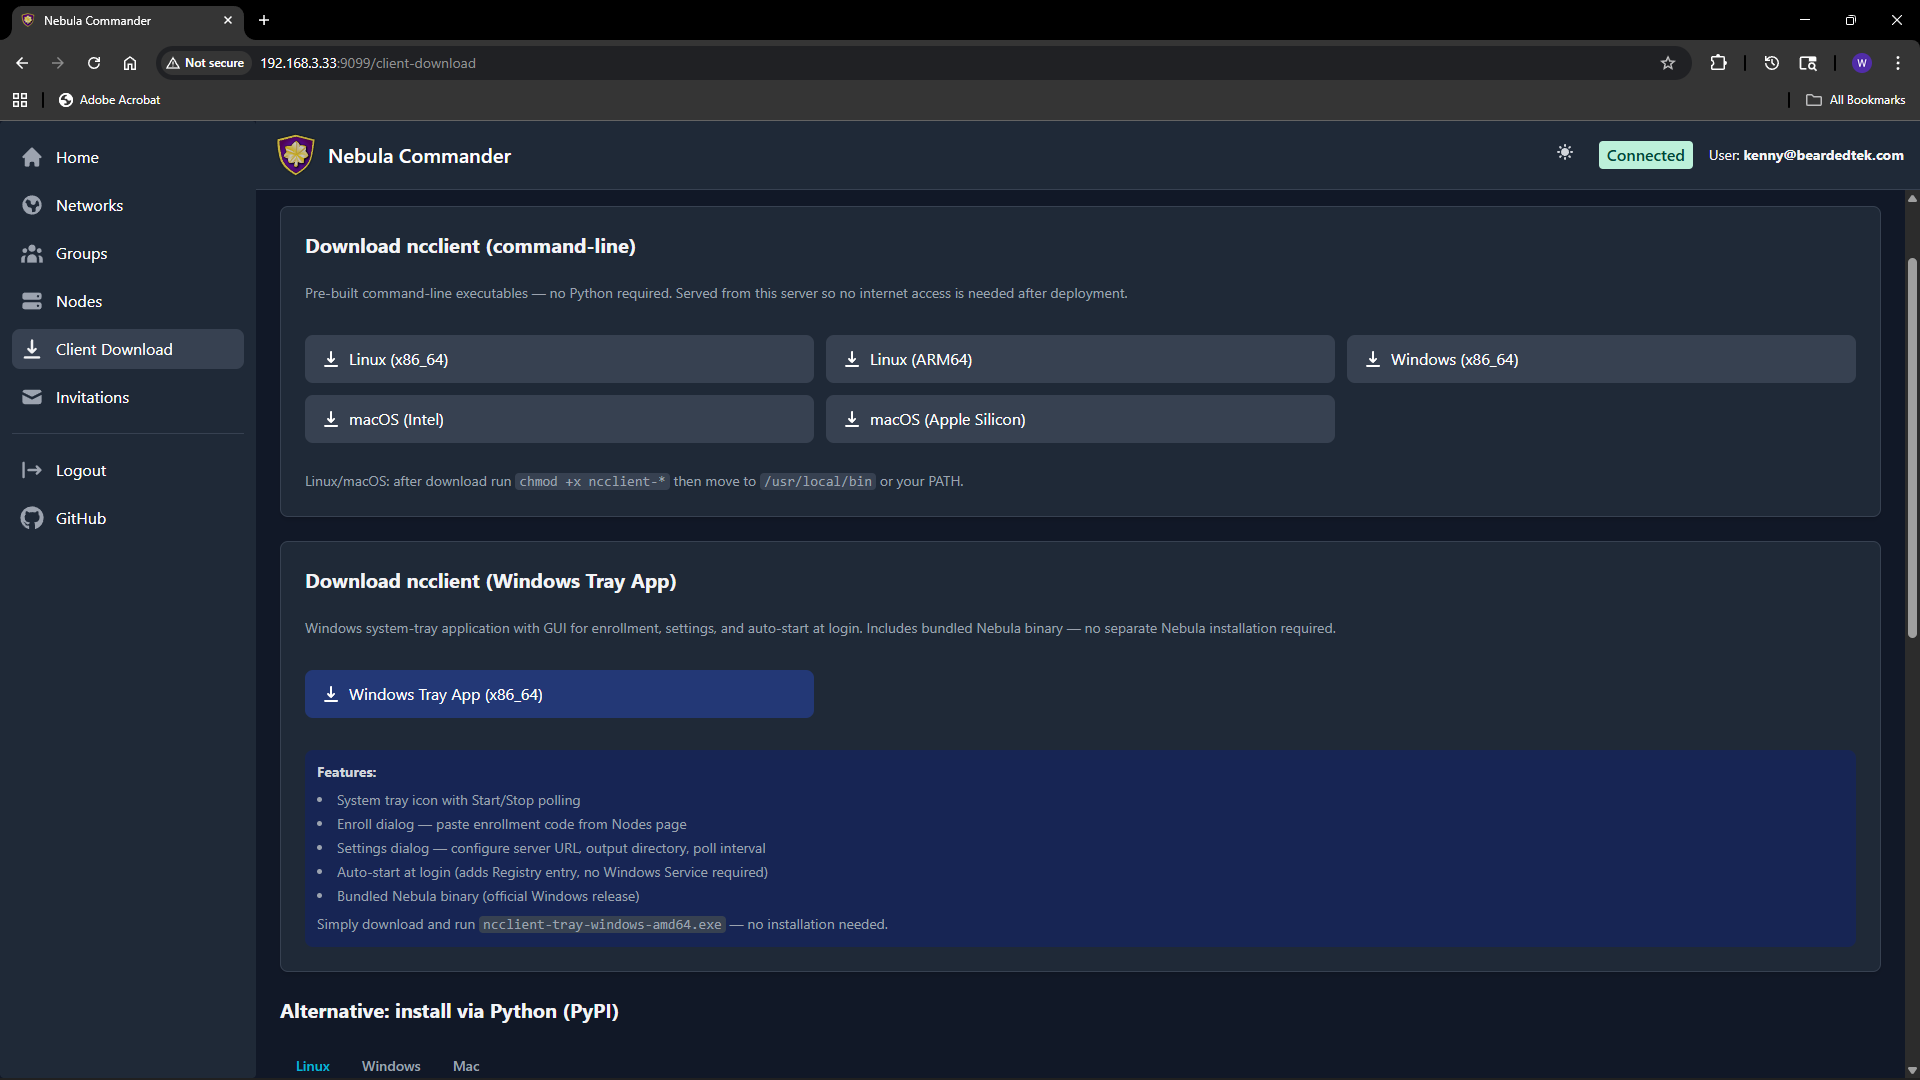
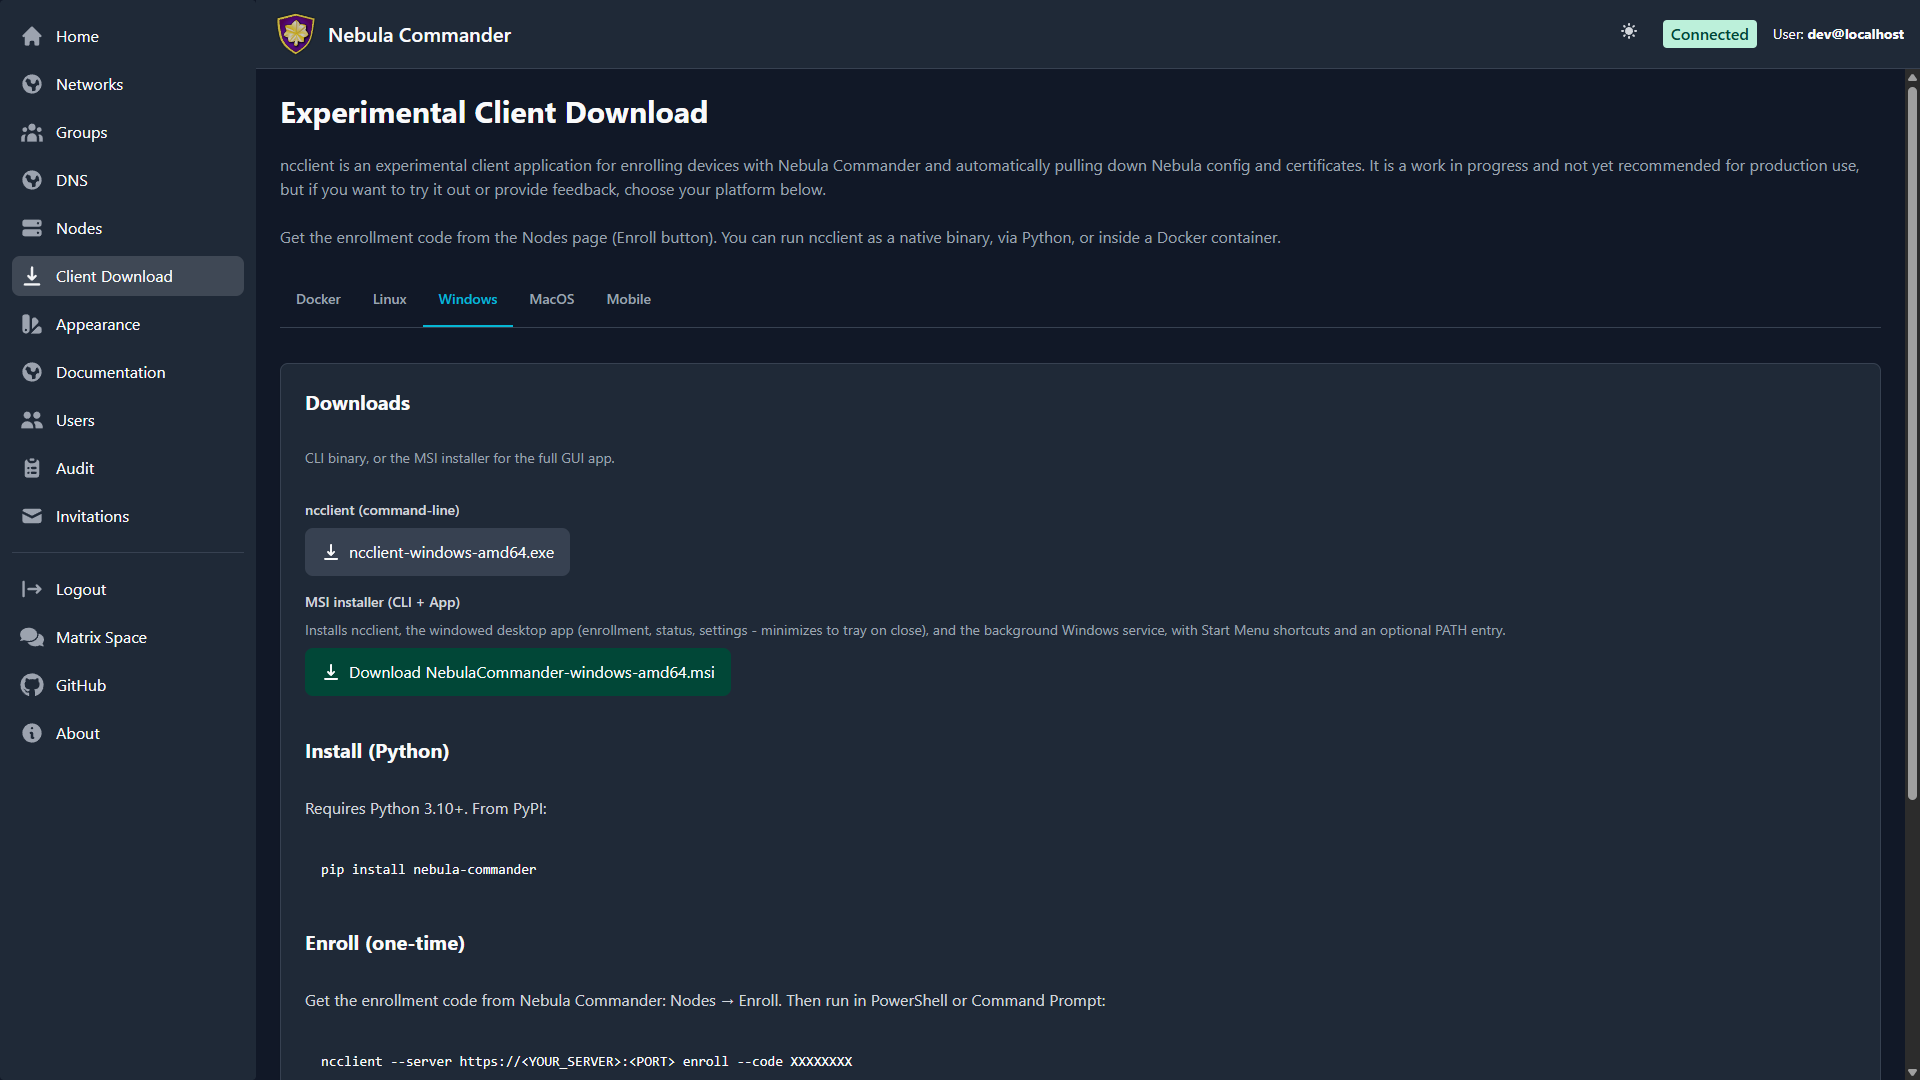
The Client Download page (also reachable from the sidebar or at /client-download) lets users download ncclient binaries served directly from your Nebula Commander instance. No internet access to GitHub is required after deployment.
| Light | Dark |
|---|
 |  |
Purpose
Install and run ncclient on a device to enroll with Nebula Commander and pull config and certificates. The enrollment code is obtained from the Nodes page (Enroll button for the node). The page is organized into tabs (Docker, Linux, Windows, macOS, Mobile) and provides the CLI for every platform, the Linux desktop app packages, and the Windows installer.
CLI binaries (command-line ncclient)
Pre-built executables for:
| Platform | File name |
|---|
| Linux x86_64 | ncclient-linux-amd64 |
| Linux ARM64 | ncclient-linux-arm64 |
| Windows x86_64 | ncclient-windows-amd64.exe |
| macOS Intel | ncclient-macos-amd64 |
| macOS Apple Silicon | ncclient-macos-arm64 |
Downloads are served from /downloads/ (e.g. /downloads/ncclient-linux-amd64). These binaries are only available if the frontend was built with client binaries included (e.g. Docker image built with DOWNLOAD_BINARIES=1). If the page shows no downloads or 404, use ncclient installation from releases or pip instead.
After download on Linux or macOS, make the file executable and place it on your PATH:
chmod +x ncclient-linux-amd64   # or the file you downloaded
# Move to /usr/local/bin or add the directory to PATH
On Windows, add the directory containing ncclient-windows-amd64.exe to your PATH or run it by full path.
Linux desktop app packages
The Linux tab offers the Linux desktop app as three packages, in both .deb and .rpm form, plus a Flatpak:
| File | Contents |
|---|
nebula-commander-client.deb / .rpm | The ncclient CLI |
nebula-commander-service.deb / .rpm | The ncclient systemd service and the D-Bus/polkit integration the app uses |
nebula-commander-desktop.deb / .rpm | The GTK4 desktop app |
org.beardedtek.NebulaCommander.flatpak | The desktop app only; still needs nebula-commander-service installed on the host |
Install all three together so the package manager resolves the order:
sudo apt install ./nebula-commander-client.deb ./nebula-commander-service.deb ./nebula-commander-desktop.deb
# or
sudo dnf install ./nebula-commander-client.rpm ./nebula-commander-service.rpm ./nebula-commander-desktop.rpm
Windows installer
The Windows tab offers the CLI on its own and the MSI installer (/downloads/NebulaCommander-windows-amd64.msi). The MSI installs the CLI, the Windows app, and a background Windows Service together, and can add them to PATH. The service does the actual work (polling, running Nebula, split-horizon DNS) as LocalSystem, so nothing here needs an admin prompt after installation.
The standalone app and service executables (NebulaCommanderApp-windows-amd64.exe, ncclient-service-windows-amd64.exe) are published on GitHub Releases but not on this page. They’re mainly for development: the service is only ever registered by the MSI, so for normal use install the MSI.
Getting the enrollment code
- In the Web UI, go to Nodes.
- Open the node for this device (or create one and create/sign a certificate).
- Click Enroll and copy the one-time code.
- On the device: if you installed the Windows MSI or the Linux desktop app, open Nebula Commander, go to the Enrollment tab, and enter the server URL and code - the service picks it up automatically. Otherwise (CLI, Docker, other platforms), run:
ncclient enroll --server https://YOUR_SERVER_URL --code XXXXXXXX, then ncclient run --server https://YOUR_SERVER_URL to start polling for config and certs.
See ncclient usage for full steps for each client, including how to re-enroll.
6 - Invitations
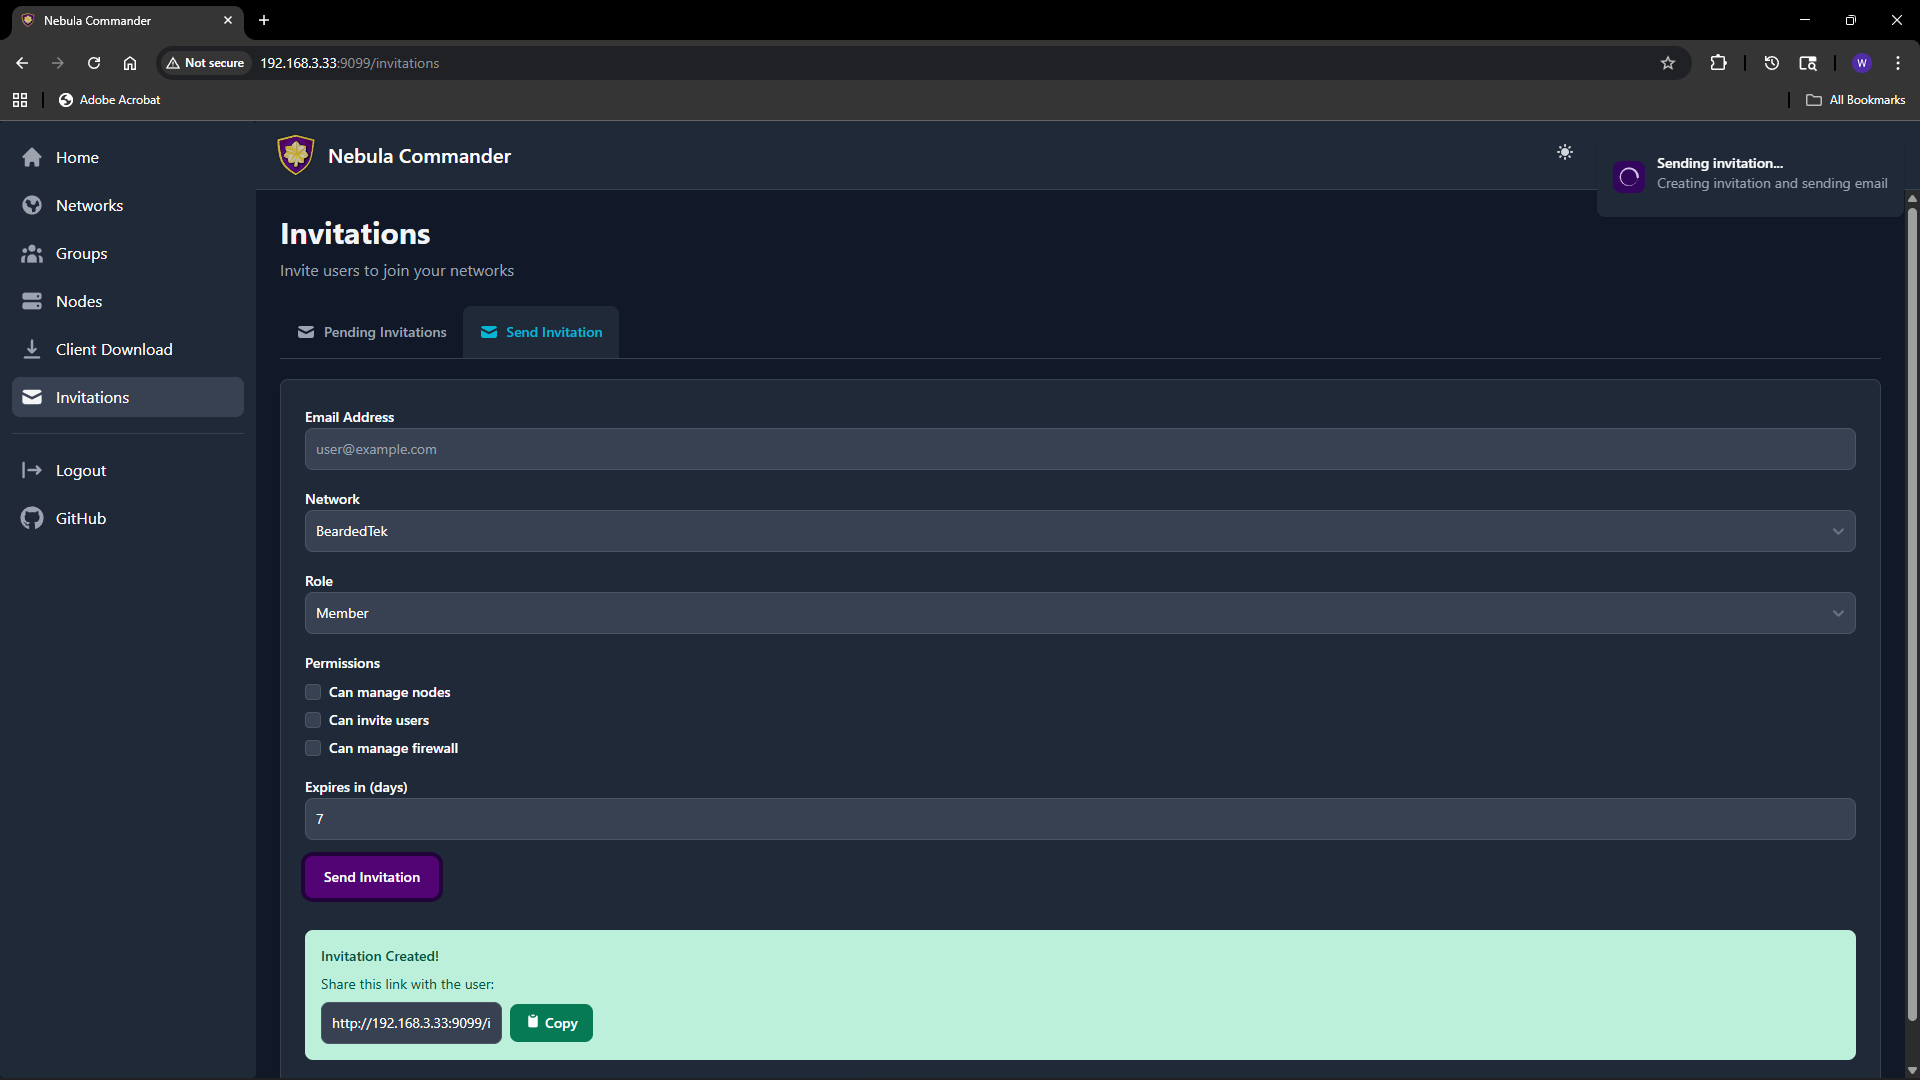
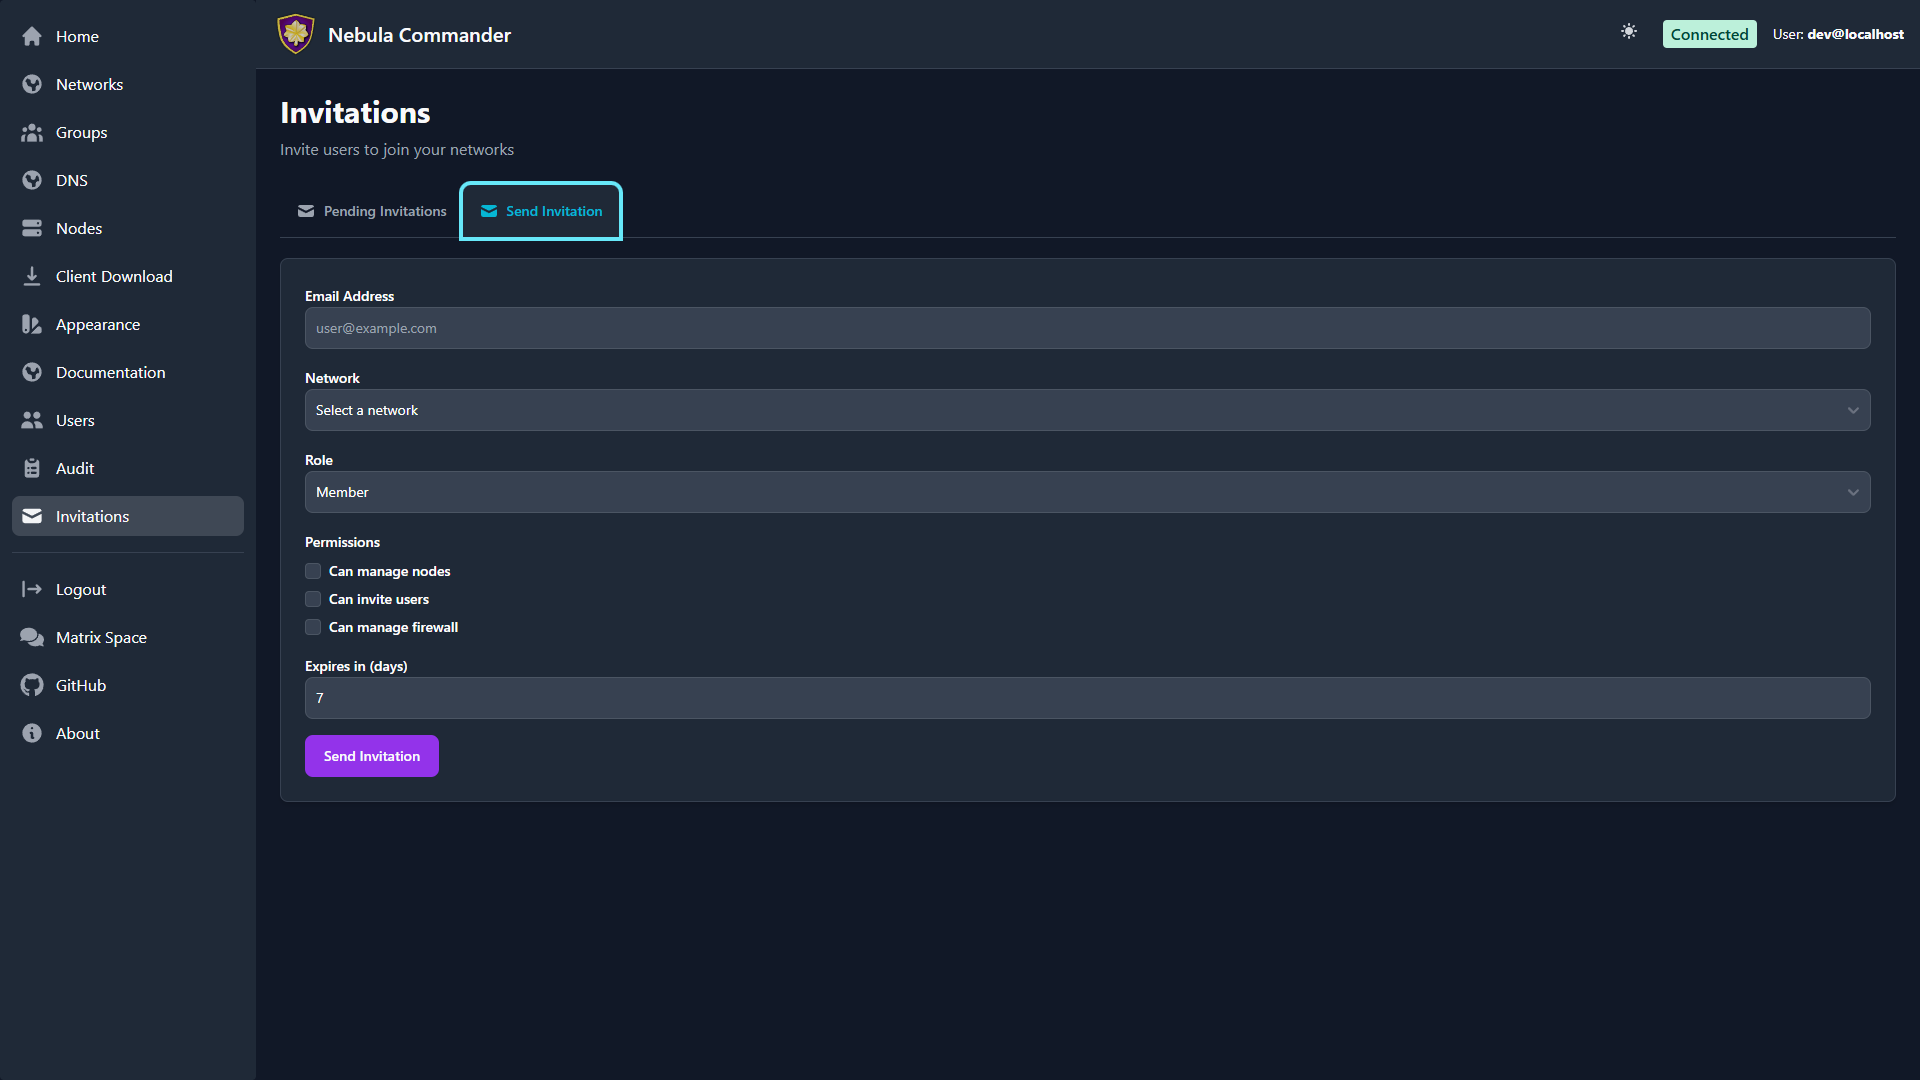
The Invitations page lets network owners (and system admins) invite users to a network with a chosen role and permissions. Invitations work when OIDC is configured; invited users sign in via the IdP and then gain access to the specified network.
| Light | Dark |
|---|
 |  |
What invitations are
An invitation associates an email (or link) with a network, a role (e.g. member, admin), and optional permissions (can manage nodes, can invite users, can manage firewall). The invitee accepts by clicking a link or using a token; after acceptance they appear as a user with access to that network according to the role and permissions.
Creating an invitation
- Open Invitations in the sidebar.
- Use the “Invite user” or similar form.
- Fill in:
- Email – Invitee’s email (used for the invite link and, if SMTP is configured, to send the email).
- Network – The network to grant access to.
- Role – e.g.
member or admin. Affects default permissions. - Can manage nodes – Allow the user to add, edit, delete nodes in this network.
- Can invite users – Allow the user to send further invitations for this network.
- Can manage firewall – Allow the user to edit groups and firewall rules for this network.
- Expires in (days) – How long the invitation link is valid (e.g. 7 days).
- Submit. You can either send email (if SMTP is configured) or copy link to send manually.
The invitation appears in the list with status (e.g. pending, accepted, expired).
Accepting an invitation
The invitee opens the invitation link (from email or shared link). The link contains a token and typically looks like /invitations/accept/TOKEN. They are prompted to log in with OIDC if not already logged in. After accepting, they have access to the network according to the role and permissions set in the invitation.
Listing and revoking
The Invitations page lists all invitations you created (or all invitations in the system if you are a system admin).
| Light | Dark |
|---|
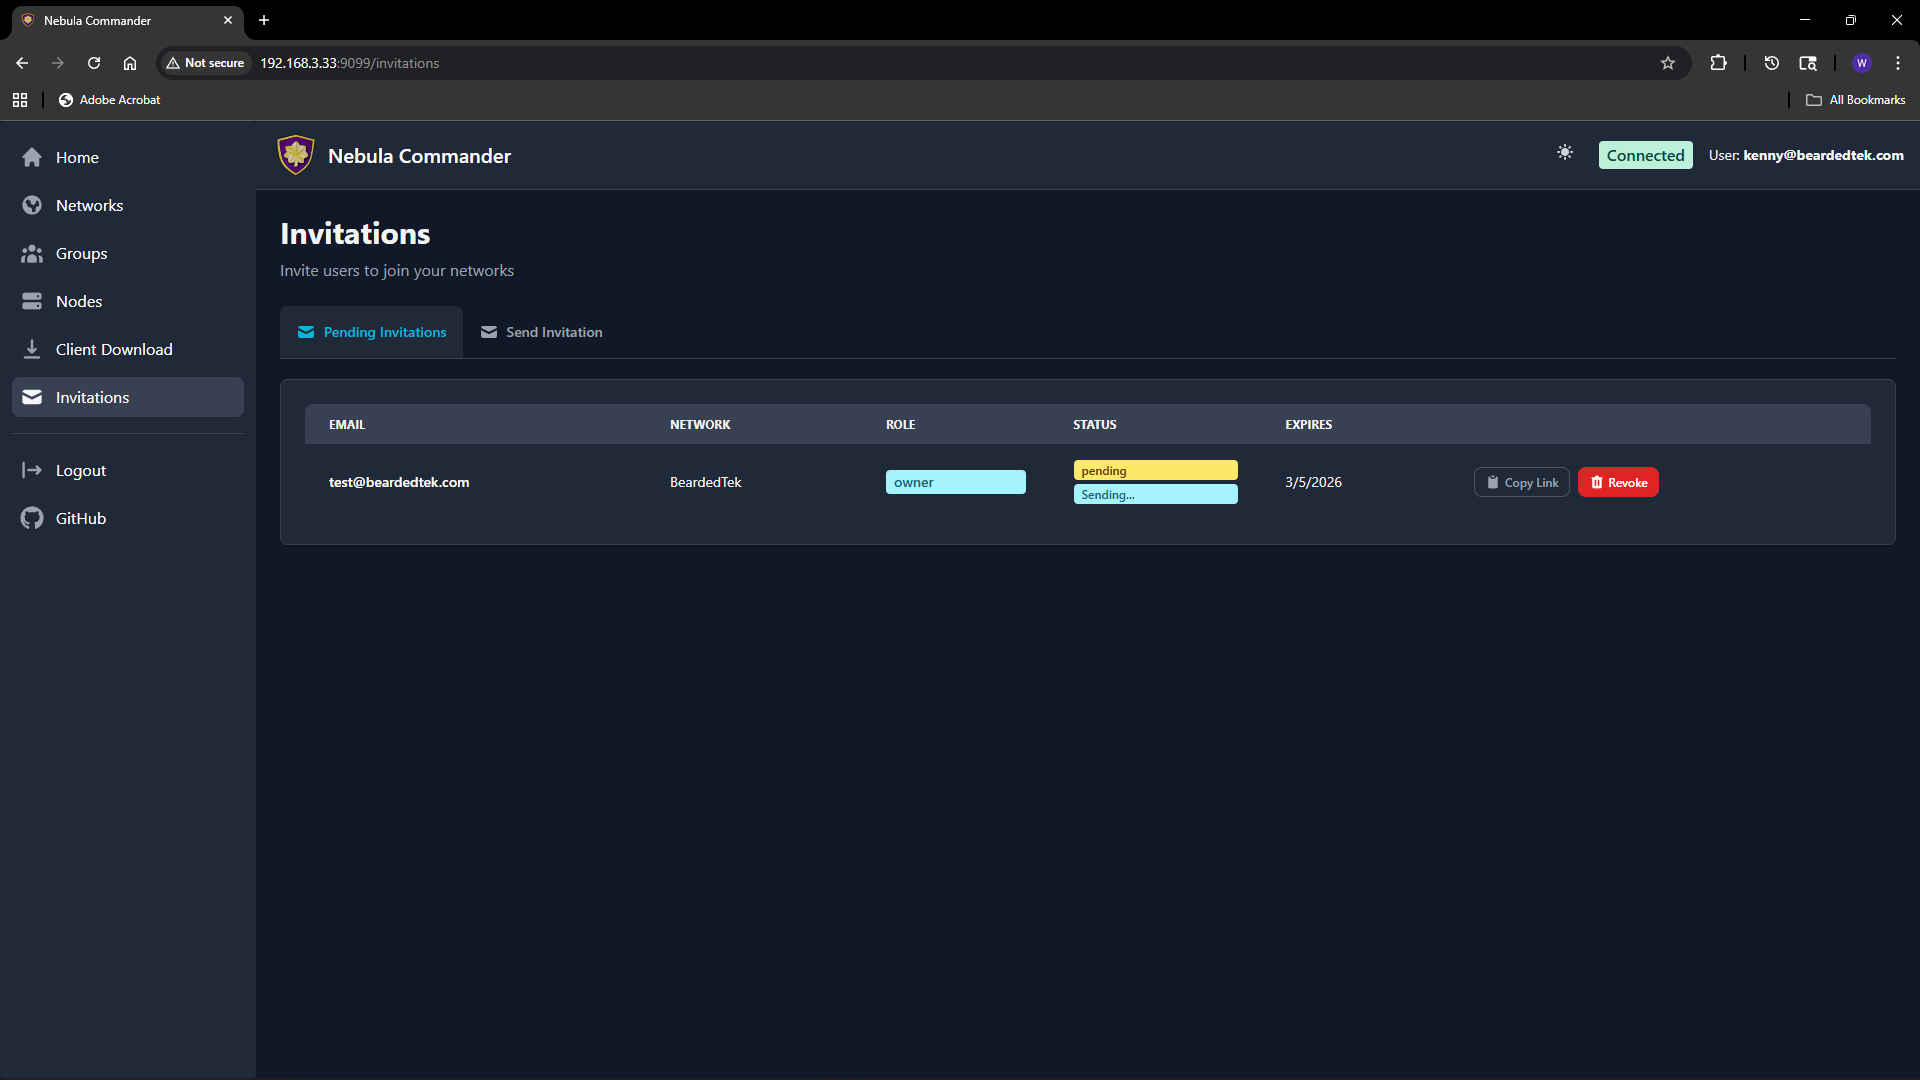 | 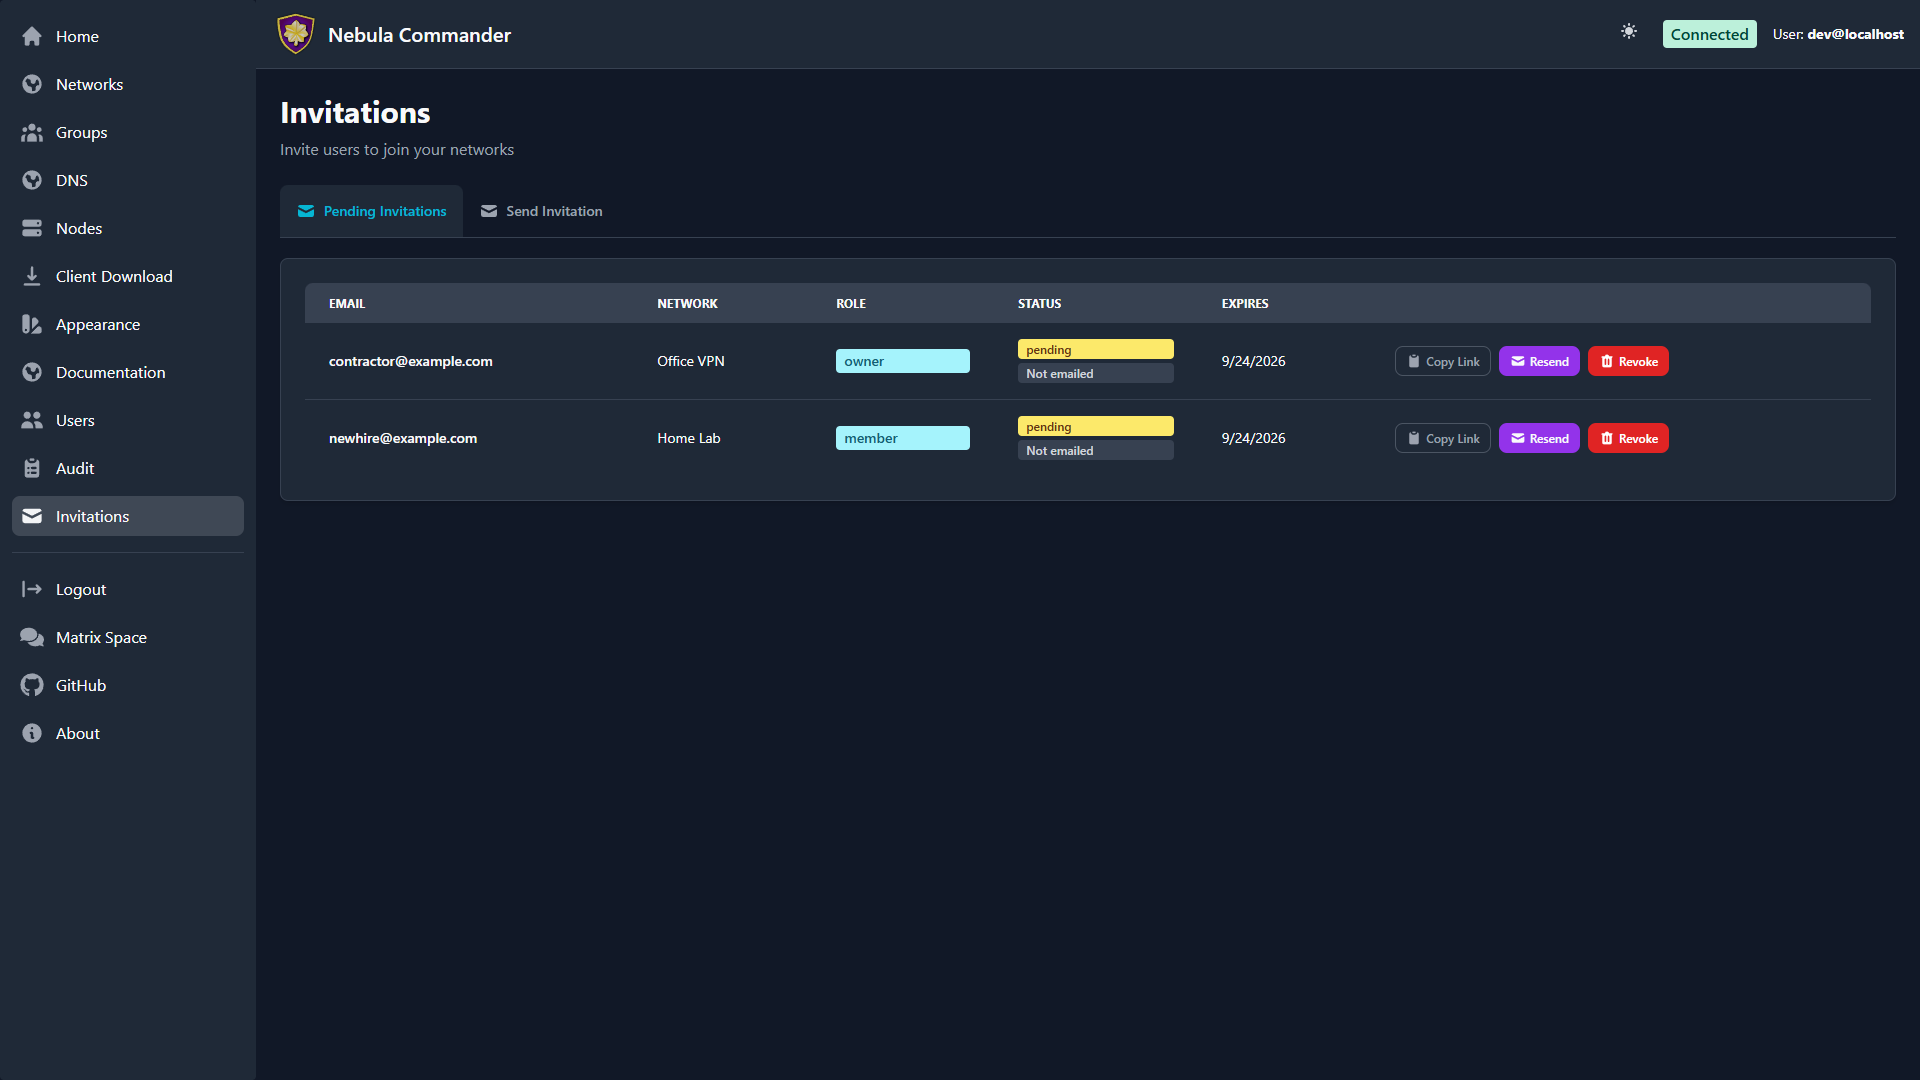 |
You can see status (pending, accepted, expired), email, network, role, and expiry. To revoke a pending invitation, use the revoke or delete action; the link will no longer work.
Email delivery
If the backend has SMTP configured, invitation emails are sent automatically when you create an invitation. If SMTP is not configured, use “Copy link” and share the URL manually. Email status (sent, failed) may be shown on the invitation row; check the Environment docs for SMTP options.
7 - Users
System-admin user management: view accounts, change system roles, and delete users.
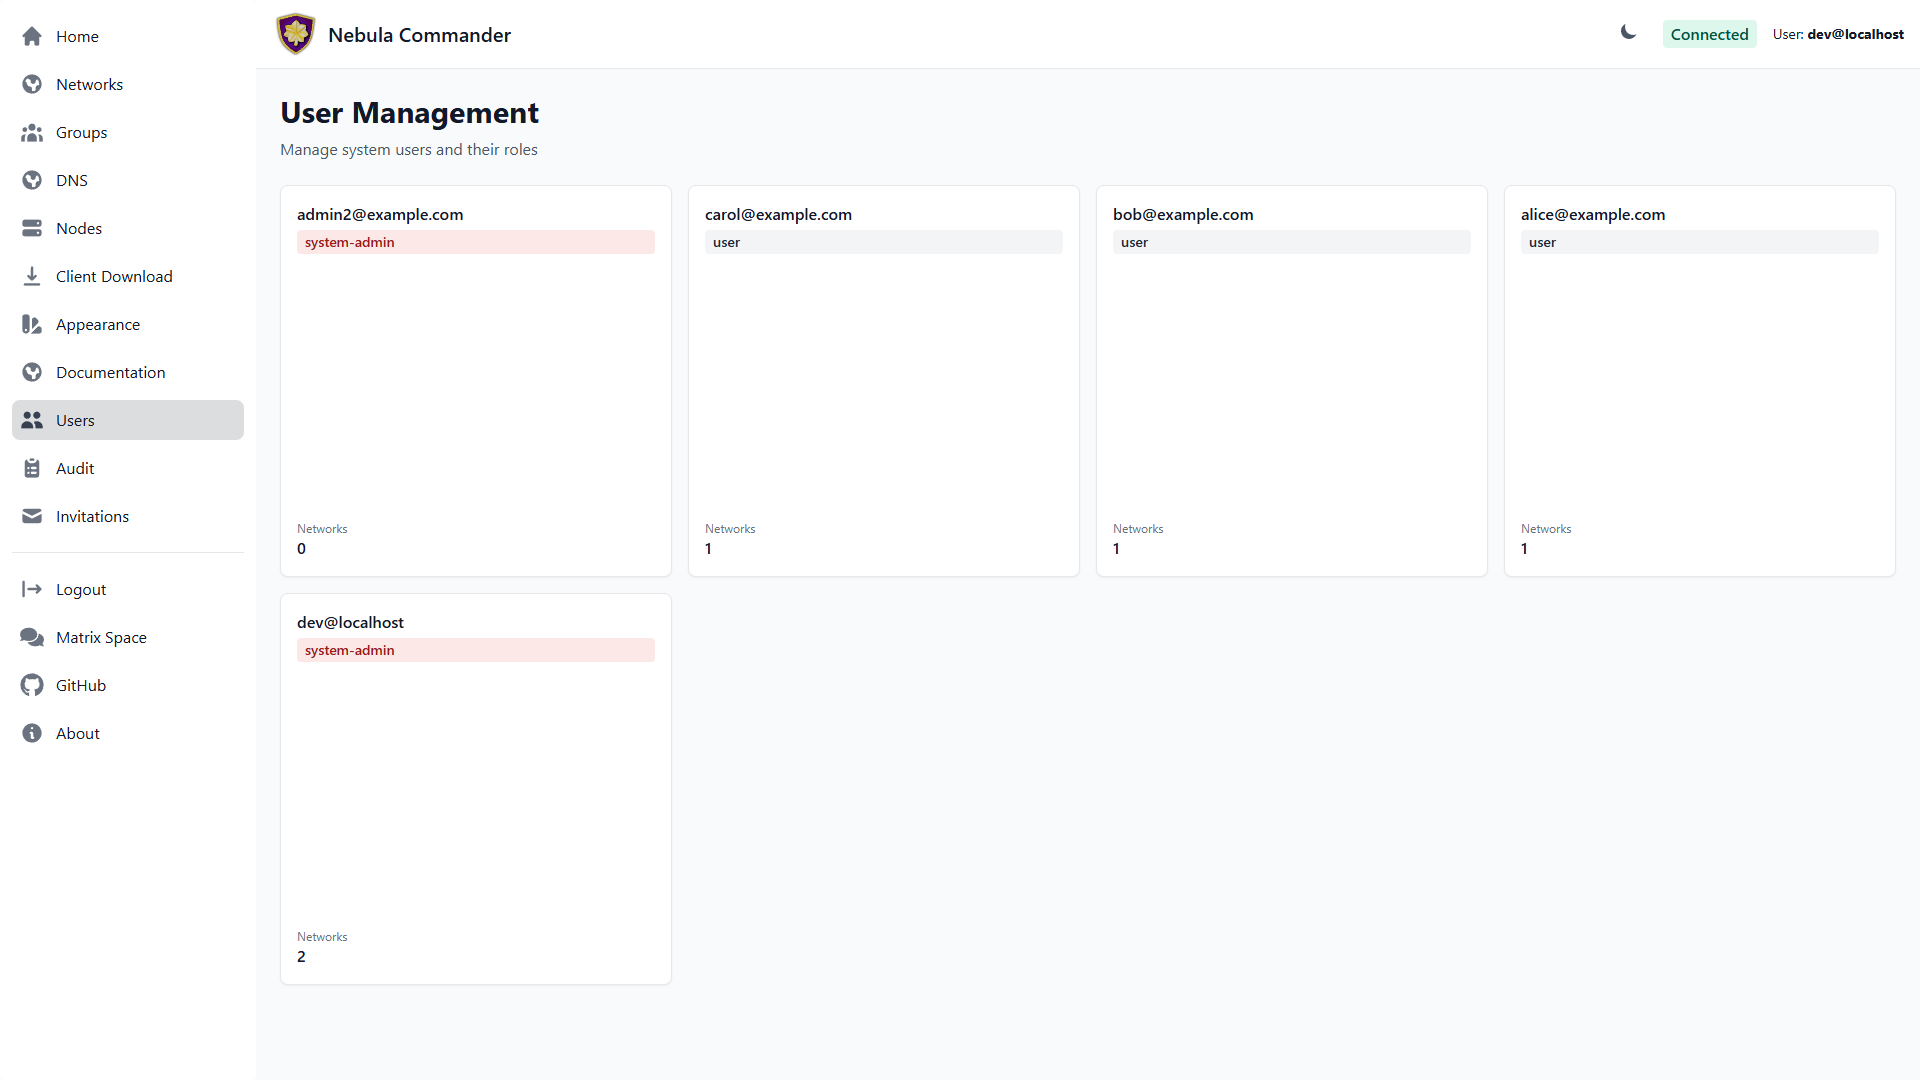
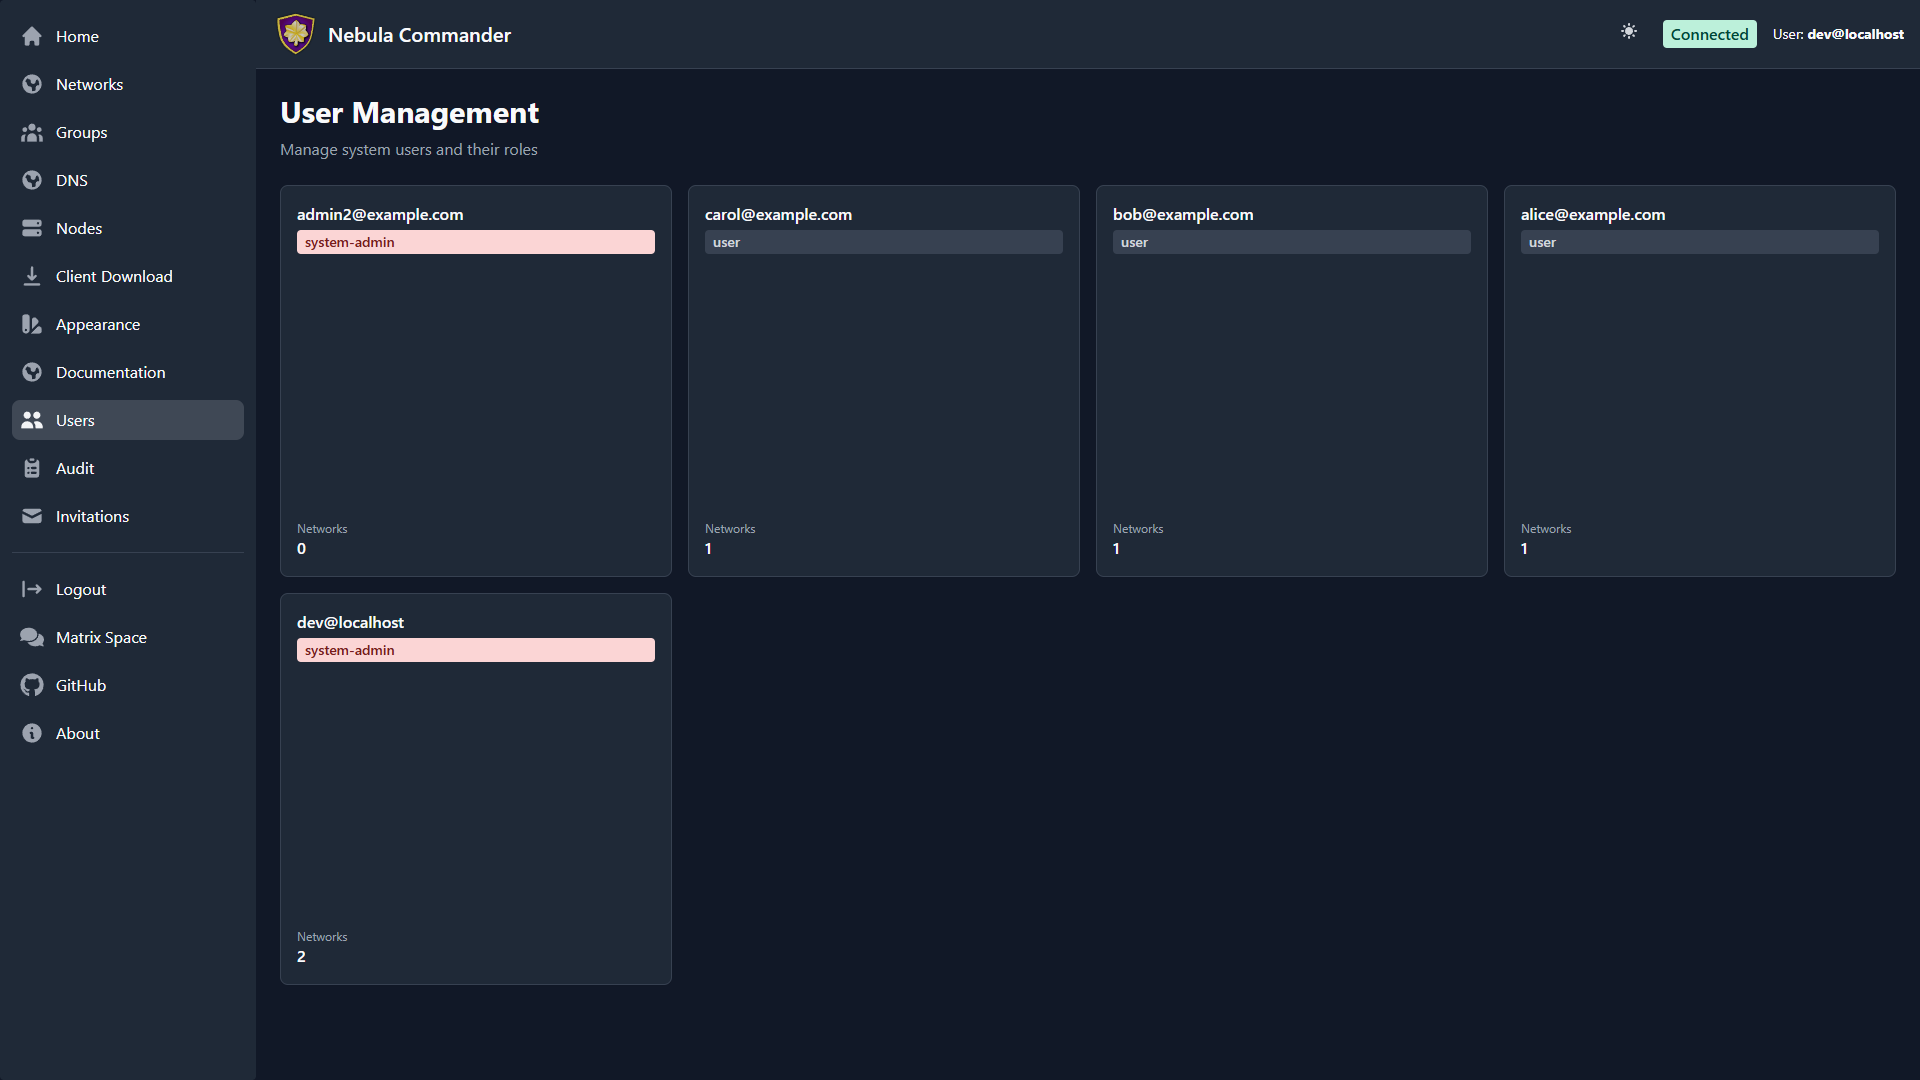
The Users page (sidebar → Users) lists every user account in Nebula
Commander as a grid of square cards. It’s visible only to system admins —
everyone else never sees this link.
| Light | Dark |
|---|
 |  |
The user grid
Each card shows a user’s email, their system role badge (system-admin in red,
user in gray), and how many networks they belong to. Click a card to open its
details.
User details
The details modal shows the user’s email, system role, creation date, and their
per-network permissions — role (owner/member) and the specific capabilities
(manage nodes, invite users, manage firewall) granted on each network they’re part
of.
| Light | Dark |
|---|
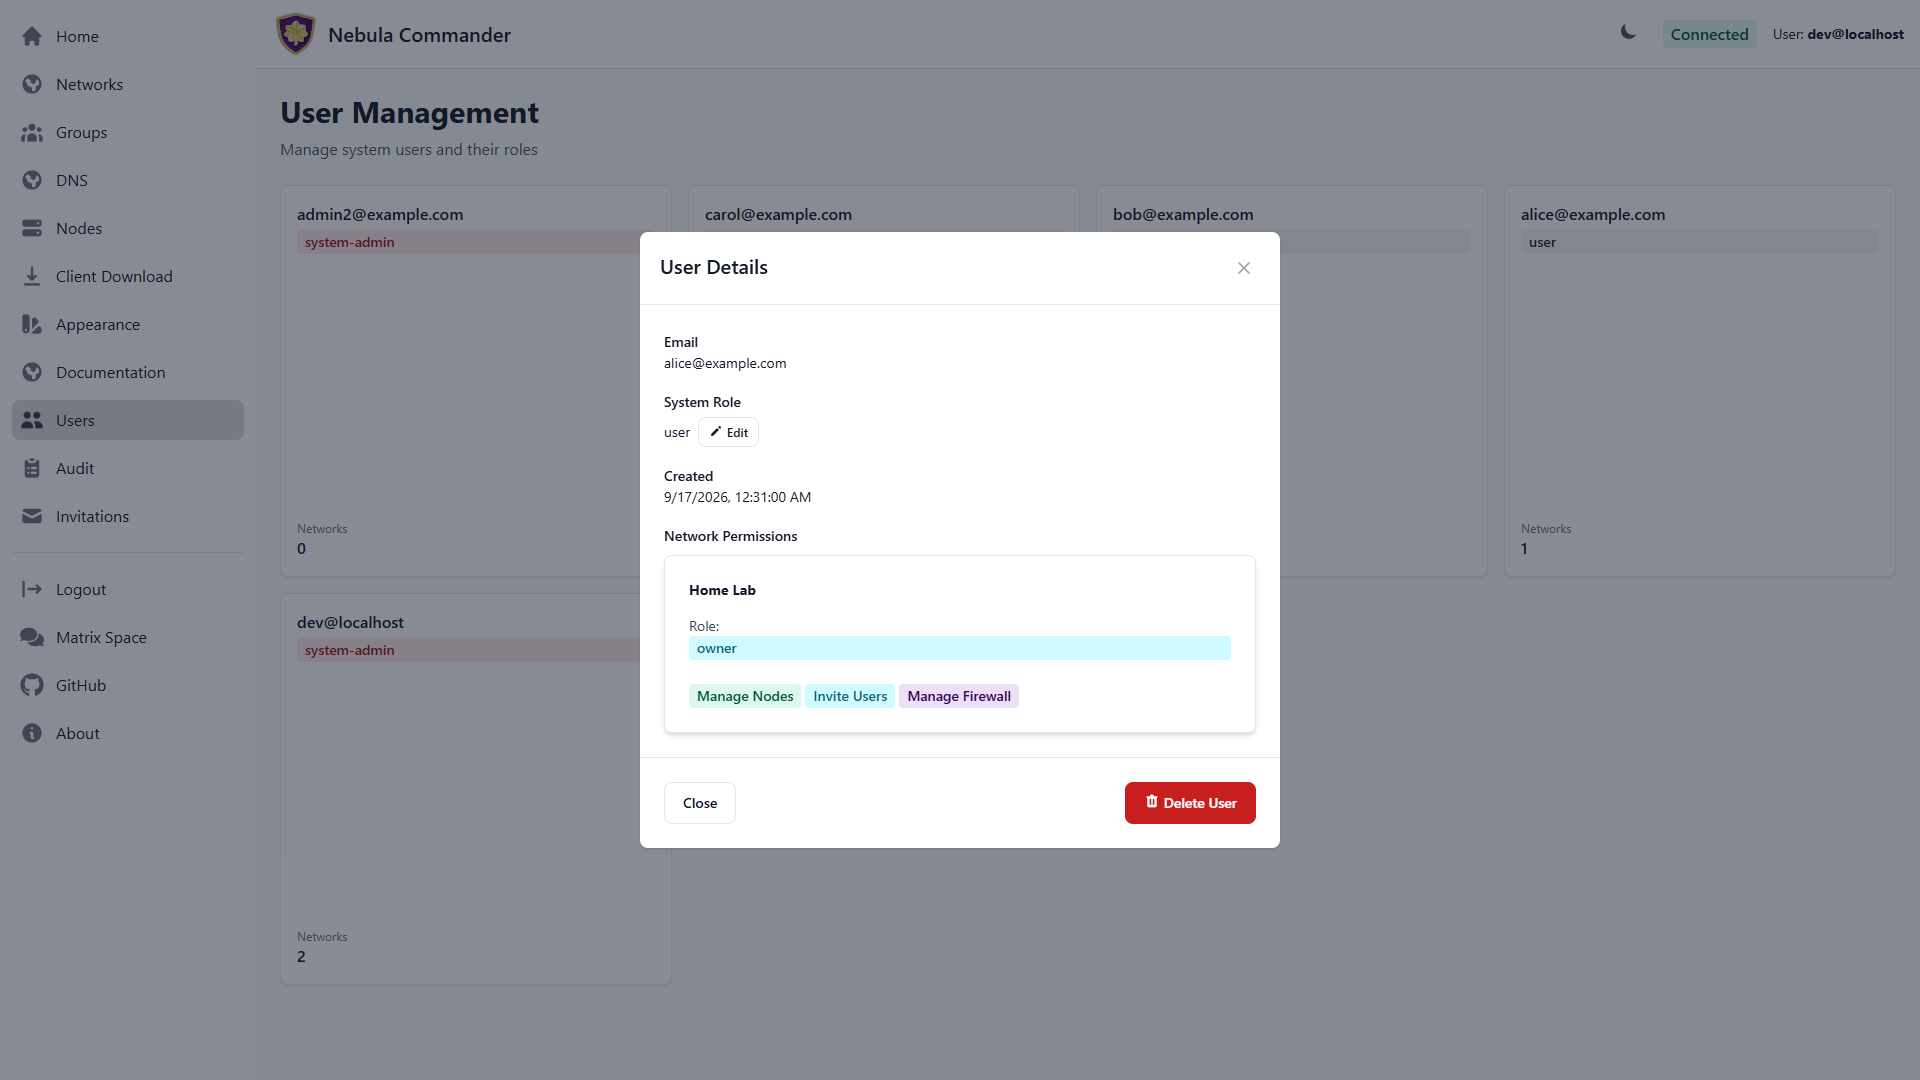 | 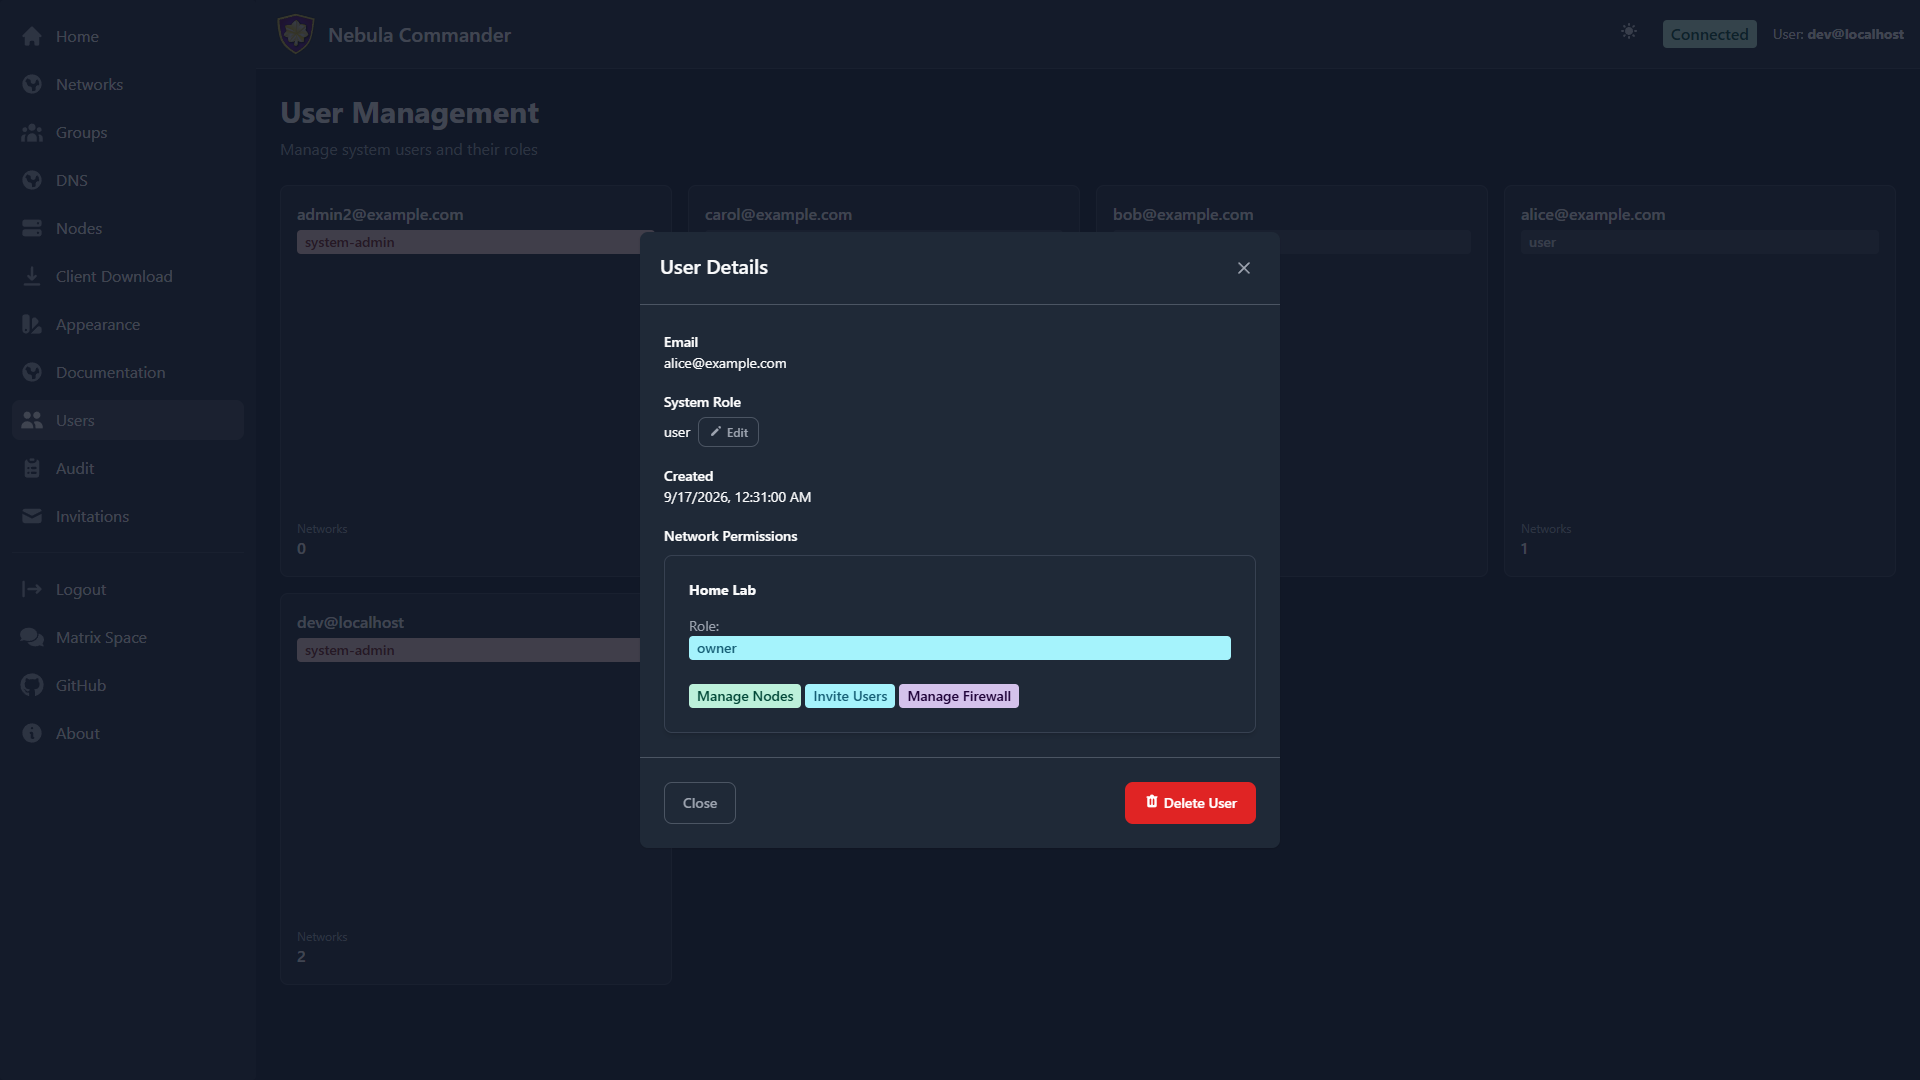 |
- Edit role — click Edit next to the system role to reveal a dropdown
(
User or System Admin) in place, without leaving the modal. Save applies
immediately and the modal updates to reflect it. - Delete User — opens a two-step, type-to-confirm delete flow (type the user’s
email to confirm) and requires reauthentication, the same as deleting a network
or a node. Deleting a user removes all their network permissions; it does not
delete nodes they created.
System role is separate from per-network permissions: a plain user can still be
a network owner with full control over their own networks — system-admin is
specifically for instance-wide administration (managing all users, viewing the
audit log across every network, and so on).
8 - Backup & export
Download an encrypted copy of your whole instance, and move it to another server with import.
The Backup & export page (sidebar → Backup & export) lets a system admin
download everything in a Nebula Commander instance as one encrypted file, and
import such a file into a new instance. Use it to:
- keep an offline backup,
- move from hosted Nebula Commander to your own server (or the other way round),
- move a self-hosted instance to new hardware.
Only system admins see this page, and both export and import ask you to
sign in again before they run.
What’s in an export
Everything needed to run the instance somewhere else:
- networks, their certificate authorities (including the CA private keys) and
host certificates
- nodes, groups, firewall rules, DNS settings and aliases, IP allocations
- users, their network and node permissions, pending invitations
- the audit log
- optionally, the key that signs device credentials (see
Keeping devices working)
Passwords aren’t included. Sign-in is handled by your identity provider
(for example Keycloak), not by Nebula Commander.
Encryption
When you export, you choose a passphrase (at least 12 characters). The file is
encrypted with it before it leaves the server, in the standard
age format:
- Without the passphrase the file can’t be opened, by you, by whoever runs the
server, or by anyone who gets hold of the file.
- The passphrase can’t be recovered or reset. After the download, Nebula
Commander shows it once more (hidden until you click Show) so you can save
it in a password manager.
- The passphrase is never stored or logged. The audit log records that an export
happened and by whom, not the passphrase.
An export protects your data wherever the file ends up. It can’t protect you
from someone who already controls the server running the live instance.
Opening an export without Nebula Commander
Because it’s a standard age file, you can always get at your data:
age -d -o export.zip nebula-commander-example.com-20260927-1200.ncexport.age
Or with the Nebula Commander backend installed:
python -m backend.scripts.ncexport inspect  export.ncexport.age   # show what's inside
python -m backend.scripts.ncexport decrypt  export.ncexport.age export.zip
The zip contains manifest.json, one JSON file per table under data/, the
certificate store under certs/ and a README.txt. It contains private
keys, so treat the decrypted zip like the keys themselves.
Creating an export
- Open Backup & export and click Create encrypted export.
- Sign in again when asked.
- Enter a passphrase twice and click Encrypt and download.
- Save the passphrase shown in the next dialog, then click I’ve saved it.
Importing into a new instance
Import only works on a fresh instance, one with no networks or nodes yet.
- Install Nebula Commander (Docker or
NixOS) and sign in as a system admin.
- Open Backup & export and click Import from a file.
- Sign in again, choose the export file and enter its passphrase.
- Check the summary, then point your devices at the new server (below).
Everything is re-encrypted with the new instance’s own encryption key. If
anything goes wrong, the import is rolled back and nothing is changed.
Users and sign-in
- Same identity provider (same issuer URL): users keep their accounts and
just sign in as before.
- Different identity provider: each person gets their access back the first
time they sign in to the new instance with the same email address, provided
the provider has verified that address. In Keycloak, turn on
Realm settings → Login → Verify email before inviting people in. This
check stops someone who registers with another person’s unverified email from
inheriting their access.
- The admin who runs the import is matched to their old account by email
straight away.
Keeping devices working
With Keep enrolled devices working after a move ticked (the default), the
export includes the key that signed your devices’ credentials. After importing,
each device only needs the new server address:
# /etc/default/ncclient (Linux service) or the ncclient environment
NEBULA_COMMANDER_SERVER=https://nebula.example.com
Restart ncclient. The device carries on with its existing certificate and keeps
receiving config updates, with no re-enrollment. The imported key is stored
encrypted and is only ever accepted for device credentials, never for signing
in. New credentials are always issued with the new instance’s own key.
Leave the box unticked for a plain backup you won’t import elsewhere. Devices
would then need a new enrollment code after an import.
9 - Appearance
Per-account color theming: customize buttons, status colors, badges, and backgrounds for both light and dark mode, and save your choices as reusable presets.
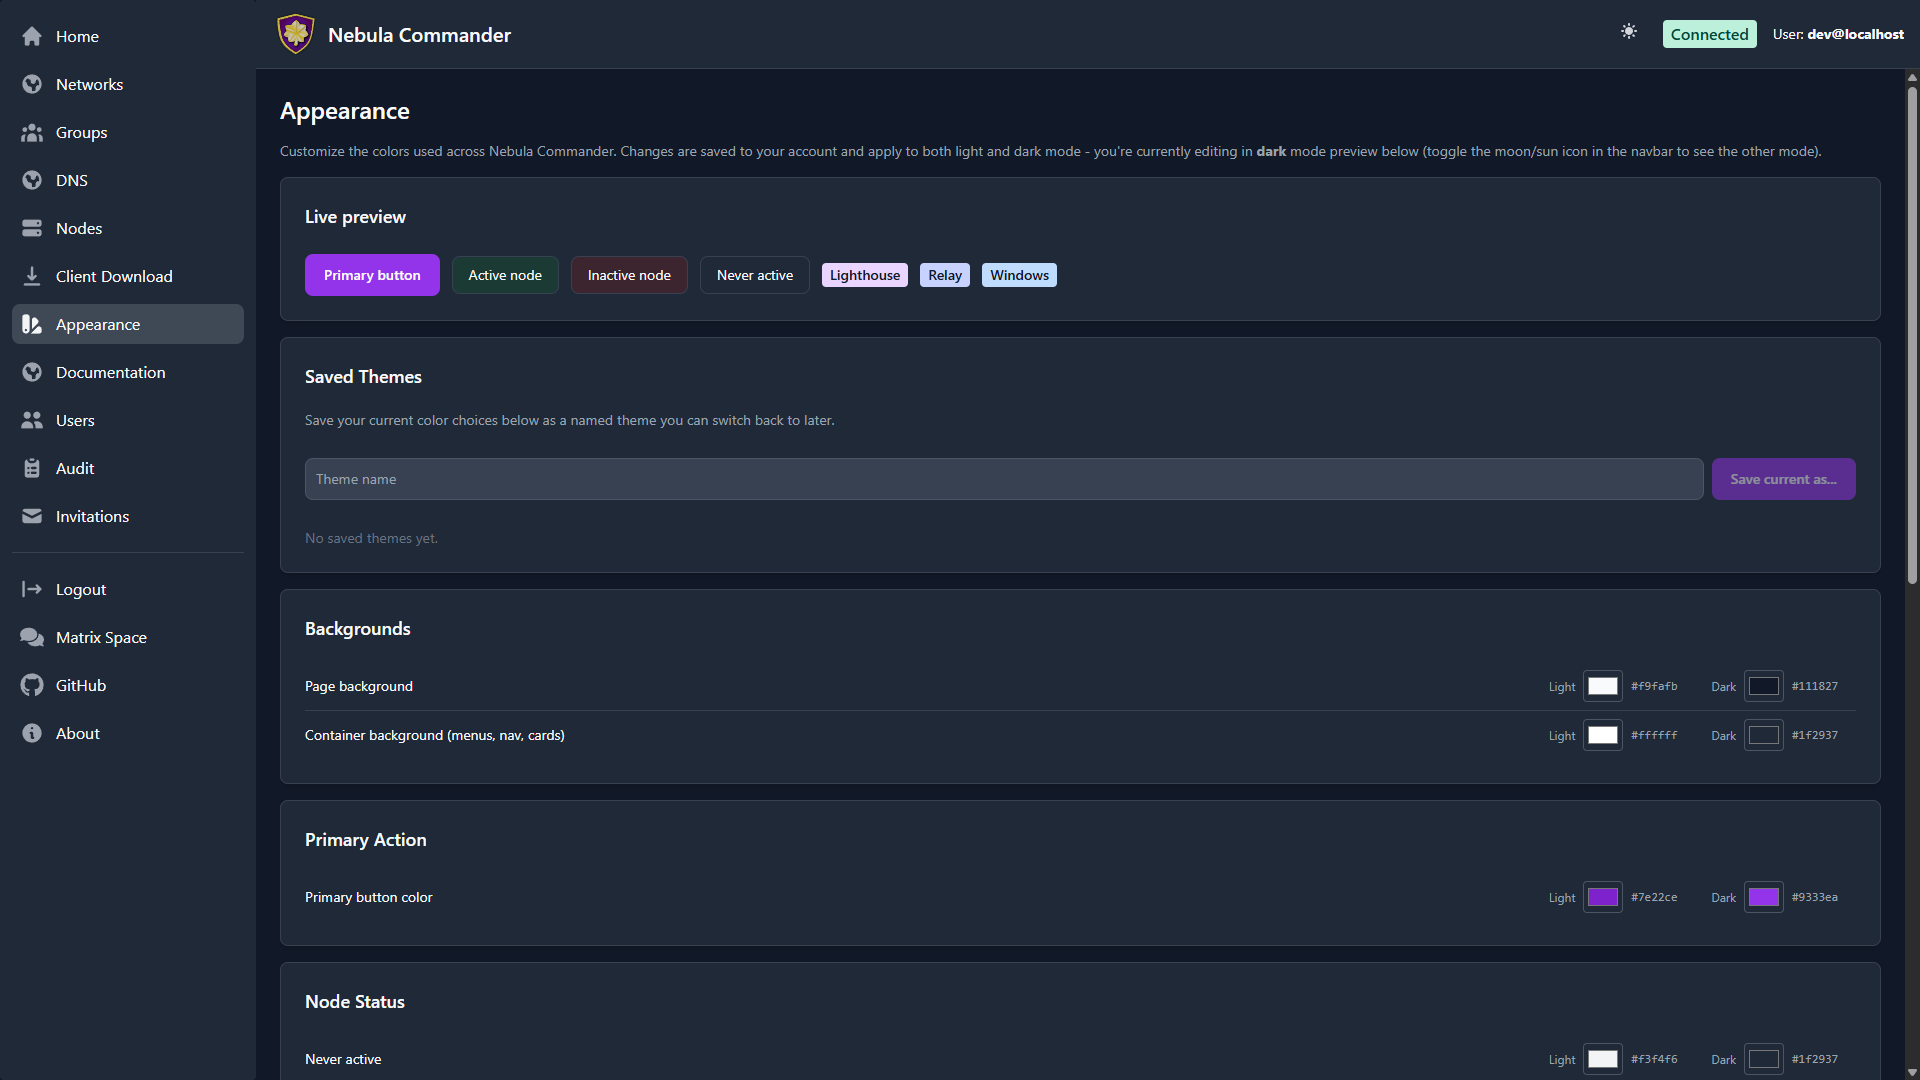
The Appearance page (sidebar → Appearance, or /settings/appearance) lets
each user customize the colors used across Nebula Commander — this is a personal
preference, saved to your own account, not a site-wide setting an admin controls.
| Light | Dark |
|---|
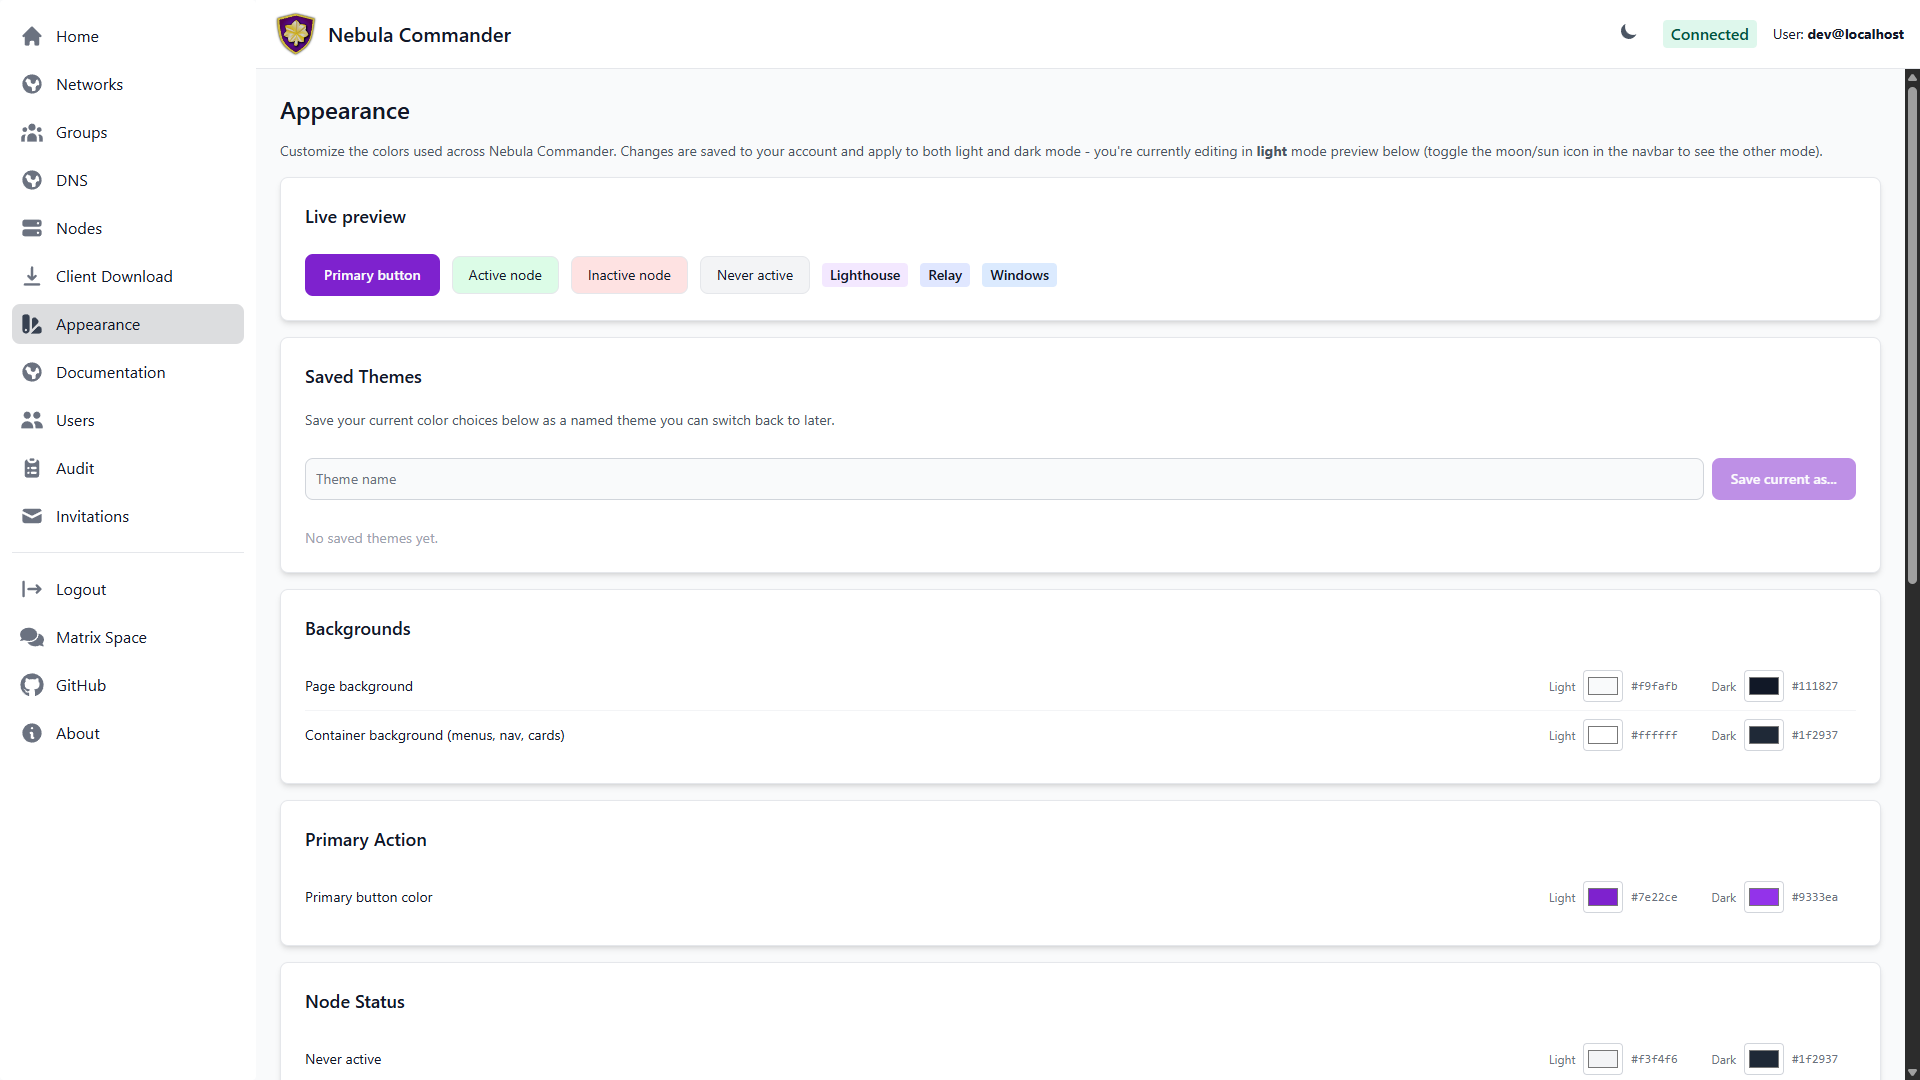 |  |
Every color you pick automatically gets a readable, contrast-checked
foreground: buttons, badges, status cards, and the page/container backgrounds
all compute their own text color (near-black or near-white) from whatever
background you choose, so an unusually light or dark pick never turns into
illegible same-on-same text.
Light and dark mode
The moon/sun toggle in the top navbar switches between light and dark mode; the
choice is remembered in your browser. Every color you customize on the Appearance
page has separate light and dark values — changing one never affects the other,
and the values shown on the page follow whichever mode you’re currently in (a
banner at the top of the page says which).
What’s themeable
Colors are grouped by where they show up:
- Backgrounds — the page background, and a separate “container” background
shared by the sidebar, the top navbar, and every card throughout the app.
- Primary Action — the color used for primary buttons everywhere in the app.
- Node Status — the three background colors used on Nodes
cards: never active, active, and inactive.
- Type / OS Badges — the background color of each badge shown on a node’s card
(Lighthouse, Relay, iOS, Android, Windows, Linux, macOS, and the generic Node
fallback). The badge’s text color is computed automatically for contrast against
whatever background you pick, so you never have to set it separately.
- Group Access Diagram — the restricted/open group colors and the edge color
used in the Network detail page’s
access diagram.
Every color picker shows the current hex code (e.g. #7e22ce) next to the swatch,
so you can match an exact brand color or copy a value elsewhere.
A live preview at the top of the page shows a sample button, status colors, and
badges updating as you edit, before you save anything.
Saving changes
Editing a color only updates the live preview — nothing is persisted until you
click Save changes. Reset to defaults reverts every color in the editor
back to Nebula Commander’s built-in defaults (also just a local edit, until you
save).
Saved themes
Beyond your one active set of colors, you can build a personal library of named
presets:
- Adjust colors to what you want.
- Type a name under Saved Themes and click Save current as…. This saves
whatever is currently in the editor, independent of whether you’ve clicked
Save changes yet.
- Later, click Apply on any saved theme to make it your active theme
immediately (this does persist right away — no separate save step). Delete
removes a saved theme; recreating one costs nothing, so there’s no confirmation
flow beyond a single prompt.
Saved themes are private to your account — other users don’t see them, and there’s
no site-wide/shared theme.
Exporting a theme
Click Export YAML (next to Save changes/Reset to defaults) to download the
colors currently in the editor as a .yaml file. Each saved theme also has its
own export button in the Saved Themes list, so you can back up or share a
specific preset. This is export only today - there’s no import button yet, so
re-applying an exported file means manually re-entering its colors.