Nodes
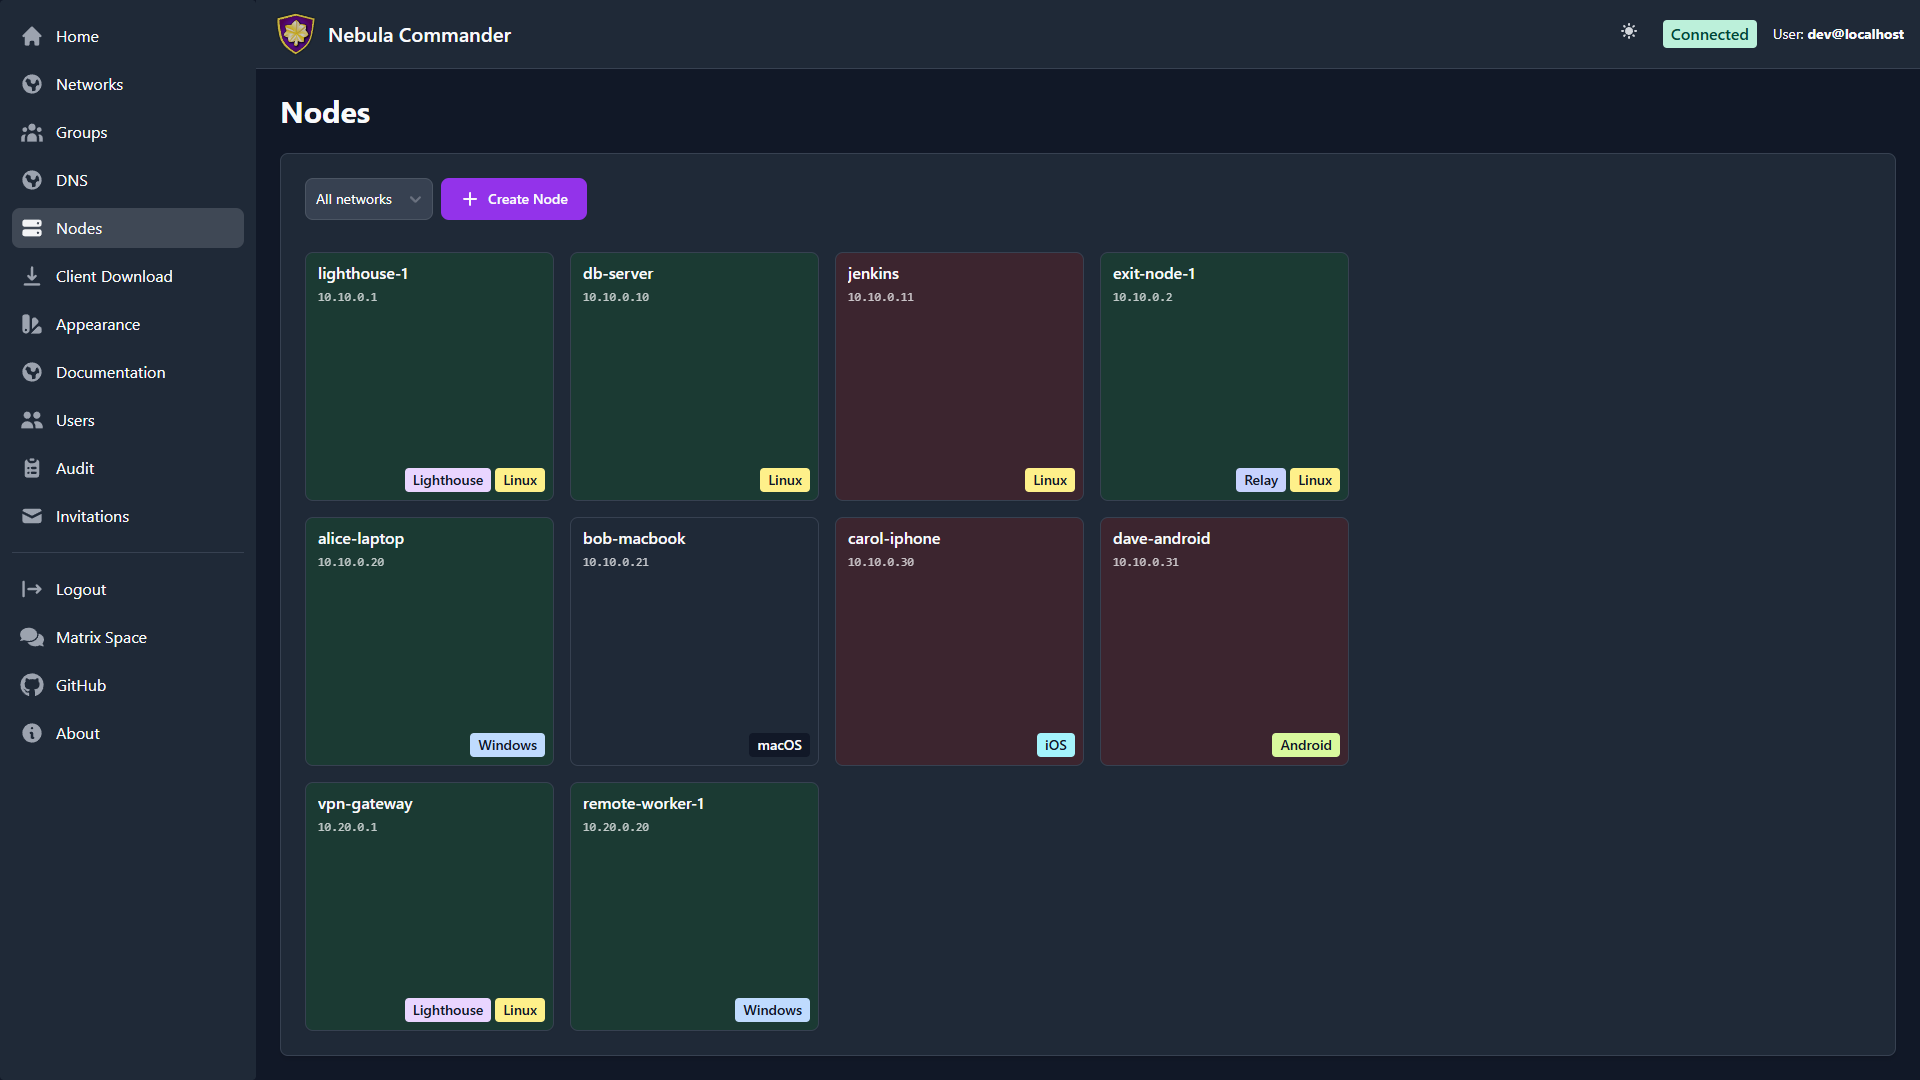
The Nodes page shows every node across networks (or filtered to one network) as a grid of square cards. You create nodes, assign IPs and groups, create or sign certificates, generate enrollment codes for ncclient, download config, and — new since v0.3.7 — pick which other node each one should route through as a subnet router or exit node.
| Light | Dark |
|---|---|
 |  |
The node grid
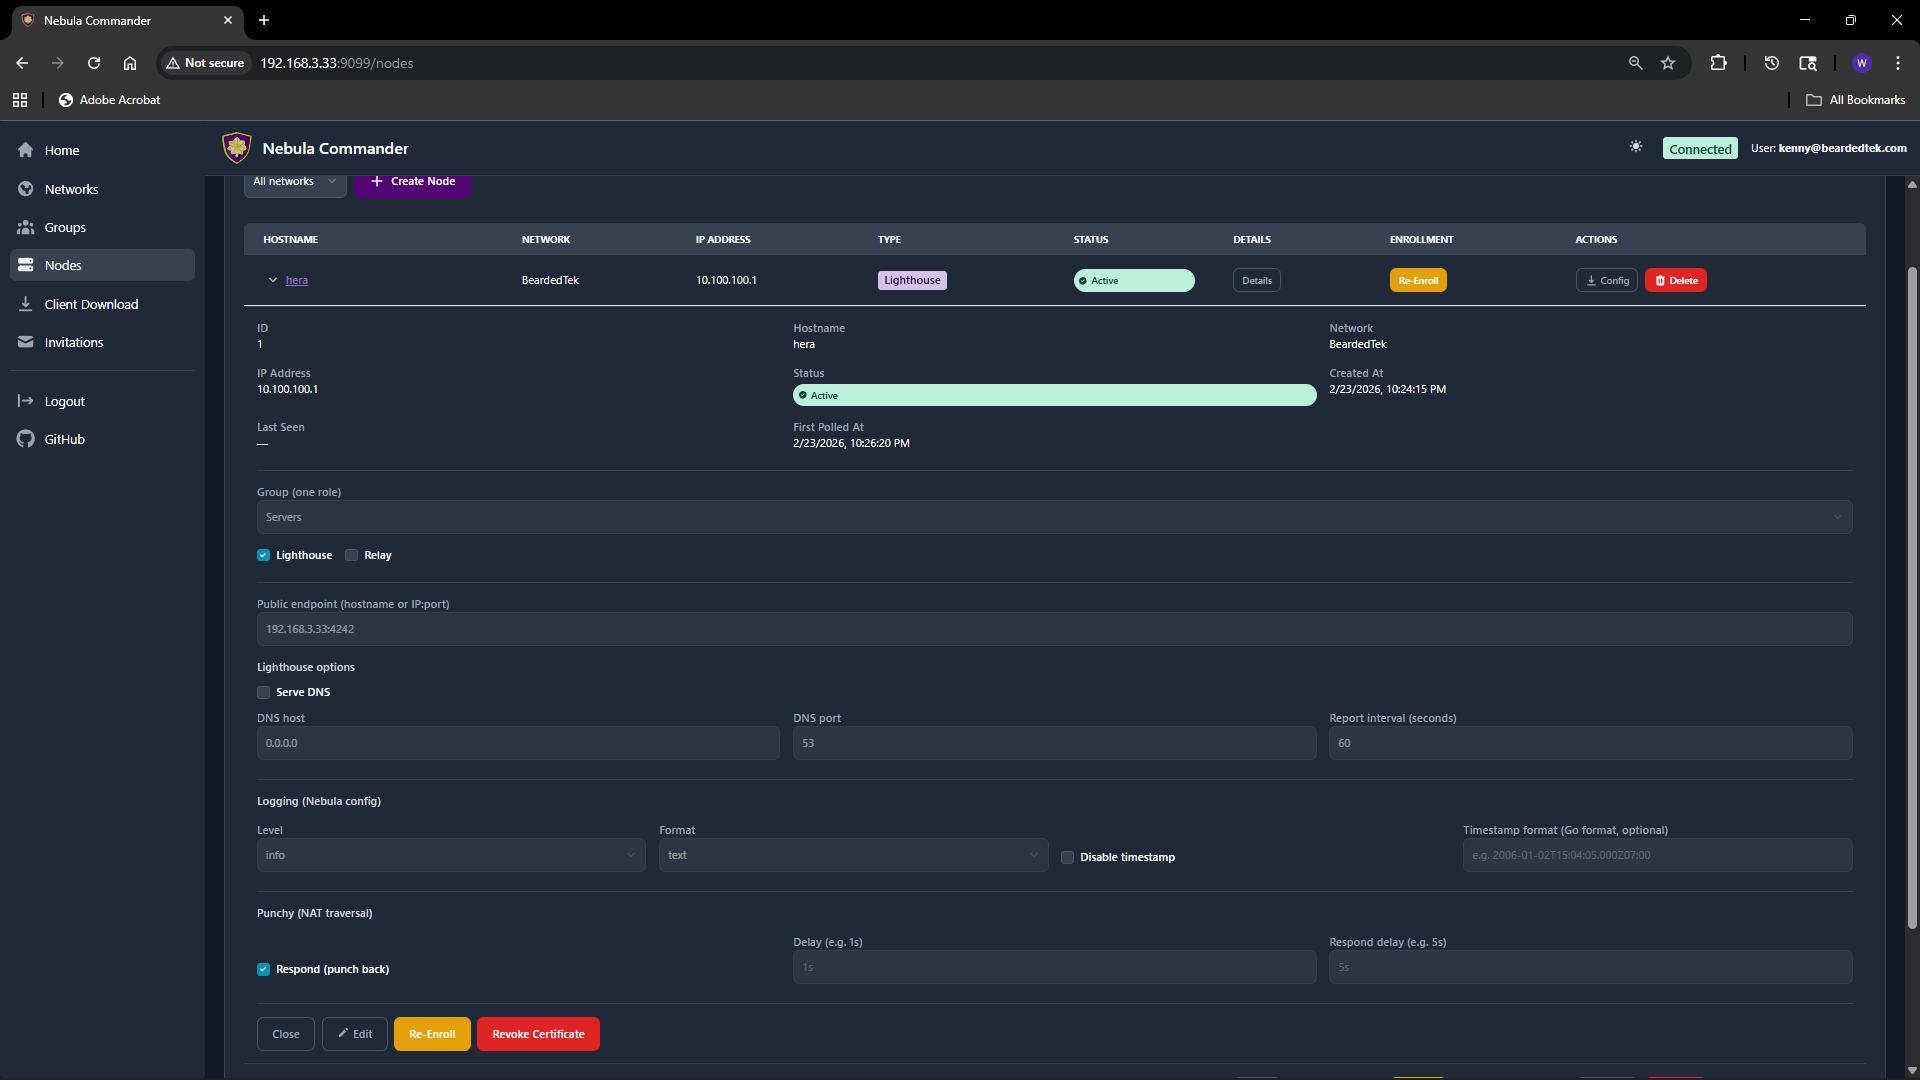
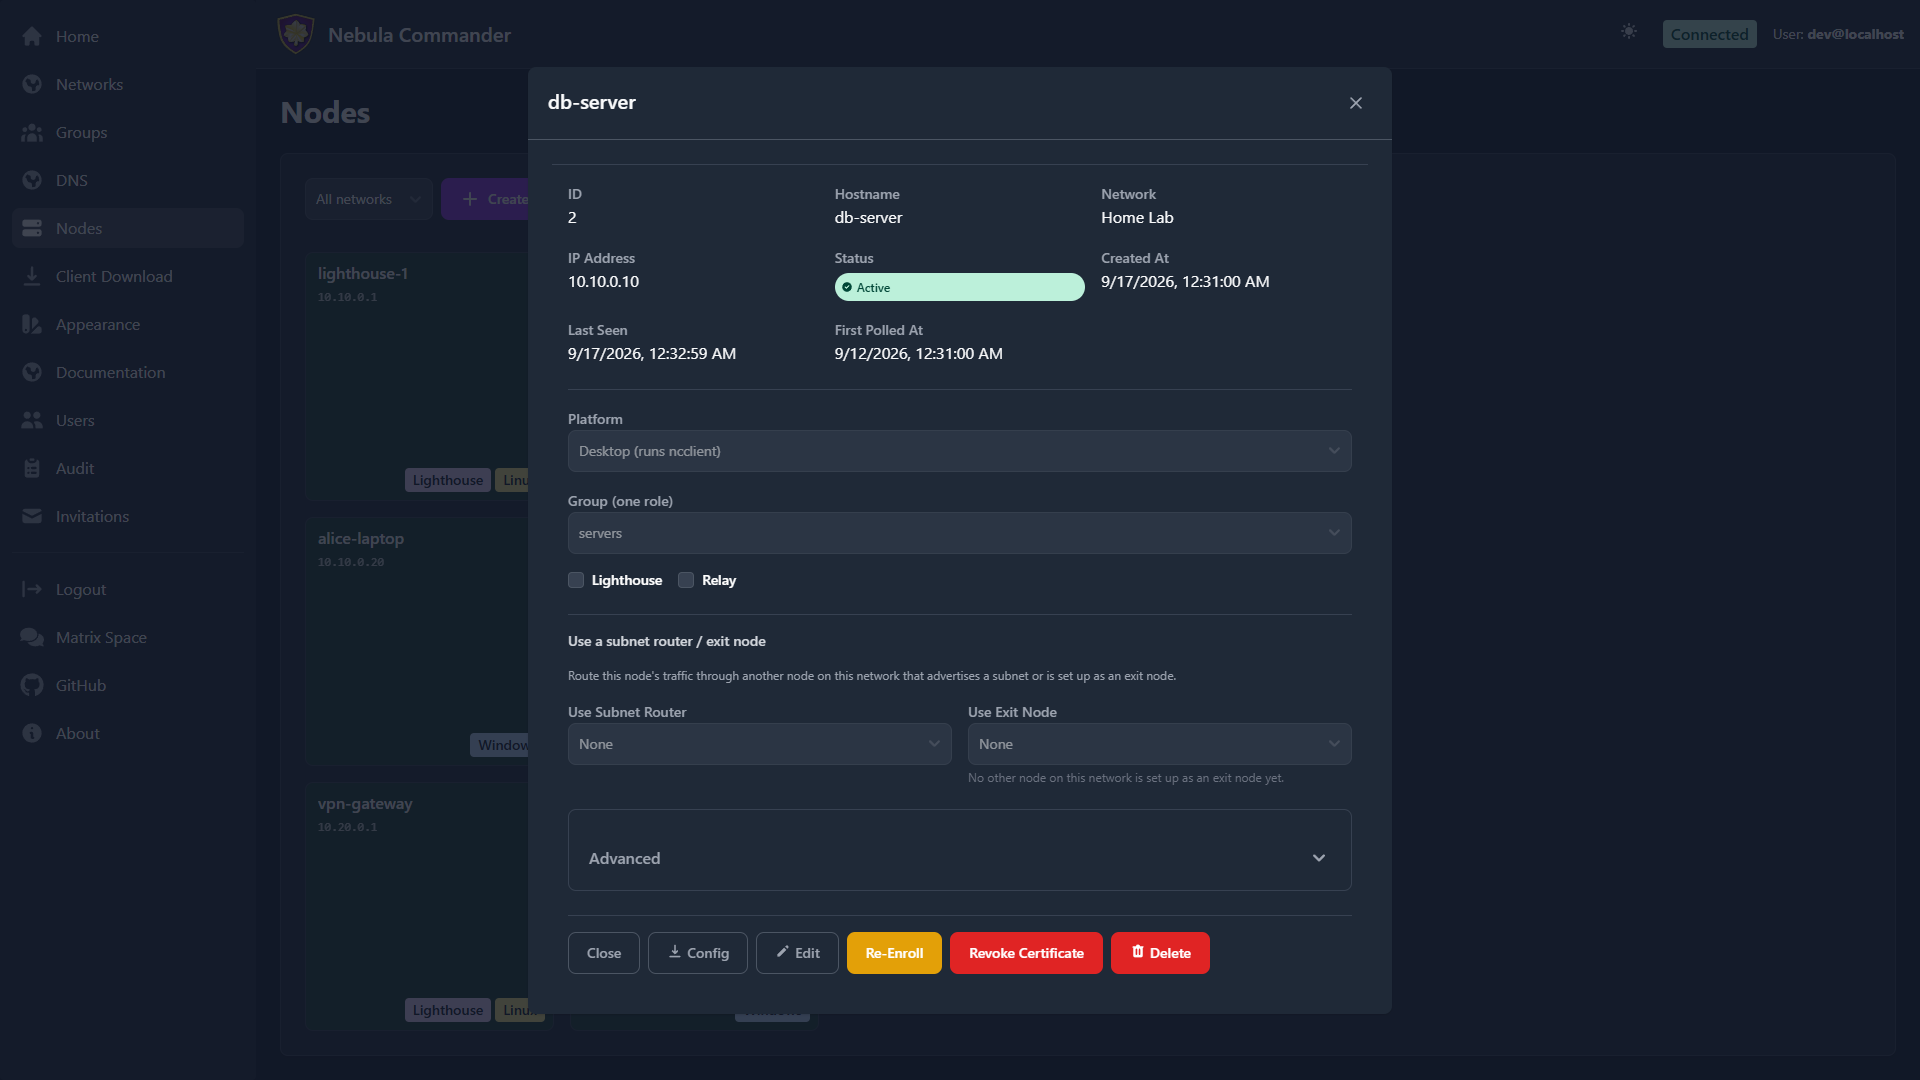
Each card is color-coded by status — never checked in, active, or inactive — and carries a bottom-right badge cluster: Lighthouse, Relay, and a type/OS badge (iOS, Android, Windows, Linux, macOS, or a generic Node fallback until the platform is known). Hostname and IP sit at the top of the card, always drawn above the badges so a long badge row can never hide them, even on a narrow phone screen. Click a card to open its details panel:
| Light | Dark |
|---|---|
 |  |
All of these colors, including the status backgrounds and badge colors, are user-configurable — see Appearance.
Creating a node
- Open Nodes and optionally filter by network.
- Click Create Node. Pick a network first if you haven’t filtered to one.
- Enter a hostname (e.g.
laptop-alice,server-1). The hostname identifies the node and is used in certificates and config. - The server assigns an IP address from the network’s subnet, or you may suggest one.
- Set the node’s group (e.g.
laptops,servers). The group is used for firewall rules and must match a group defined for that network. - Set the platform — Desktop (runs
ncclient), iOS, or Android. - Optionally set a public endpoint (
hostname:portorIP:port) if other nodes can reach this one at a fixed address. See the details panel below. - Submit. The node is created, its certificate is issued, and its card appears in the grid.
The node details panel
Click a card to open its details. The fields visible by default are the ones you’re likely to change often:
| Field | Description |
|---|---|
| Platform | Desktop, iOS, or Android. Converting an existing node changes how it’s enrolled — see Mobile nodes below. |
| Group | Nebula security group for this node. Used for firewall (see Groups). |
| Lighthouse | If enabled, this node acts as a Nebula lighthouse (others can punch through to it). Desktop only. |
| Relay | If enabled, this node can relay traffic for other nodes. Desktop only. |
| Public endpoint | Optional hostname:port or IP:port where other nodes can reach this one directly (Nebula’s UDP port, usually 4242; IPv6 as [2001:db8::1]:4242). Every node’s endpoint is added to every other node’s static_host_map, so peers can connect without asking a lighthouse first. Lighthouses and relays need one. Clear the field to remove it. For more addresses, see Additional reachable addresses under Advanced and Public Endpoints & Reachable Addresses. |
| Use Subnet Router | Pick another node on this network to route this node’s traffic to its advertised subnets through. See Subnet Routers and Exit Nodes. |
| Use Exit Node | Pick another node to route all of this node’s traffic through (full-tunnel). Same doc as above. |
Advanced
Settings you set once and rarely touch again are tucked under an Advanced disclosure at the bottom of the panel:
- Logging — Nebula’s own log level, format, and timestamp options.
- Punchy — NAT hole-punching behavior (respond, delay, respond delay).
- Additional reachable addresses — extra
IP:portaddresses this node reports to the lighthouses (a port forward, a second uplink), added one at a time with a delete button on each. Not shown for lighthouses. See Public Endpoints & Reachable Addresses. - Subnet Router & Exit Node Config — the gateway side of routing: which local
subnets this node advertises (auto-discovered on Linux nodes running
ncclient, or entered by hand under Other), plus a “Used by” list per route where you add the groups and individual hosts that may consume it. - Exit Node — the gateway-side exit-node toggle (Exit node (route all traffic)) and its own “Used by” picker.
If you’re setting up a node to be a subnet router or exit node for others, that’s all under Advanced. If you just want this node to use one that already exists, the visible Use Subnet Router/Use Exit Node dropdowns are all you need.
Certificates: Create vs Sign
For each node you need a host certificate. Two flows:
- Create certificate – The server generates the private key and certificate. You can download a bundle that includes
host.key,host.crt, andca.crt. Use this when the device does not already have a key (e.g. ncclient or you will copy the bundle to the device). - Sign certificate – You generate the private key on the device; the server only signs the cert. The server never has
host.key. After signing, downloadhost.crtandca.crtand place them on the device next to your existinghost.key.
Choose Create for simplicity when the server can hold the key (or when you will deploy the bundle once). Choose Sign when you want the key to never leave the device.
Enrollment code (for ncclient)
After the node exists and has a certificate, you can generate an enrollment code for ncclient. Open the node’s card and click Get Enrollment Code. Copy the one-time code. On the device run:
ncclient enroll --server https://YOUR_NEBULA_COMMANDER_URL --code XXXXXXXX
The device stores a token and can then use ncclient run to pull config and certs. See Client Download for binaries.
Download config
You can download the node’s Nebula config and certs (e.g. config.yaml, ca.crt, host.crt, and host.key if Create was used). Use this for manual (nebula) setup or backup.
Revoke, re-enroll and delete
- Revoke certificate: takes the node off the network but keeps its record, so it can be re-enrolled later. Requires reauthentication and typing the node’s hostname to confirm.
- Re-enroll: issues the node a new certificate and enrollment code (for example if the device’s token was lost, or the device is being replaced), and retires the old certificate.
- Delete node: removes the node and its certificate from Nebula Commander. Requires reauthentication and typing the node’s hostname to confirm.
All three retire the node’s current certificate in the same way:
- Every other node rejects it. Its fingerprint goes on the network’s certificate blocklist (Nebula’s
pki.blocklist), which every node picks up on its next config poll (within its poll interval, 60 seconds by default). Existing tunnels using it are dropped. This works even if the device keeps a copy of its key and ignores the server. - The device shuts itself down. Its token stops working;
ncclientthen stops Nebula and deletes its config and key from disk, and waits to be enrolled again. - Its IP address is held until the old certificate would have expired, so it isn’t given to a different node in the meantime. A re-enrolled node gets its own address back.
Changing a node’s group, or which subnets it advertises, re-issues its certificate; the previous certificate is blocklisted the same way, so the old group’s firewall access really goes away.
Certificates revoked before v0.7.0 can’t be blocklisted retroactively, because no fingerprint was kept for them. If that matters for your network, re-create the network to get a new CA.
If Nebula Commander is unreachable
Nodes keep working: the mesh doesn’t depend on the server, only on lighthouses. A node that restarts while the server is down starts Nebula from its last known config. Config, route and DNS changes, and revocations, reach a node once it can poll the server again.
Mobile nodes (iOS/Android)
There’s no ncclient agent for mobile, so mobile nodes skip the enroll-code flow
entirely. Set a node’s platform (Desktop, iOS, or Android) when creating or
editing it — a mobile node can’t also be a lighthouse or relay. Instead of an
Enroll button, a mobile node’s card shows a download config.yaml action: that
file is the same one GET /nodes/{id}/config always generates (inline
cert/key/CA already embedded), which is exactly the format the official Nebula
app from defined.net’s “Add Site → From file” import
expects.
Split-horizon DNS for mobile is platform-specific: iOS applies it automatically whenever the network has DNS enabled (no per-node opt-in needed); Android has no scoped equivalent, so it’s an explicit opt-in checkbox — when enabled, all device DNS routes through the network’s lighthouse(s) while connected.